Business Expense Tracker
Painless Expense Tracking designed for All Business Sizes
Go paperless with online expense tracker
Remember the last time you couldn’t find an important receipt? We’re talking, aren’t we? It’s time to start using professional business expense tracker. MoneyPenny covers your back. All you have to do is: snap a photo… Done! Your expenses are safely stored on our cloud.
Capture business expenses on the go
Wherever you are, take a photo of your receipts and MoneyPenny will instantly attach them to your expense reports. Access simple and smart business expense tracking with MoneyPenny.

Manage Your Business Expenses like a PRO
Simplify tax time. With MoneyPenny:
- you keep good records by assigning tax-friendly categories to your expenses
- tax-related business expenses will be automatically tracked
- map receipts to your tax form all year round
- get professional expense reports.
For a tax time without headaches, get the best app for tracking expenses.
Frequently asked questions about our Business Expense Tracker
How does the expense tracking app work?
The expense tracking mobile app helps you capture expenses on the go, through a smartphone or other portable device, so that no expense remains unregistered. For instance, you and your employees can use the receipt capturing feature to snap photos of business expenses, then upload them on MoneyPenny as well as attach them to invoices or projects.
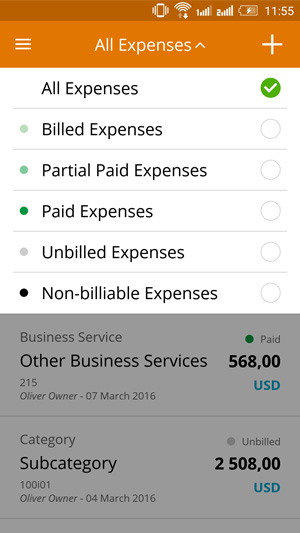
In case somebody paid for something from their own pocket, the reimbursement process can be easily checked through MoneyPenny. And to further simplify the way you track business expenses, we use 5 statuses for each expense, helping you keep a close eye on costs and budgets.
These statuses are: “Non-billable”, “Unbilled”, “Billed”, “Partial” and “Paid”. The app is free, easy to use and you can install it on all your devices to make sure all company costs are synced 24/7. As soon as you capture or create a new expense, that expense is instantly featured on your MoneyPenny business account.
How to track business expenses with MoneyPenny?
There are many ways of recording a business expense via MoneyPenny:
- You can use your phone camera for receipt capturing (snap a photo and submit expense),
- you can manually create it by clicking on the “Add expense” button (go to Purchases -> Expenses)
- you can email us the details at expenses@moneypeny.me and we’ll create the expense for you.
- In case your business expenses are on Expensify, Shoeboxed or Concur, within seconds, you can painlessly integrate them on MoneyPenny.
And when you need more than a scan receipt feature – for instance, you’re interested in an overview of your business spending, the Expense Report is your safe bet. This tool will customize, filter and organize expense data by expense category, vendor, author of expense, client or project. All expense features save you time by automating expense creation, monitoring and simplifying decision-making. Expenses are captured on the cloud in real-time. It just takes seconds and a few clicks to access them.
Example: Expense tracking on Business Travel Trip
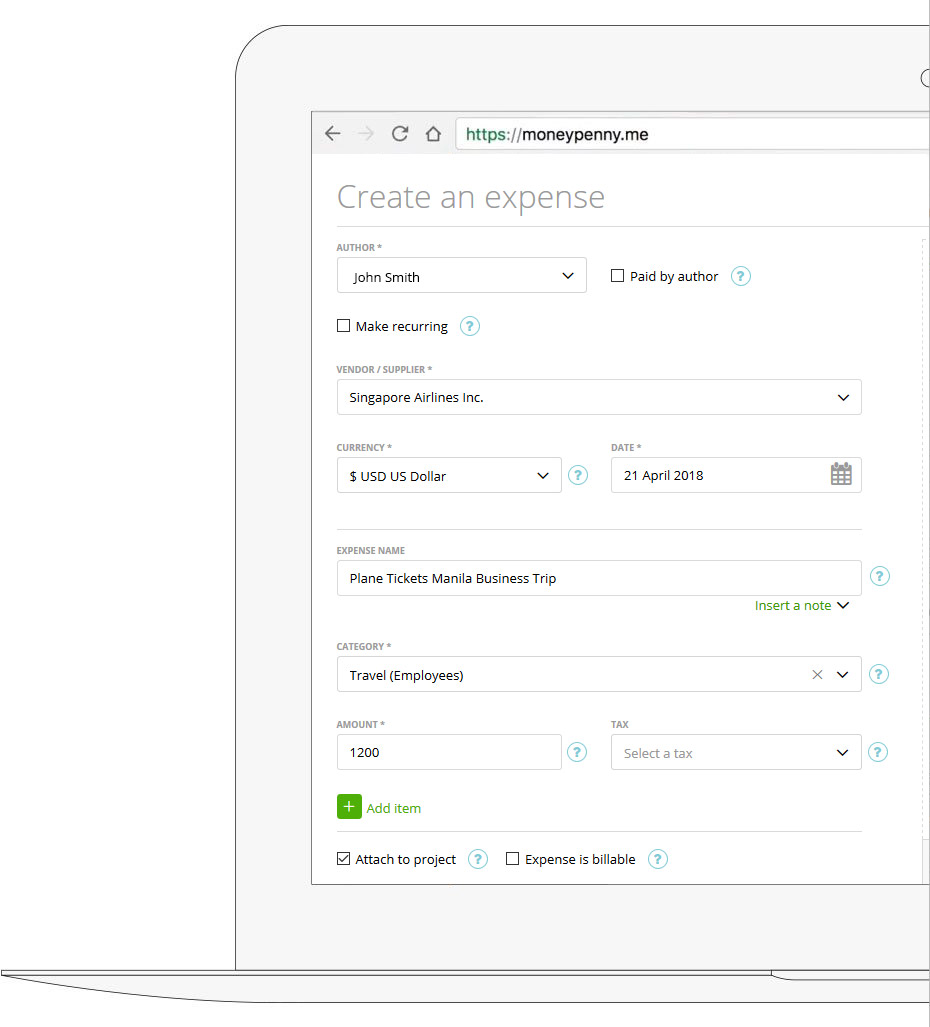
Let’s say John – one of your employees – must book plane tickets for a business trip. With MoneyPenny, any business traveler is able to capture and submit expenses as they’re incurred, right from their phone. Creating an expense in MoneyPenny is very simple. John will have to use the “Add Expense” button, then fill in the following info:

- “Author name” (John Smith),
- “Expense name” (Plane Tickets Manila Business Trip),
- “Notes” (context details – “Business trip to Manila. 22-29 April 2018. Purpose: Renegotiating contract with Ashore Inc.”),
- “Supplier” (Singapore Airlines Inc.),
- “Currency”(USD),
- “Date” (21 April 2018),
- “Category” (Travel – Employees),
- “Amount” (1200),
- “Tax” (Select VAT from the dropdown),
- “Attach to project” (assign expense to a client – Ashore Inc. – or project – Investment consulting),
- “Attach file” (attach the invoice from Singapore Airlines).
Also, John will have to mark the “Paid by Author” field. The expense will appear in the Expenses table as “Not reimbursed”. Once John gets his money back, the status changes to “Reimbursed”.
Upgrade to Business 4.0 today
Enjoy a 14 day FREE TRIAL of our powerful suite of features designed to automate your business, save you time and money. Start sending estimates & invoices, capture expenses, sync timesheets and manage your clients and your team more effectively. Welcome to Business 4.0 at its best.
Start your 14 day free trial