How to create an expense?
How do I update/delete an expense?
Recurring Expenses
Expense Statuses
How to create an expense?
To create an expense go to Purchases ➝ Expenses ➝ Add Expense
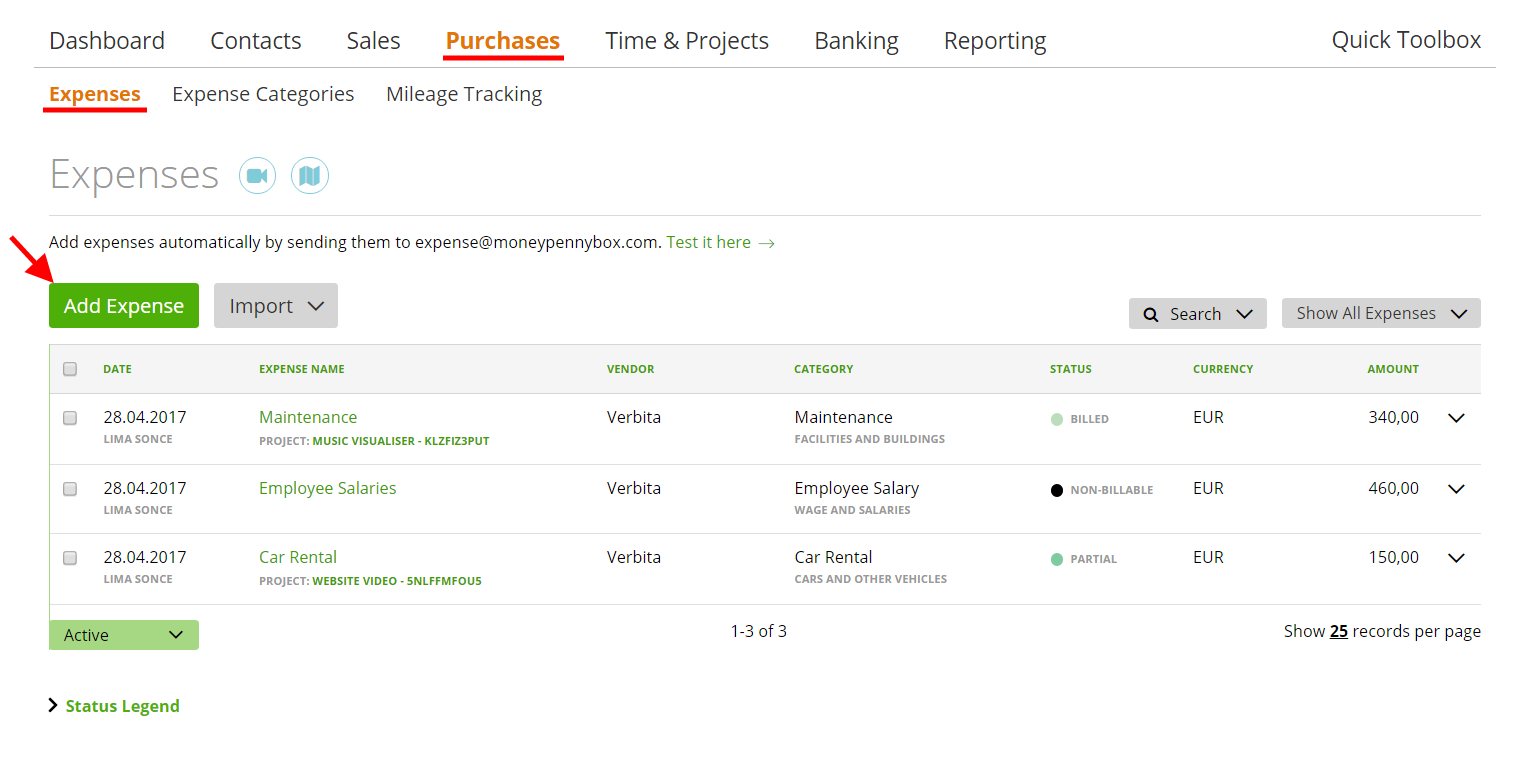
Expense creation page includes:
– The Author name or the Expense creator. By default, this is the member who has created the expense. This field is visible only for the Account Owner and Administrators, so, for instance, they can change the Author of an expense, which then will be visible also to the chosen member (author). There is also a ‘Paid by claimant’ box next to it, means this expense will be paid by the author if checked:
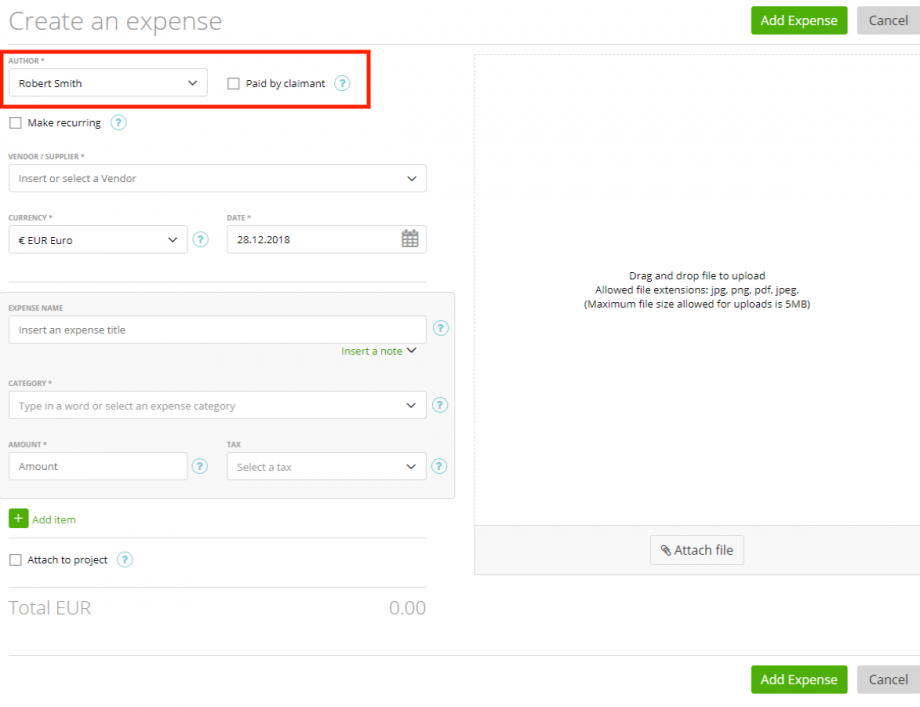
– ‘Make Recurring’ box. You can make the expense recurring, read more here
– Expense name
– Notes
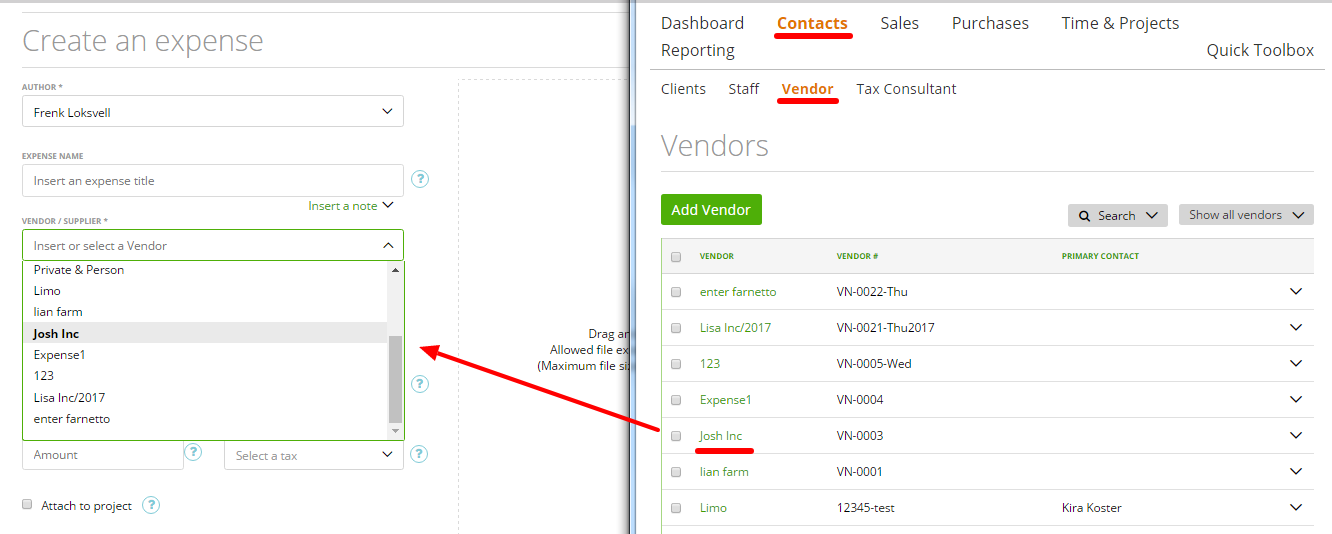
– Vendor/supplier. There are two ways to add the vendor on the expense page:
1. Just type the name in the field
2. Add the vendor in Contacts -> Vendor, then choose the name from the dropdown
– Currency – more about it here
– Date
– Category. You can choose one category from the dropdown or create a new one in the tab ‘Expense Categories’ and then select it, more here
– Amount
– Add item – one expense can have more than one item, more here
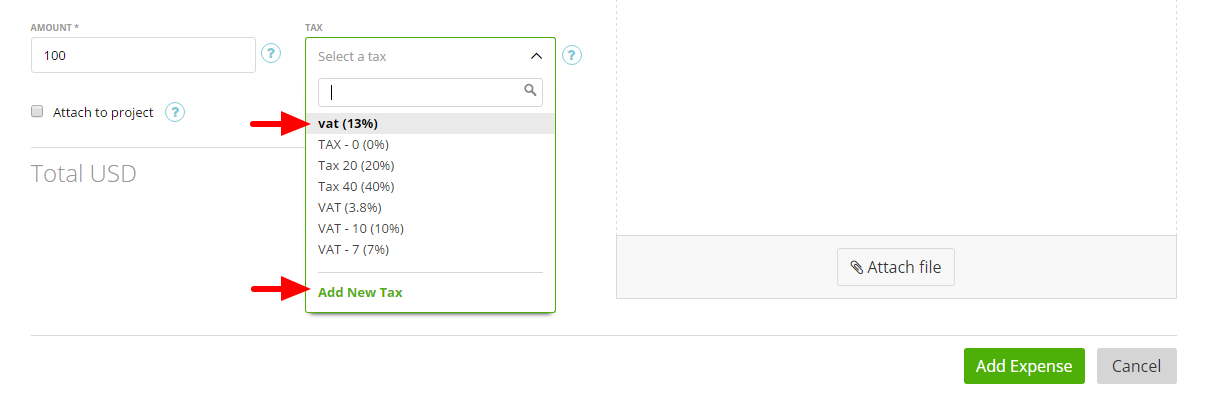
– Tax. Select the tax from the drop-down or simply add a new tax by using the ‘Add New Tax’ link. Defalut Tax? Read more here.
– ‘Attach to project’ – assign the expense to a client or project, more here.
– ‘Attach file’ – attach a receipt or other billing document
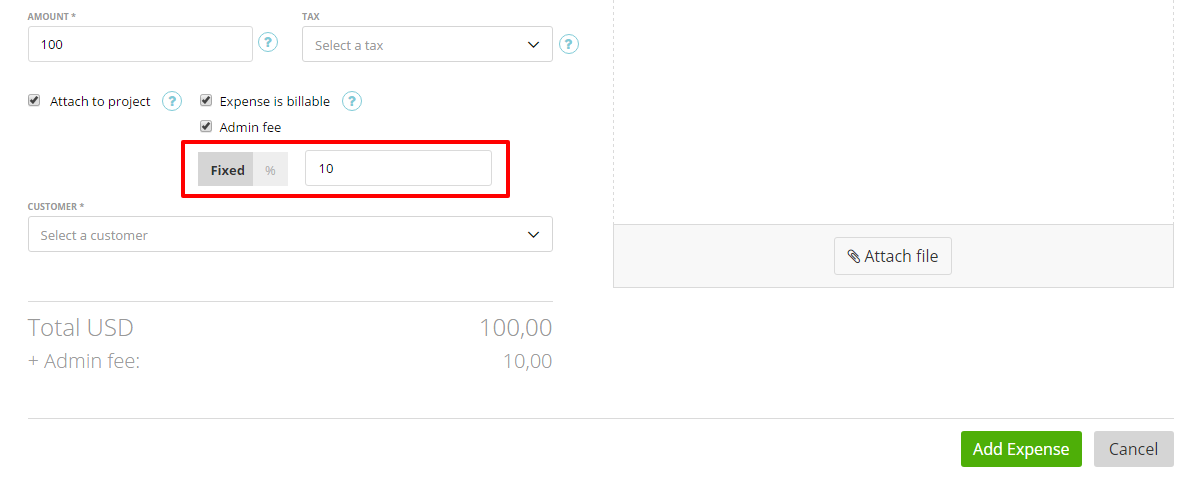
– Admin fee. To add the admin fee, checkmark ‘Attach to project’ -> ‘Admin fee’. You can add the admin fee as a fixed amount or as a percentage (more here).
How do I update/delete an expense?
To edit an expense go to, Purchases ➝ Expenses ➝ click on the expense name on the grid or click ‘edit’ in the row end menu.
To delete an expense go to Purchases ➝ Expenses ➝ mark checkboxes of needed expense and click ‘Delete’.
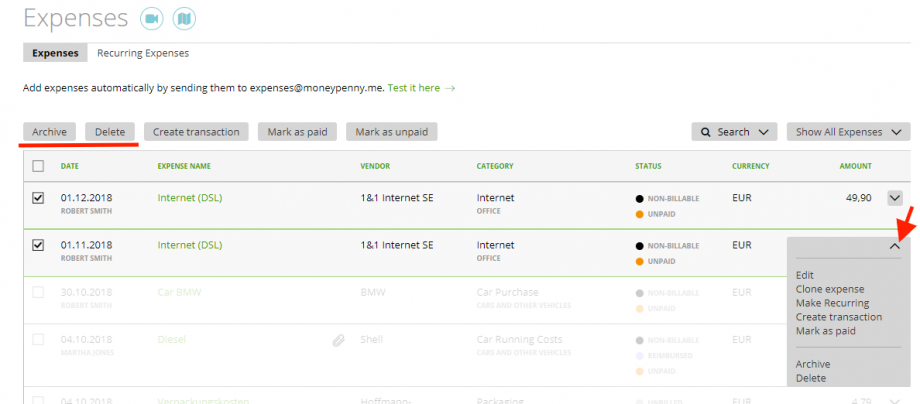
… Or choose the same option (‘Delete’) on the row end menu.
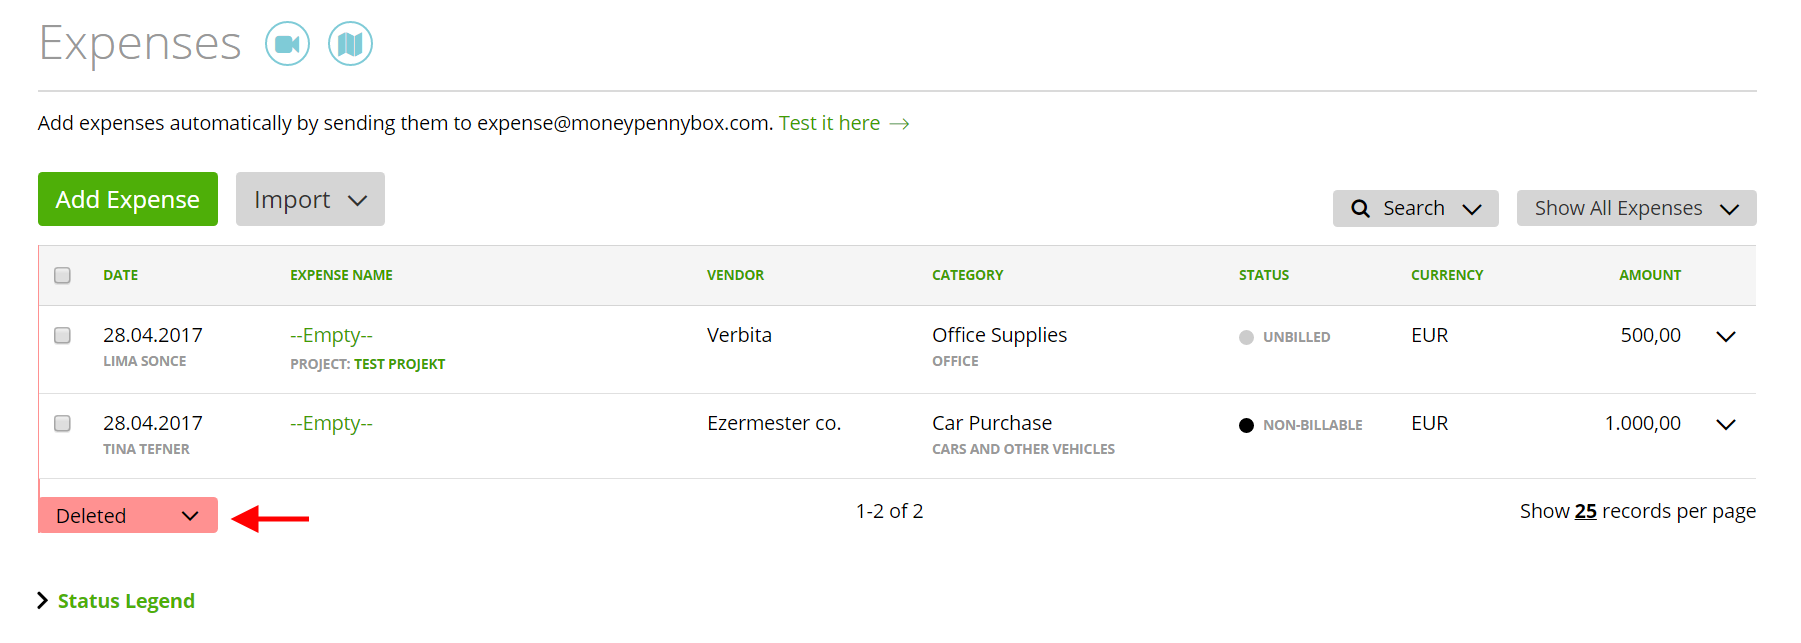
Deleted expenses will be moved to the tab ‘Deleted’, however, you are always able to restore deleted items by moving them to the ‘Active’ tab.
You can also mark the expense as paid, or unpaid (when the expense is or isn’t paid by the claimant yet).
More about expenses:
Find out how to create expenses by sending an email from here.
