How do I create a client?
Advanced Settings for the Role “Team Leader”
Allow ‘Team Leader’ to add/edit clients
Hide Financial Data on client dashboard (Role: “Team Leader”)
Client page – data explanation
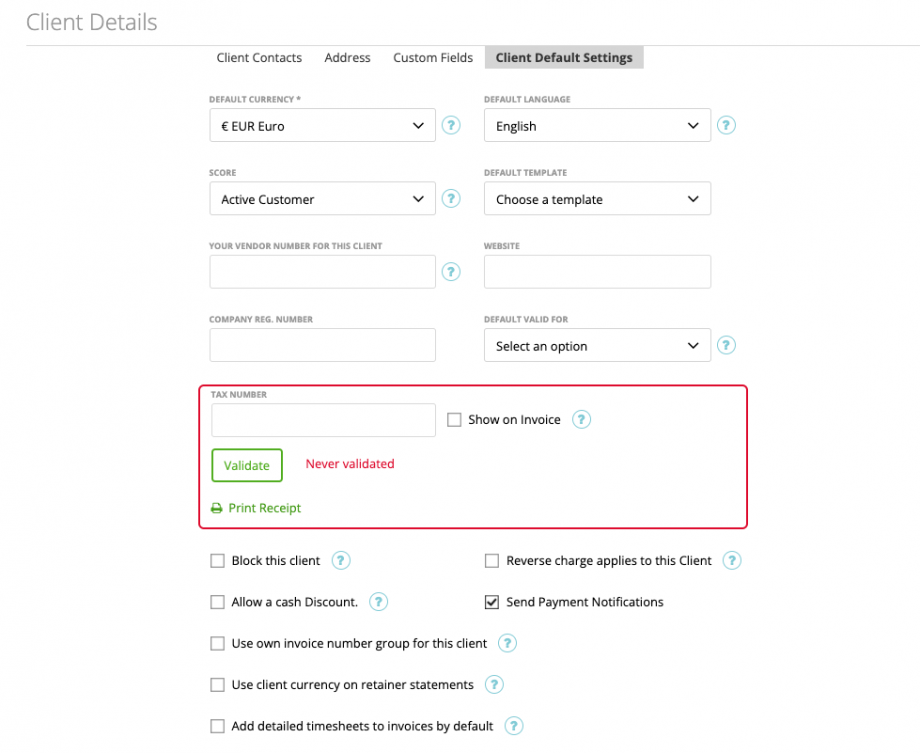
Client default settings
Create Client
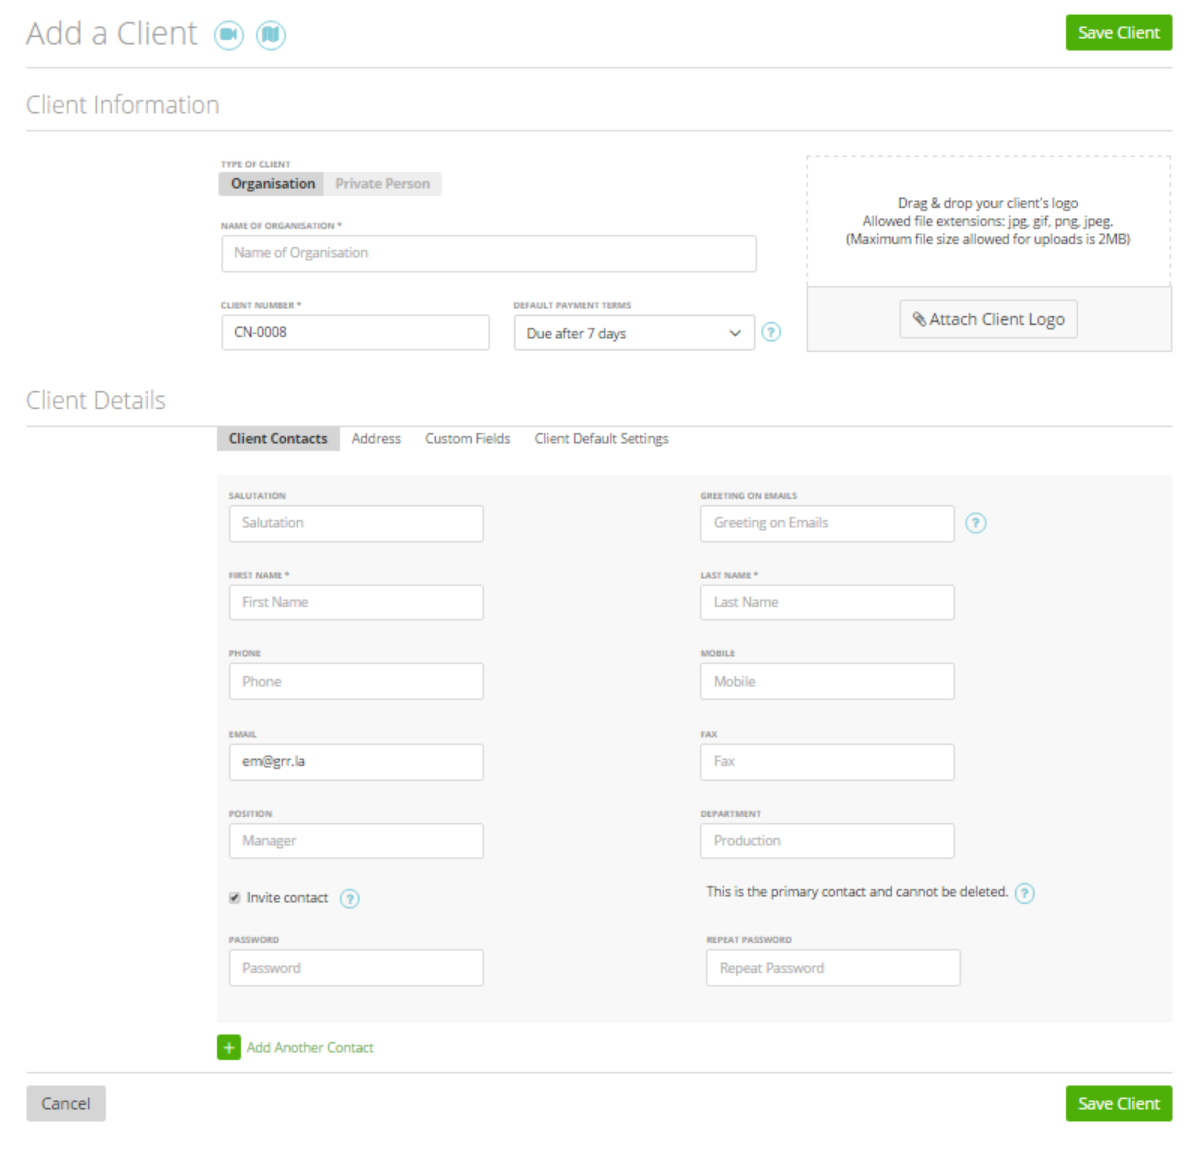
To create a client, go to Contacts ➝ Clients ➝ Add Client ➝ fill the necessary fields ➝ click ‘Save Client’
Allow Team Leader to add/edit clients
If you want, that your employee has ‘Team Leader’ as role, but also with the ability to create and edit clients, just allow it via staff settings: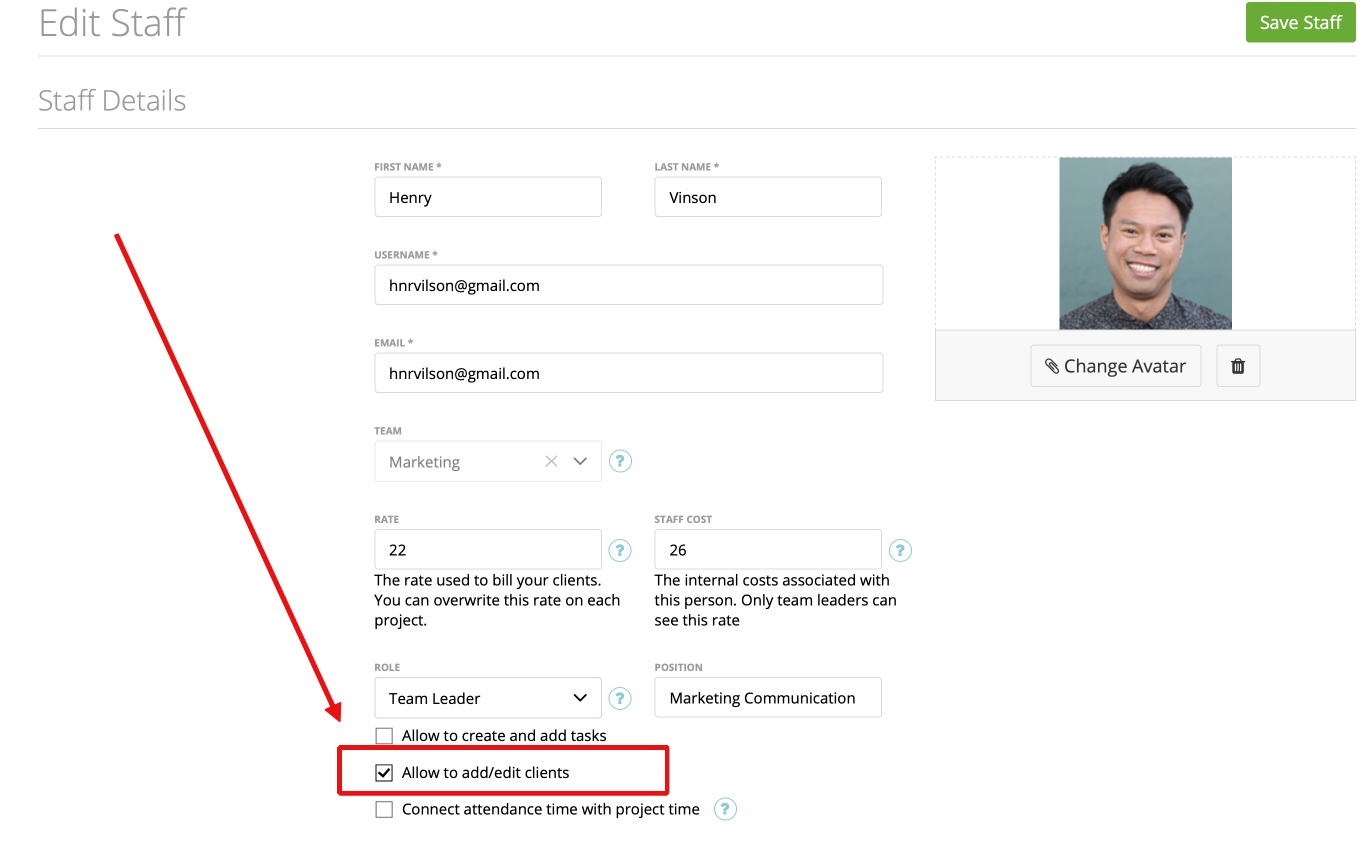
After enabling the option, your team leader is able to add/edit clients.
Hide Financial Data on client dashboard (Role: “Team Leader”)
You can also enable “hide financial data on client dashboard”. By enabling this option, the “team leader” is not able to see any financial data on clients dashboard: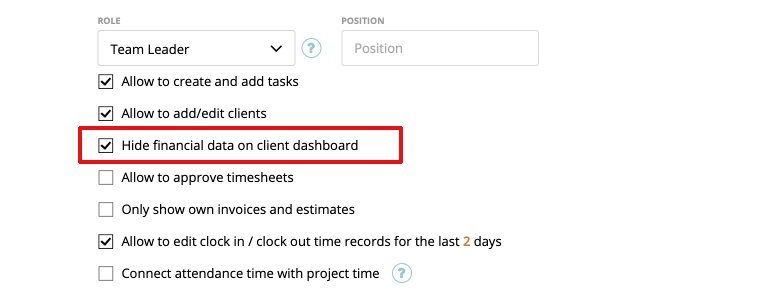
If option is enabled, following info is dibbled on clients dashboard:
Client page – data explanation
On the Create/Update Client page, you can keep various details about each client and also choose some default settings.
First, you can choose whether this client is an organization or a private person.

– Client number – internal client number (read more here).

– Default payment terms – set a specific due date which indicates by when this client should pay the invoices and it will become the default invoice option for this client.

You can also edit and configure specific payment terms for your clients: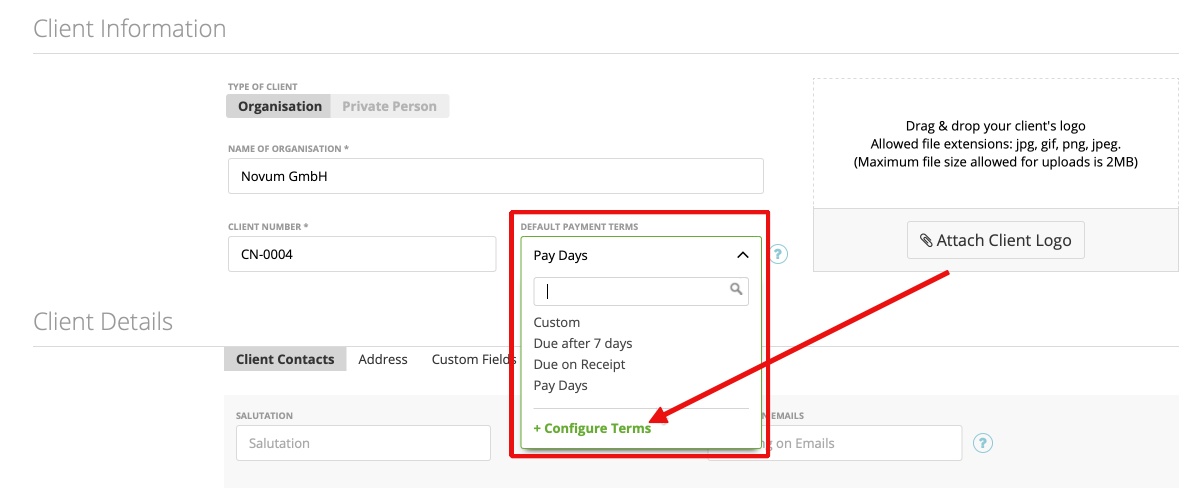
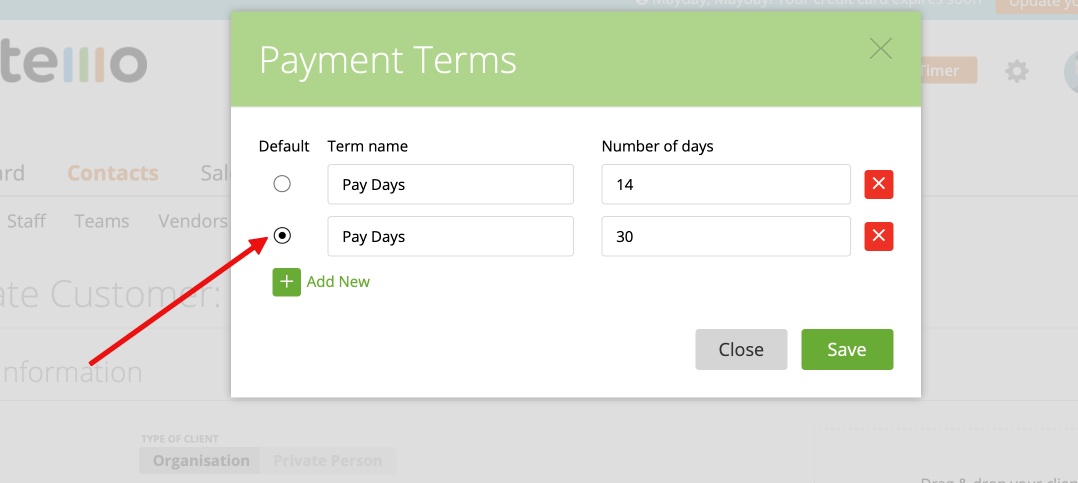
You can also set the payment term as default company wide in the term settings:
– Client logo – the logo or photo of this client will be displayed on estimate/invoice dispute messages or comments.

– Client contacts – includes contact’s first name, last name, email, phone, mobile, fax, salutation (like Mr., Mrs., Ms., Miss, etc.), greeting on emails (dear, etc.), position (member’s position in this company – a field available only for “Organization”), department (where the contact works – again, a field available only for the “Organization” clients).
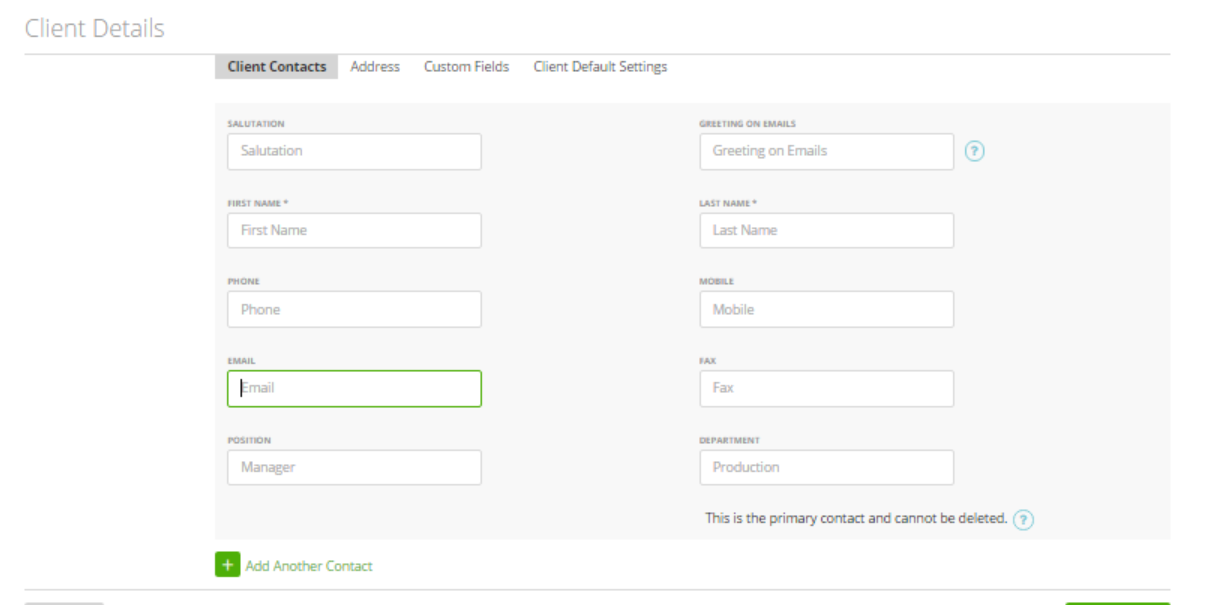
– Invite contact – the ability to invite this client’s contact (send an invitation email with the login/password to the client profile in your account), available only if you have entered contact’s email address. 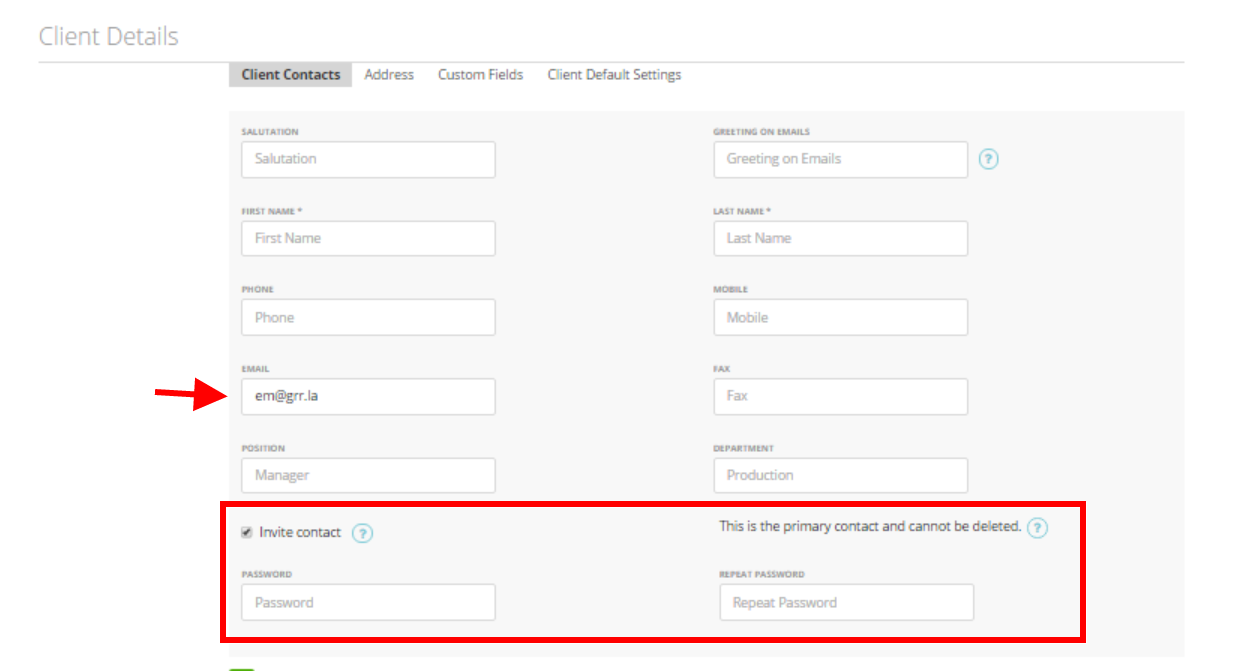
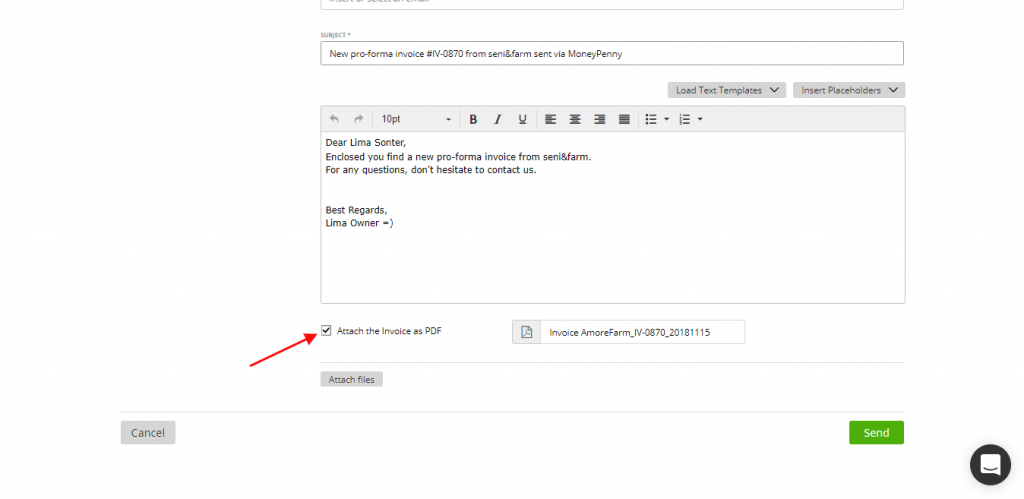
Note: It is not mandatory to invite the clients for them to see your invoices. When this check box is checked (see below) the client will receive an e-mail with the PDF Invoice attached. But to pay the invoices online you will need to send the invitation to your client to set up a zistemo account.
Address – the billing and shipping address for this client.
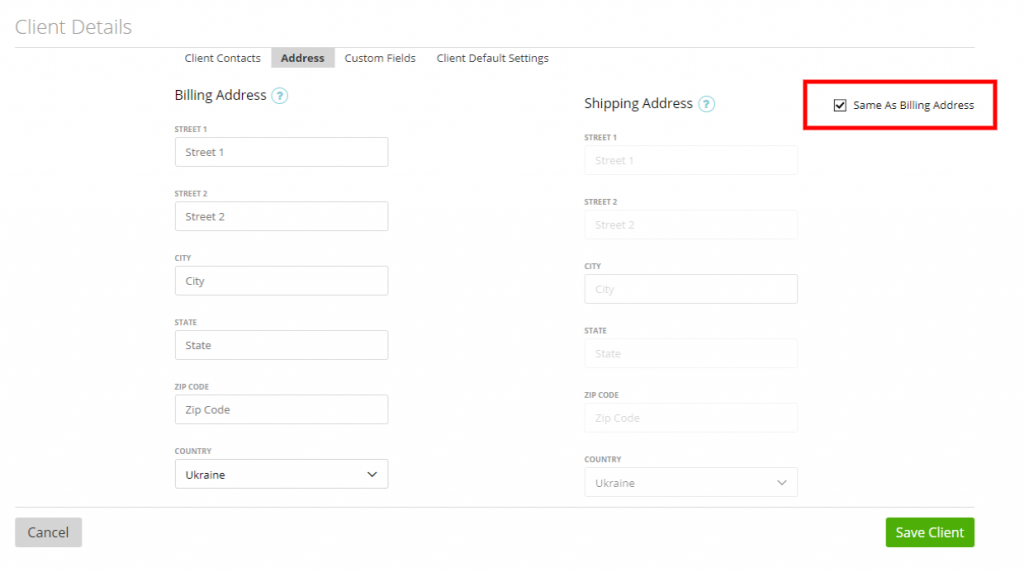
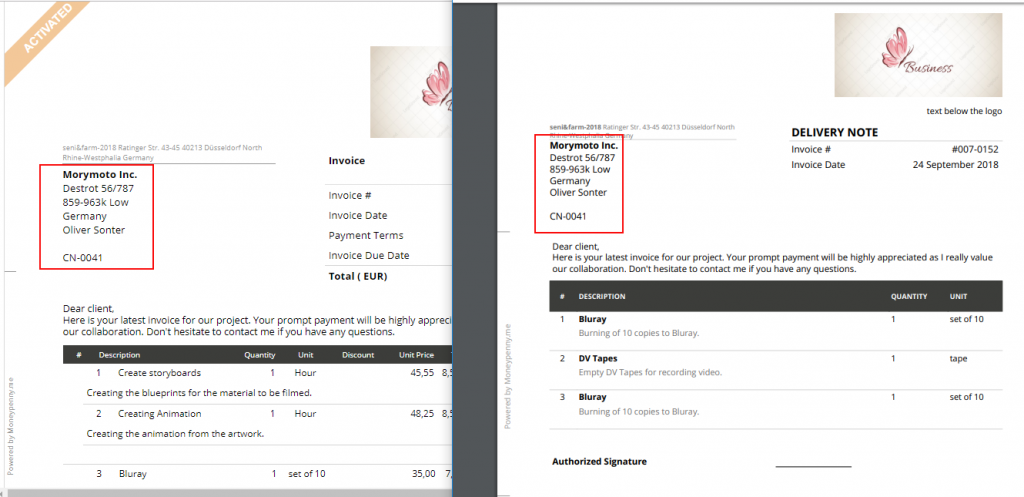
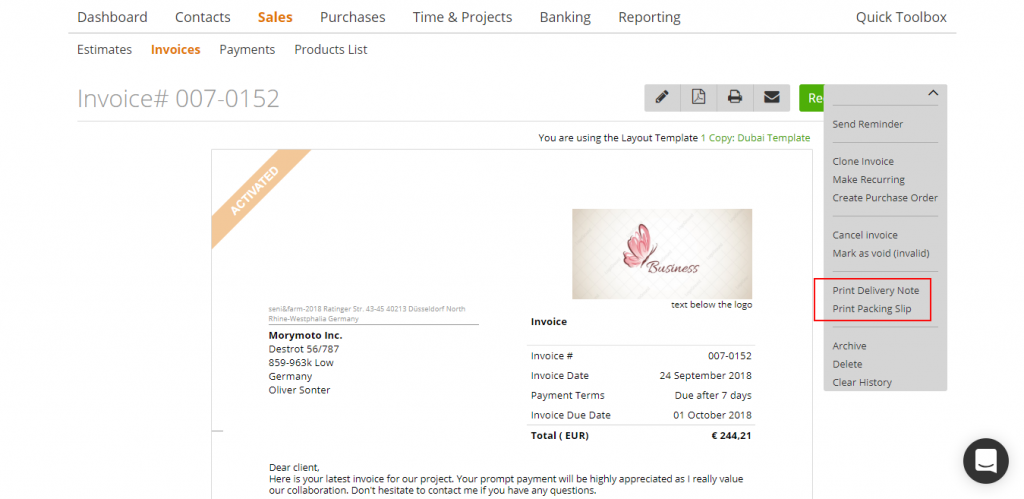
Note: If the checkbox ‘Same as Billing Address’ is checked then for the Delivery Note and Packing Slip we print the client’s address as on the Invoice preview:
Custom fields – these are the additional fields customized by you in “Settings” -> “Preferences”. Each client will also see them through his/her profile. For more details on this topic, please check this article.

Client default settings
-Default currency (default option for invoices/estimates)
-Default language (invoice/estimate language for this client, documents will be translated automatically if you are using the Default zistemo invoice/estimate template). If you are using the customized template, (the one that you created yourself), then the documents will be in that language you have chosen.
-Score (additional internal information)
-Default template
-Your vendor number for this client ( available only for “Organization”)
-Tax number (available only for “Organization”)
-Company registration number (available only for “Organization”)
-Default valid for – Choose as default the, ‘valid for’ option for all new estimates created for this client. Or, create a new one by clicking ‘+ Configure valid for’. You can overwrite valid dates on each estimate.
-Block this client
-Reverse charge
-Allow cash discount
-Contact ID for Invoice Prefix
-Send payment notification – check this box if you want your client to receive the notifications when the payment was made.
– Use client currency on retainer statements – This option will show the retainer infos in the clients currency and not in your company base currency
– Add detailed timesheet to invoices by default: If you create an invoice timesheets to this client, a detailed timesheet will be added automatically. Learn more about detailed timesheet →
Internal notes – enter any data you need, it won’t be visible to your client.
