How to create my own template?
Templates Editor
General Settings
Template Blocks (Placeholders)
– Sender Name
– Client Address
– Company Logo
– Document Info
– Intro
– Item table settings
– Totals
– Terms, Notes, Payment Options
– Pagination
– Footer
– Footer Border
– Signature
– Placeholder
– Default zistemo templates
How to create my own template?
zistemo allows you to customize your own Stationery templates through invoice/estimate document style and content.
You will find 6 default templates – read more about them here, but you can always create your own by just going to Settings -> Stationery Templates -> choose one of the default templates and click ‘Copy’.
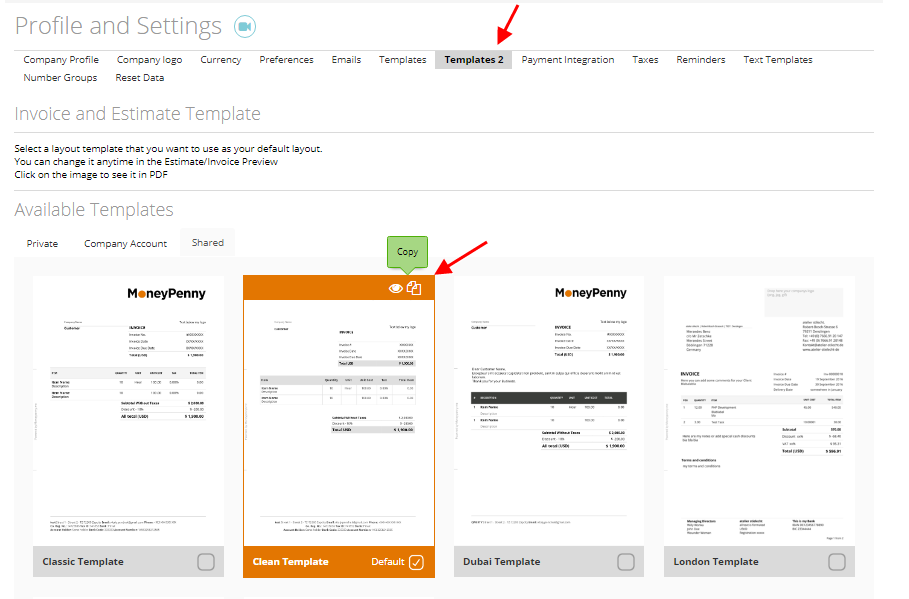
Templates Editor
The Templates Editor includes the next elements:
– Template name – which is a required field.

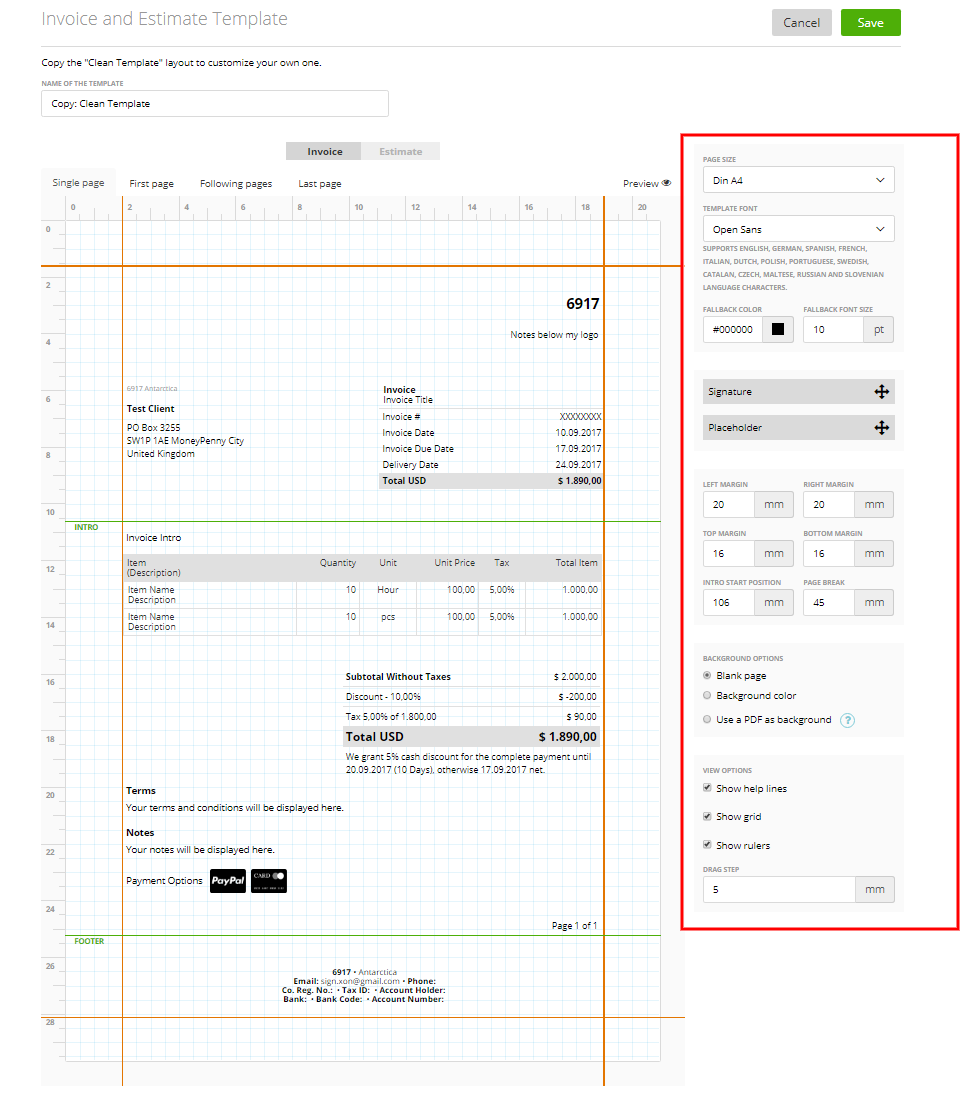
– General settings – page size, font type/color/size, margins, background options, view options.
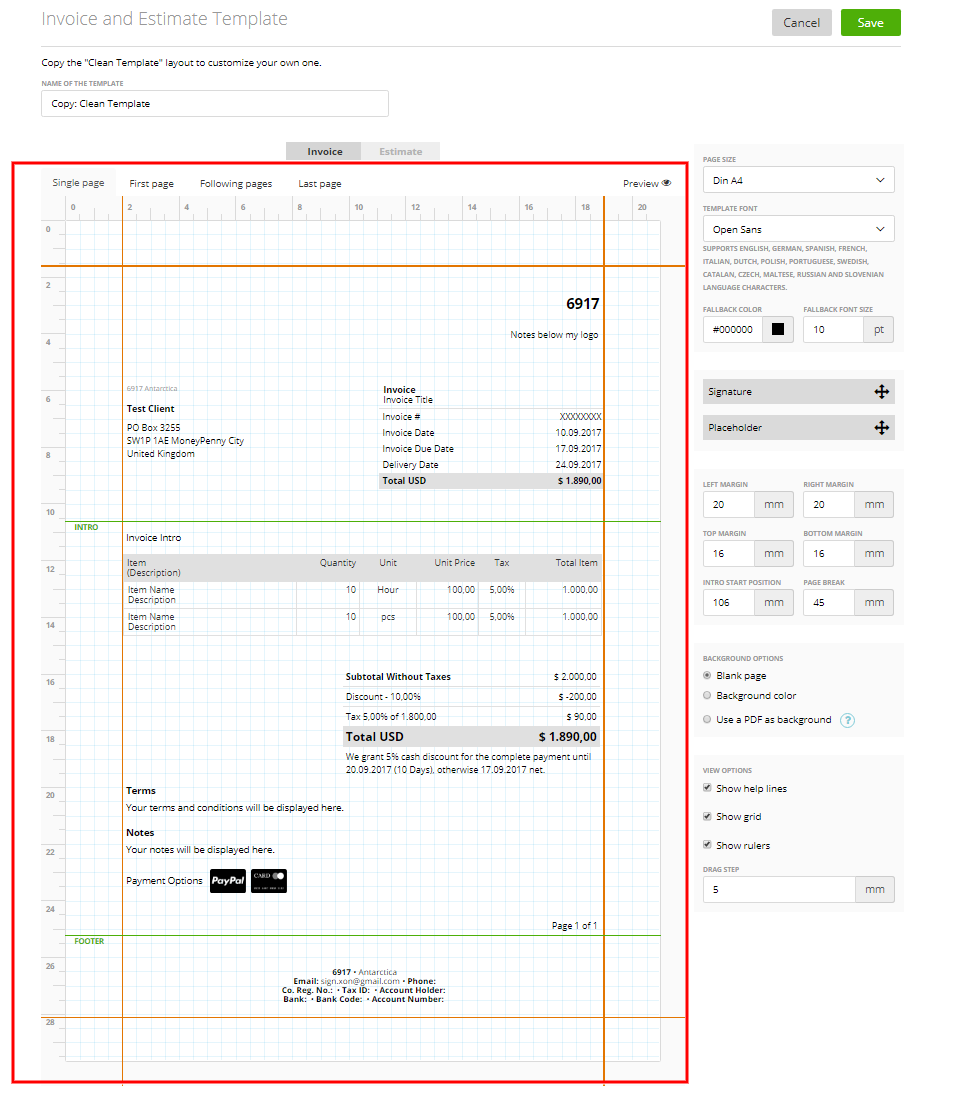
– Template – includes template blocks (placeholders) with its settings.
General Settings
– Page size – choose US letter or Din A4

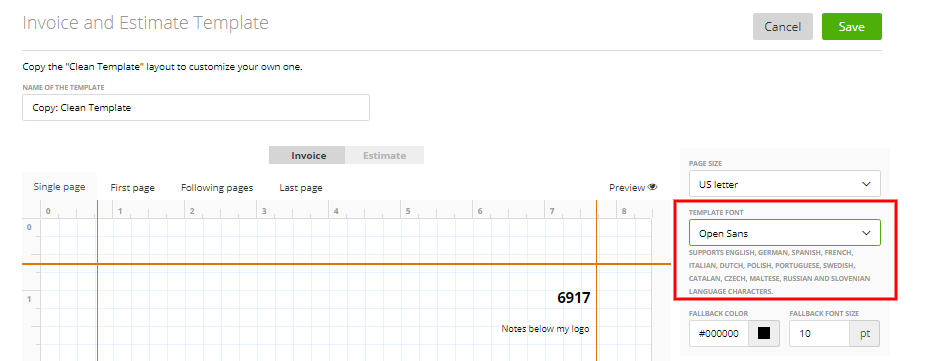
– Template font – choose the font, keeping in mind that below the input field you can see a hint with languages supported by this font.
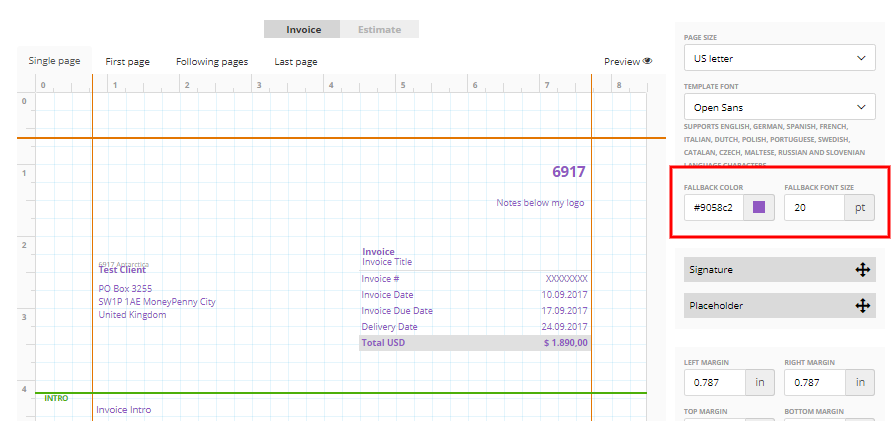
– Fallback color, fallback font size – this is the default font color for all template blocks and the default font size for ‘Placeholder’ blocks.
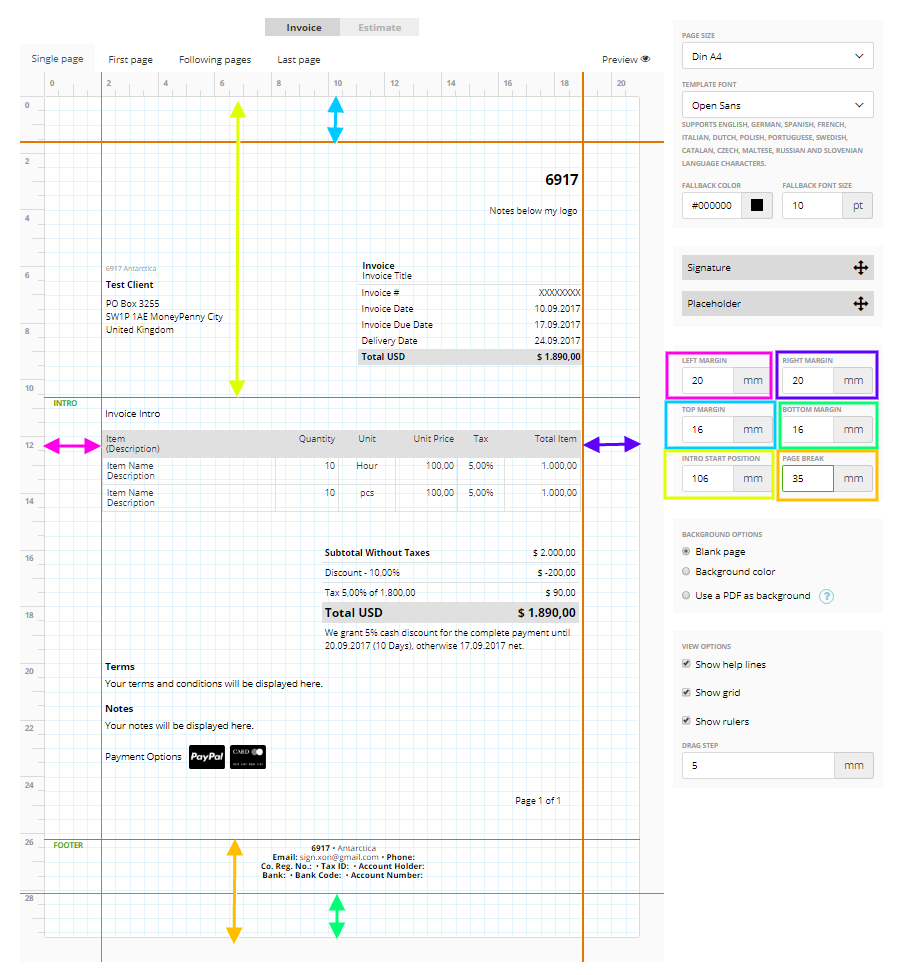
– Margins – You can enter margins in the input fields or change them by moving the orange and green lines right on the template.
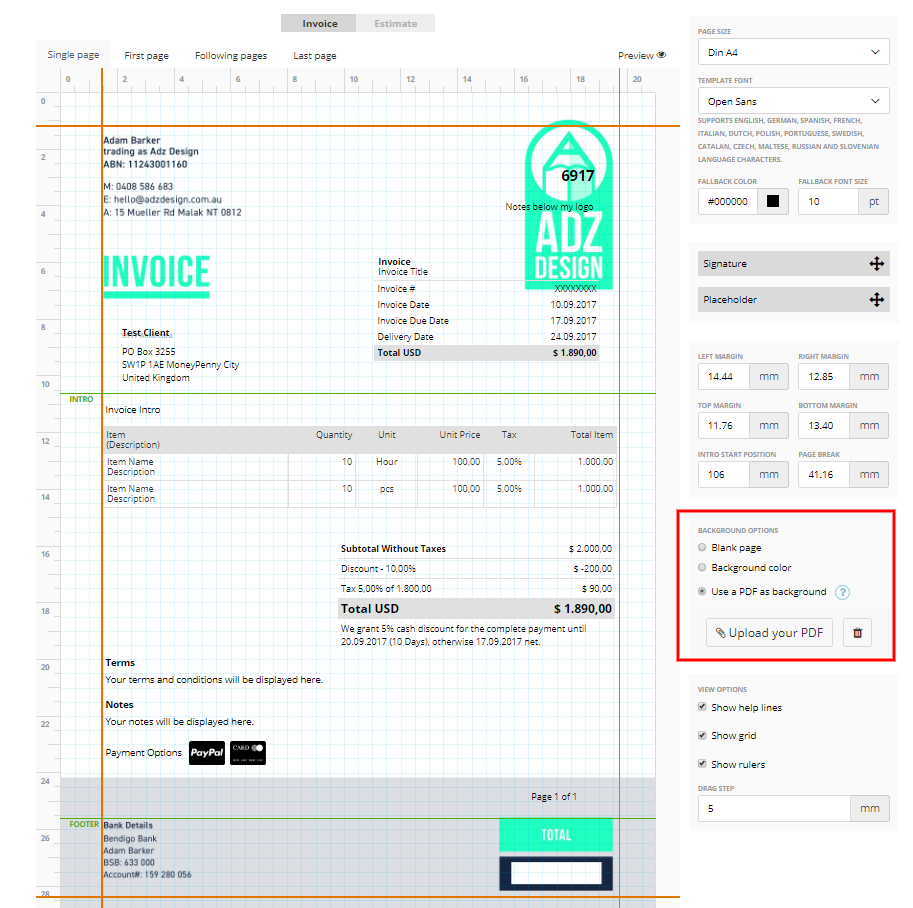
– Background options – you can leave it blank, choose a background color or use your own background from a PDF.
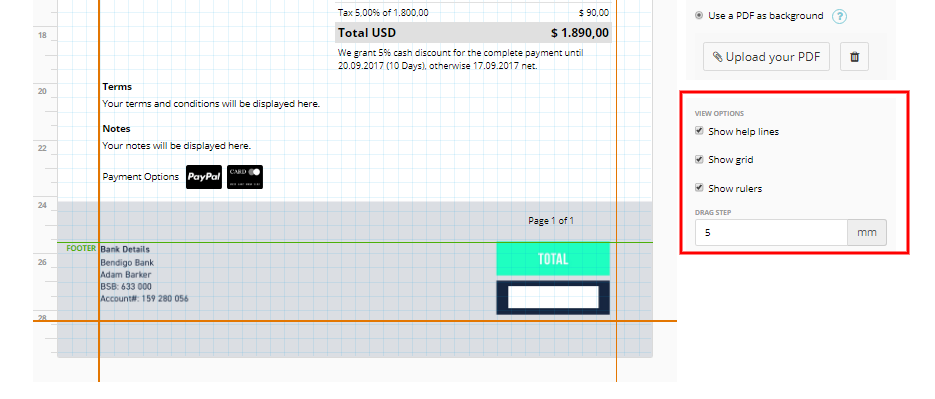
– View options – by default, on your template preview, you see helping lines (with margins, intro line, footer line); grid; rulers – but you can hide any of them or all.
Template Blocks (Placeholders)
Your template has the following blocks:
– Sender Name
Use it to fill in the info about your company (name, address). You can move, change or delete this block as you wish.
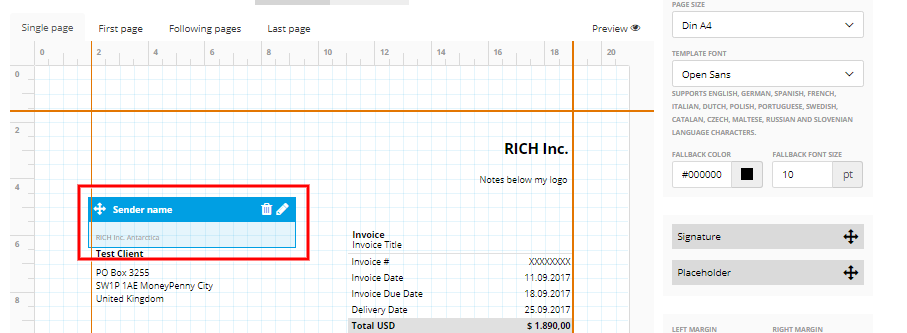
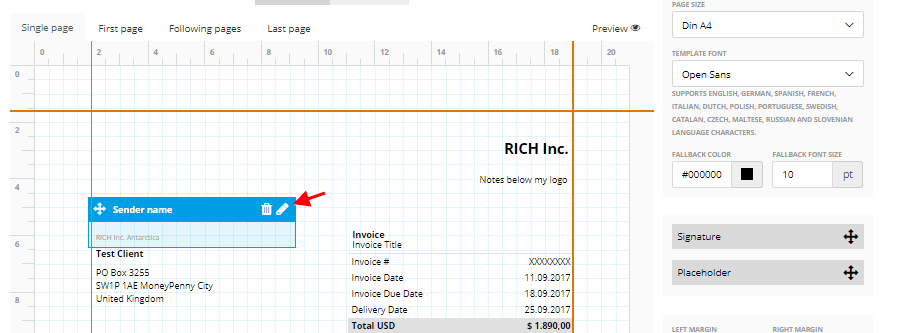
Click the pencil icon and start changing its content and appearance.
By default, it consists of the ‘Sender address’ placeholder – in one table row with gray text color and 7 pt font size.
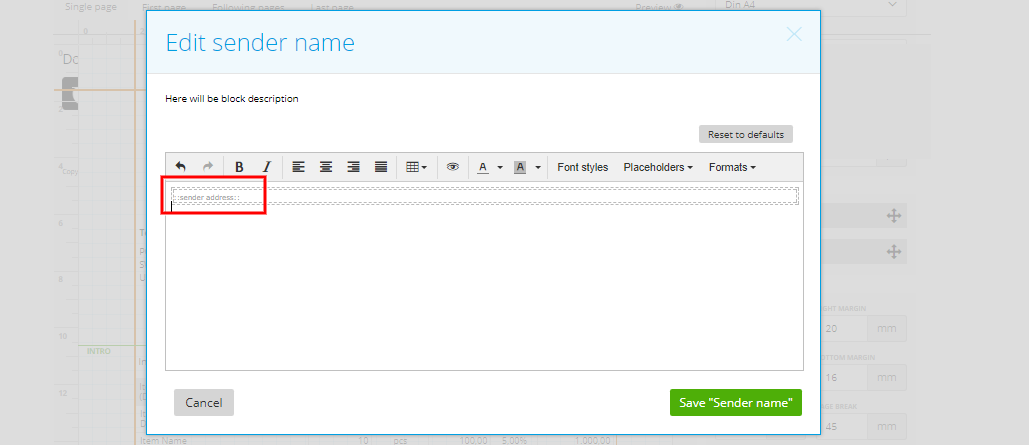
Here you can change the alignments, add/remove/customize table cells, change text/background colors, font style (font size and line height) and format (add/remove lines above/below Sender Name).
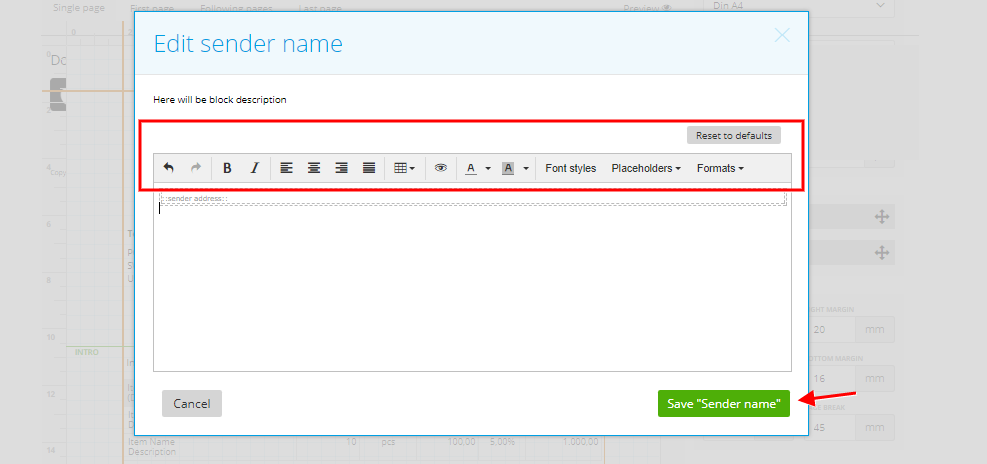
After making all the changes, save them by clicking Save “Sender name”.
– Client Address
This field shows the client address information. You can customize its view, content, and position to show it in the envelope window, for instance.
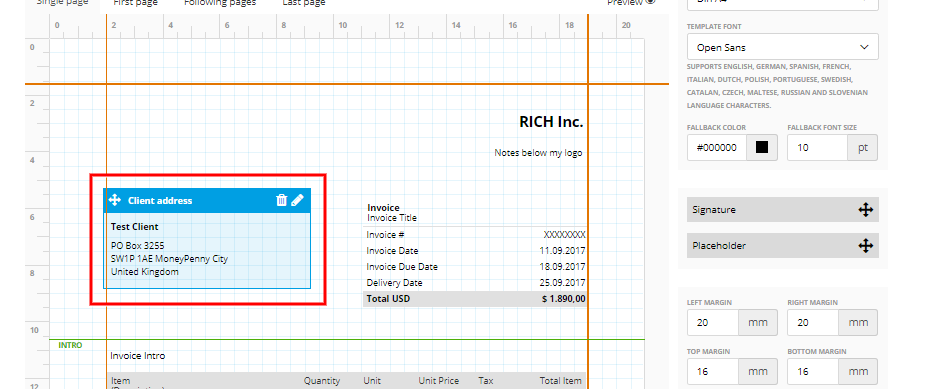
Click the pencil icon to start editing.
By default, it has two table rows with the ‘client name’ and ‘client address’ placeholders.
You can modify the alignments, add/remove/customize table cells, change text/background colors, the font style (font size and line height) and the format (add/remove lines above/below Client Address).
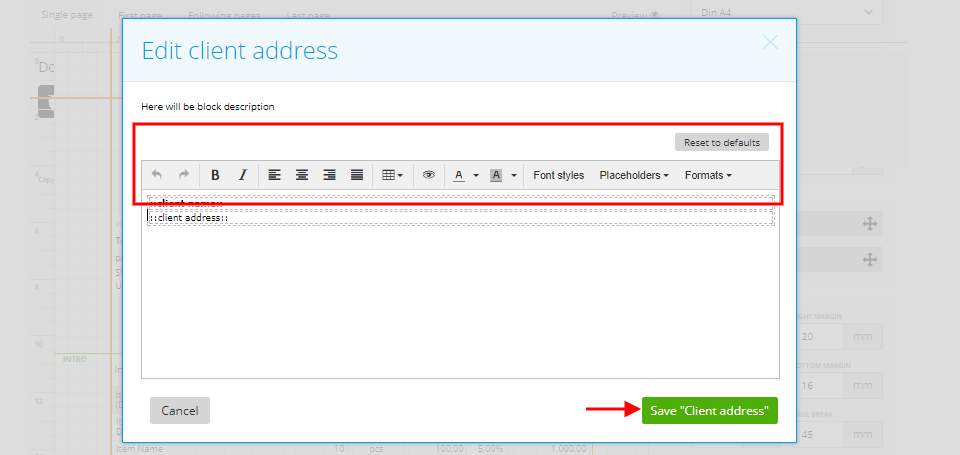
Save changes by clicking Save “Client address”.
– Company Logo
This one is for your company logo (more here) or (if you don’t have it) your company name. Below the logo, you see the ‘Notes below my logo’ (more details here).
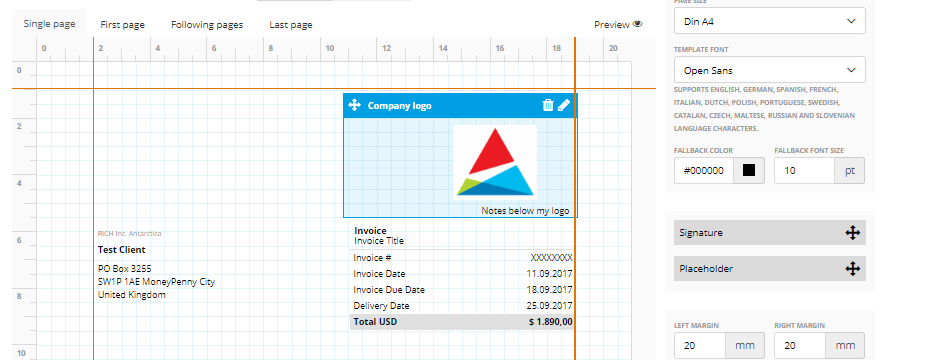
To start editing this template block, click on the pencil icon. By default, it consists of two table rows with ‘logo image’ and ‘logo text’ placeholders. However, you can alter the alignments, add/remove/customize table cells, change text/background colors, the font style (font size and line height) and the format (add/remove lines above/below Company Logo). Don’t forget to save changes by clicking the Save “Company logo” button.
– Document Info
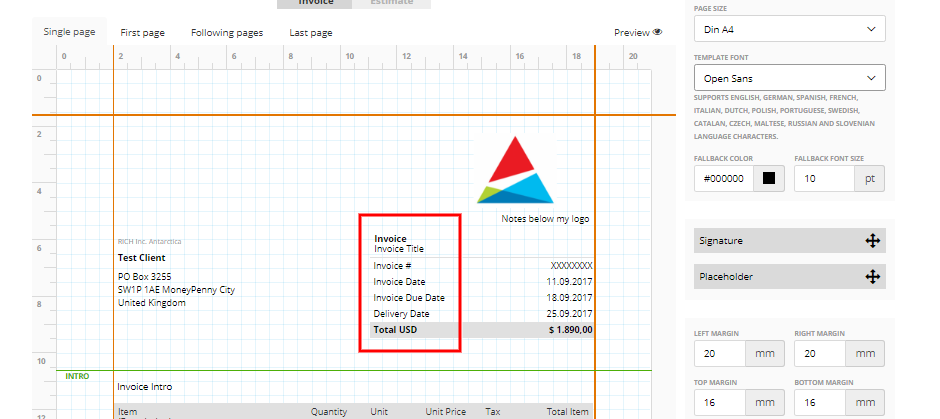
Here you can view the general information about your invoice: invoice number, invoice date, due date, delivery date, etc.
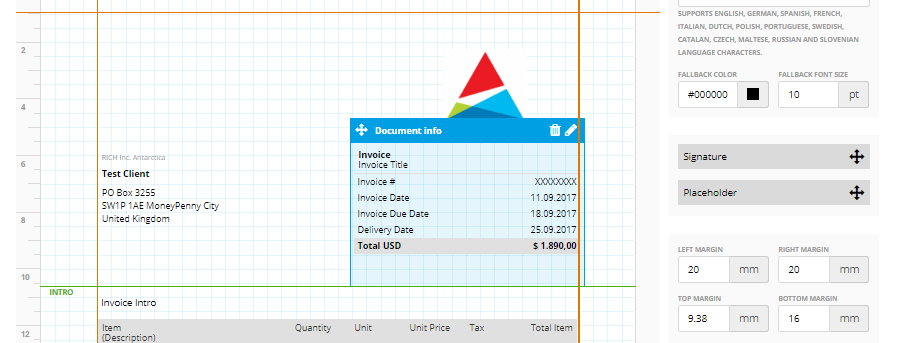
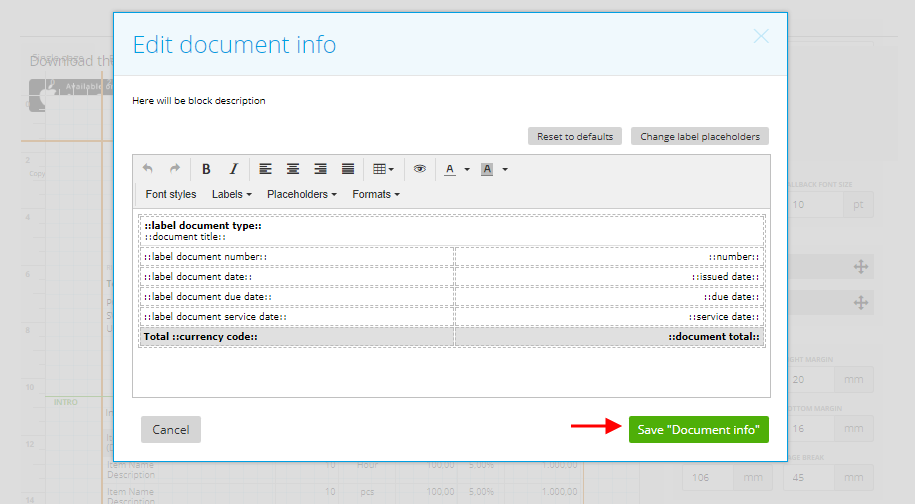
Click on the pencil icon to start making changes on this template block, including alignments, adding/removing/customizing table cells, changing text/background colors, font style (font size and line height) and format. You can add placeholders like on the other editors but also you have one additional option: ‘Labels’.
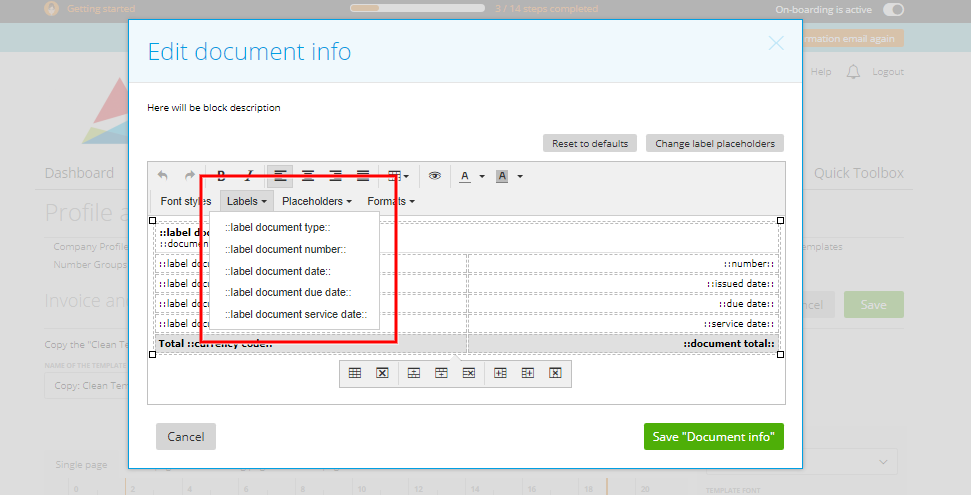
This is the type of document – invoice/estimate/proforma invoice/order confirmation/credit note. You create one template for all types of documents, and instead of these ‘label placeholders’ zistemo will put the correct information. For example, ‘::label document type::’ for invoices is ‘Invoice’, for estimates is ‘Estimate’, for credit note – ‘Credit Note’ etc.
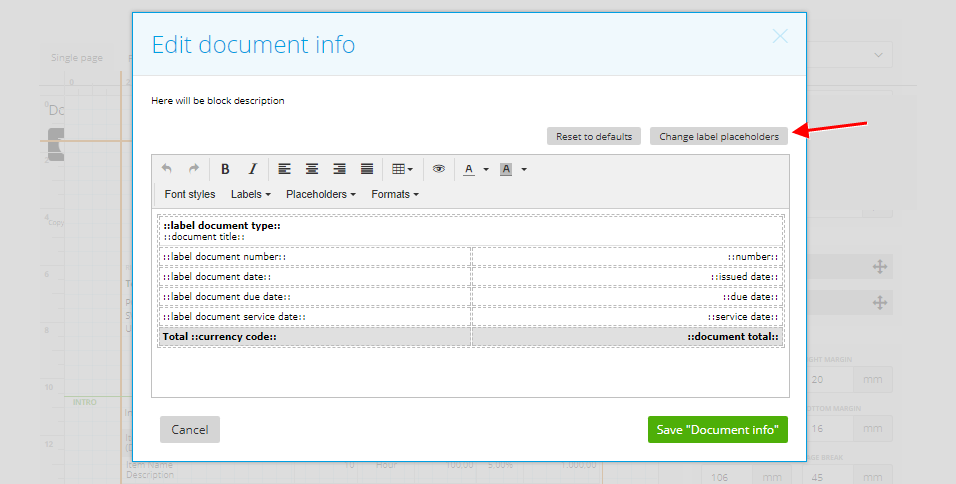
Change label placeholders
By the way, you can modify the label placeholders value (what will be printed instead of this placeholder) by clicking ‘Change label placeholders’.
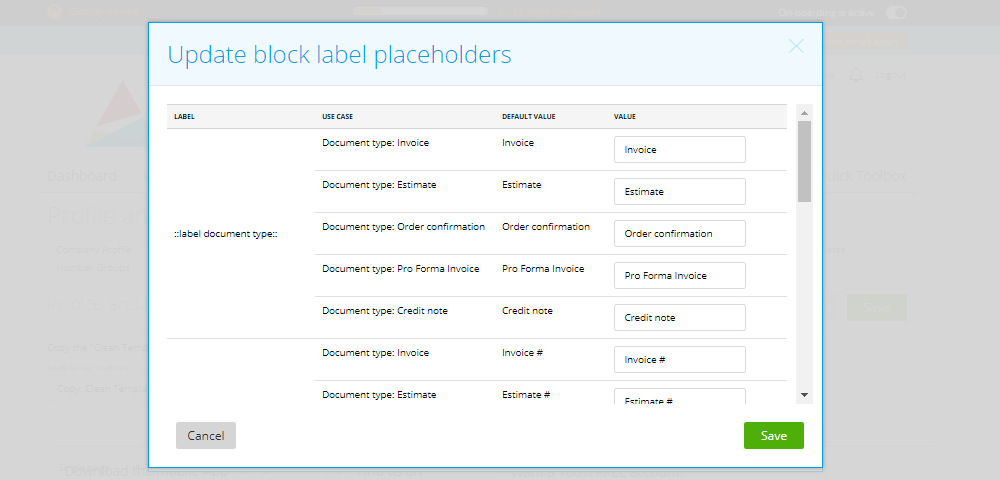
You can also see your label placeholders’ values in the template preview.
But all your changes will be saved and displayed only after clicking Save “Document Info”.
– Intro
This template block cannot be deleted, but you can click on to edit the information featured in it.

You can edit the text format and enter one intro text for all types of documents. If you need different texts for different documents, just keep the placeholder ‘::intro::’, this placeholder will take the text from Settings -> Text Templates (here you can change the text – more here). If you don’t need any intro information, you can just delete any data and keep this editor empty.
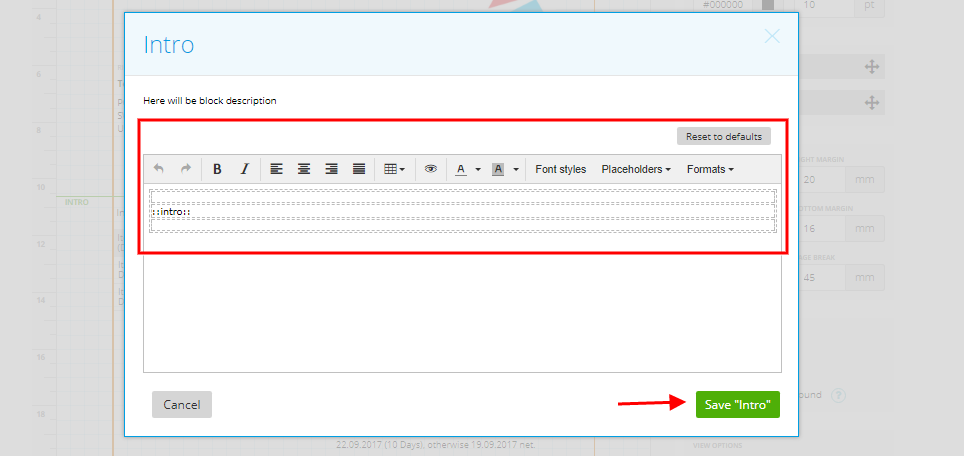
Click Save “Intro” to save your changes for this editor.
– Item table settings
This is probably the most important part of your invoice/estimate/etc. Item table shows all the key information about the goods/services you deliver (products, amounts, prices, taxes).
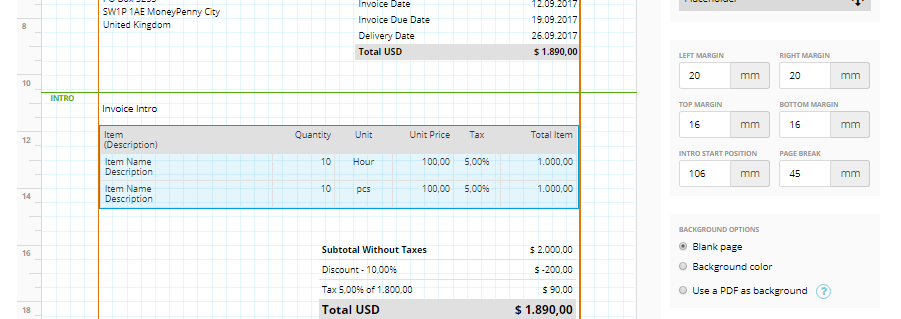
You cannot delete it, but you can edit its look by clicking over it.
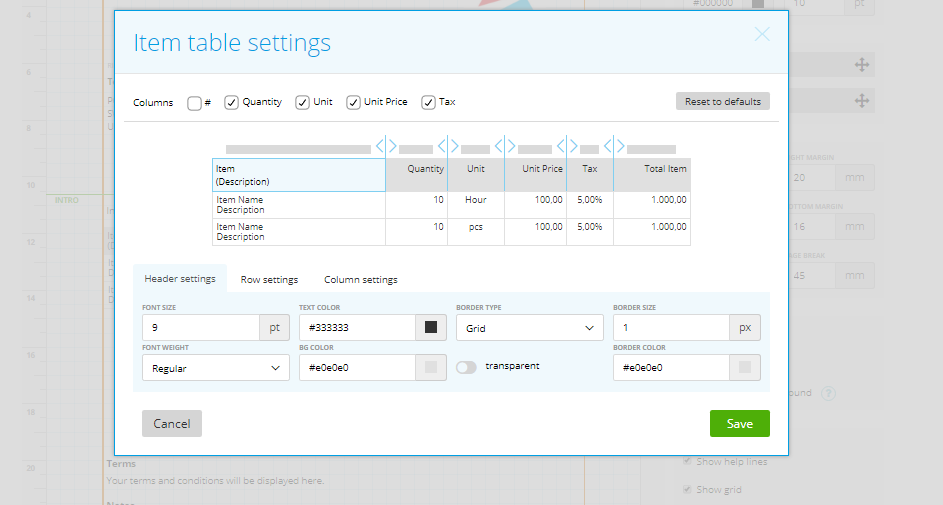
The editor consists of:
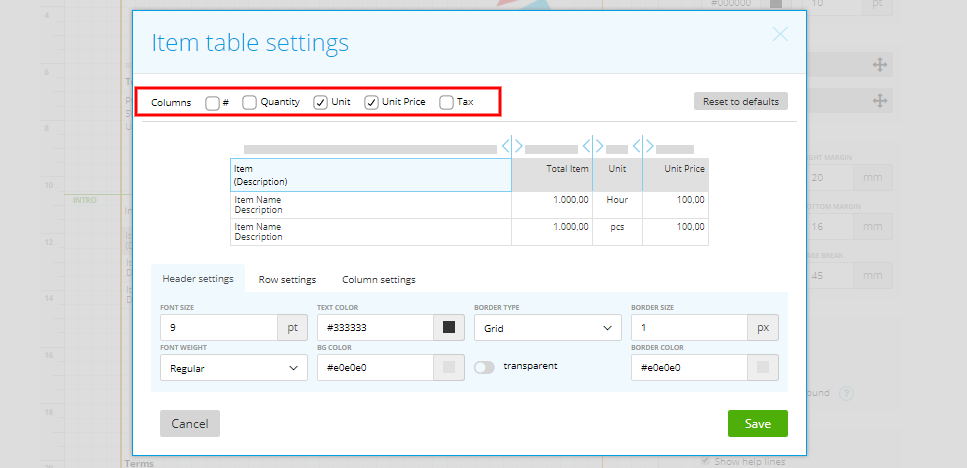
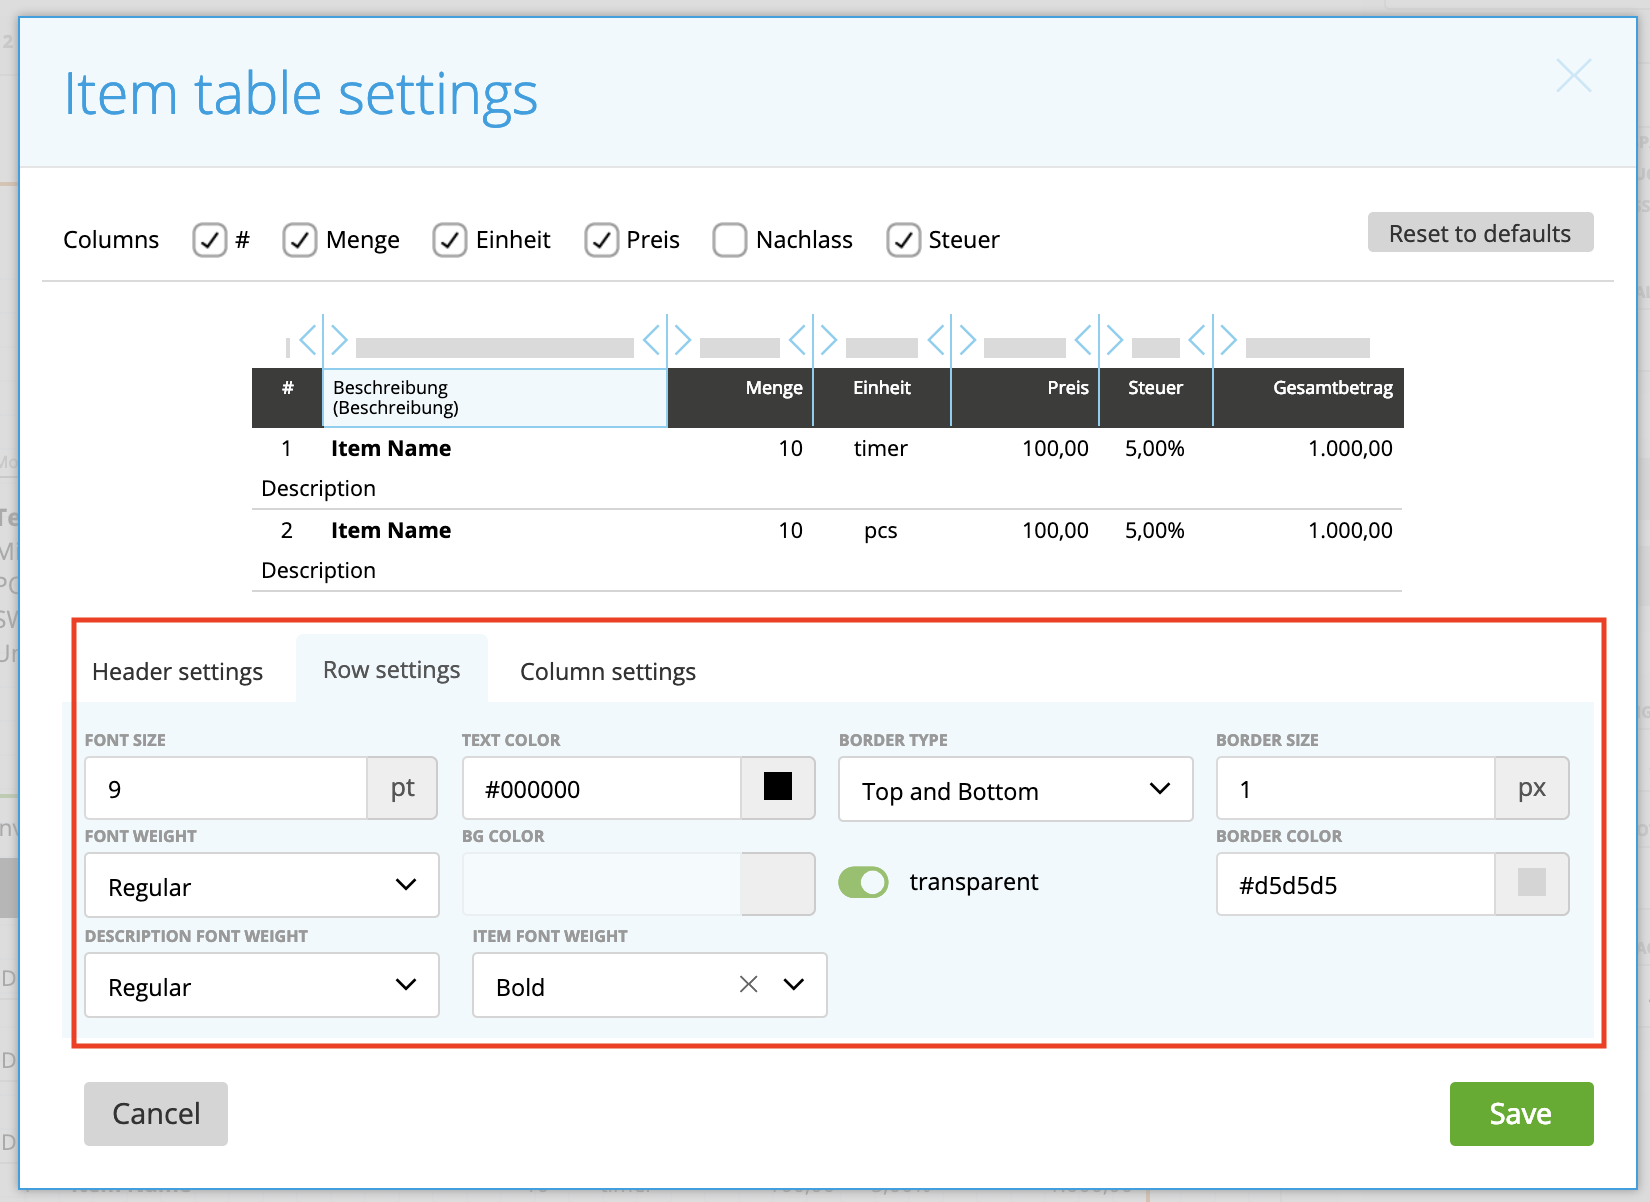
Columns – you can switch or hide columns such as ‘#’, ‘Quantity’, ‘Unit’, ‘Unit Price’, ‘Tax’.
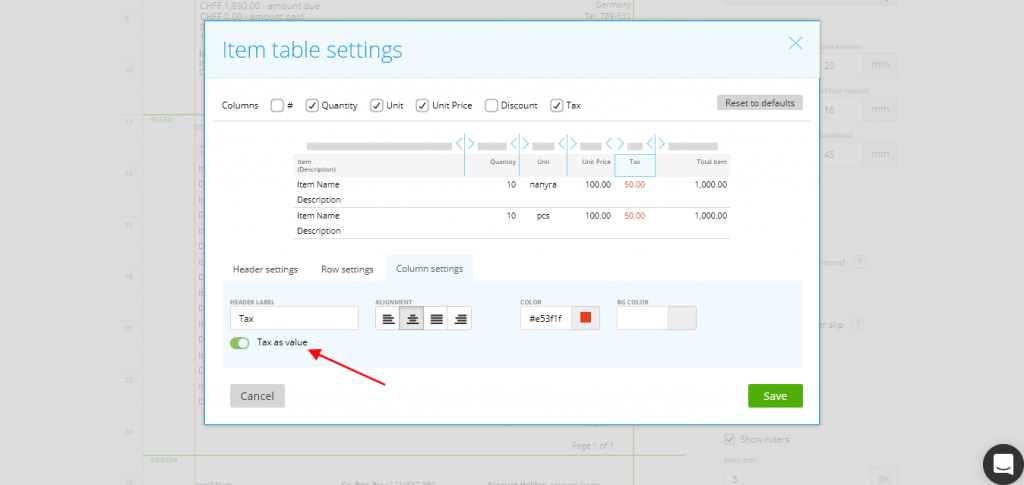
Note: this button will set your taxes to become a value, not percentage:
Header settings – here you can customize the appearance of the table header.
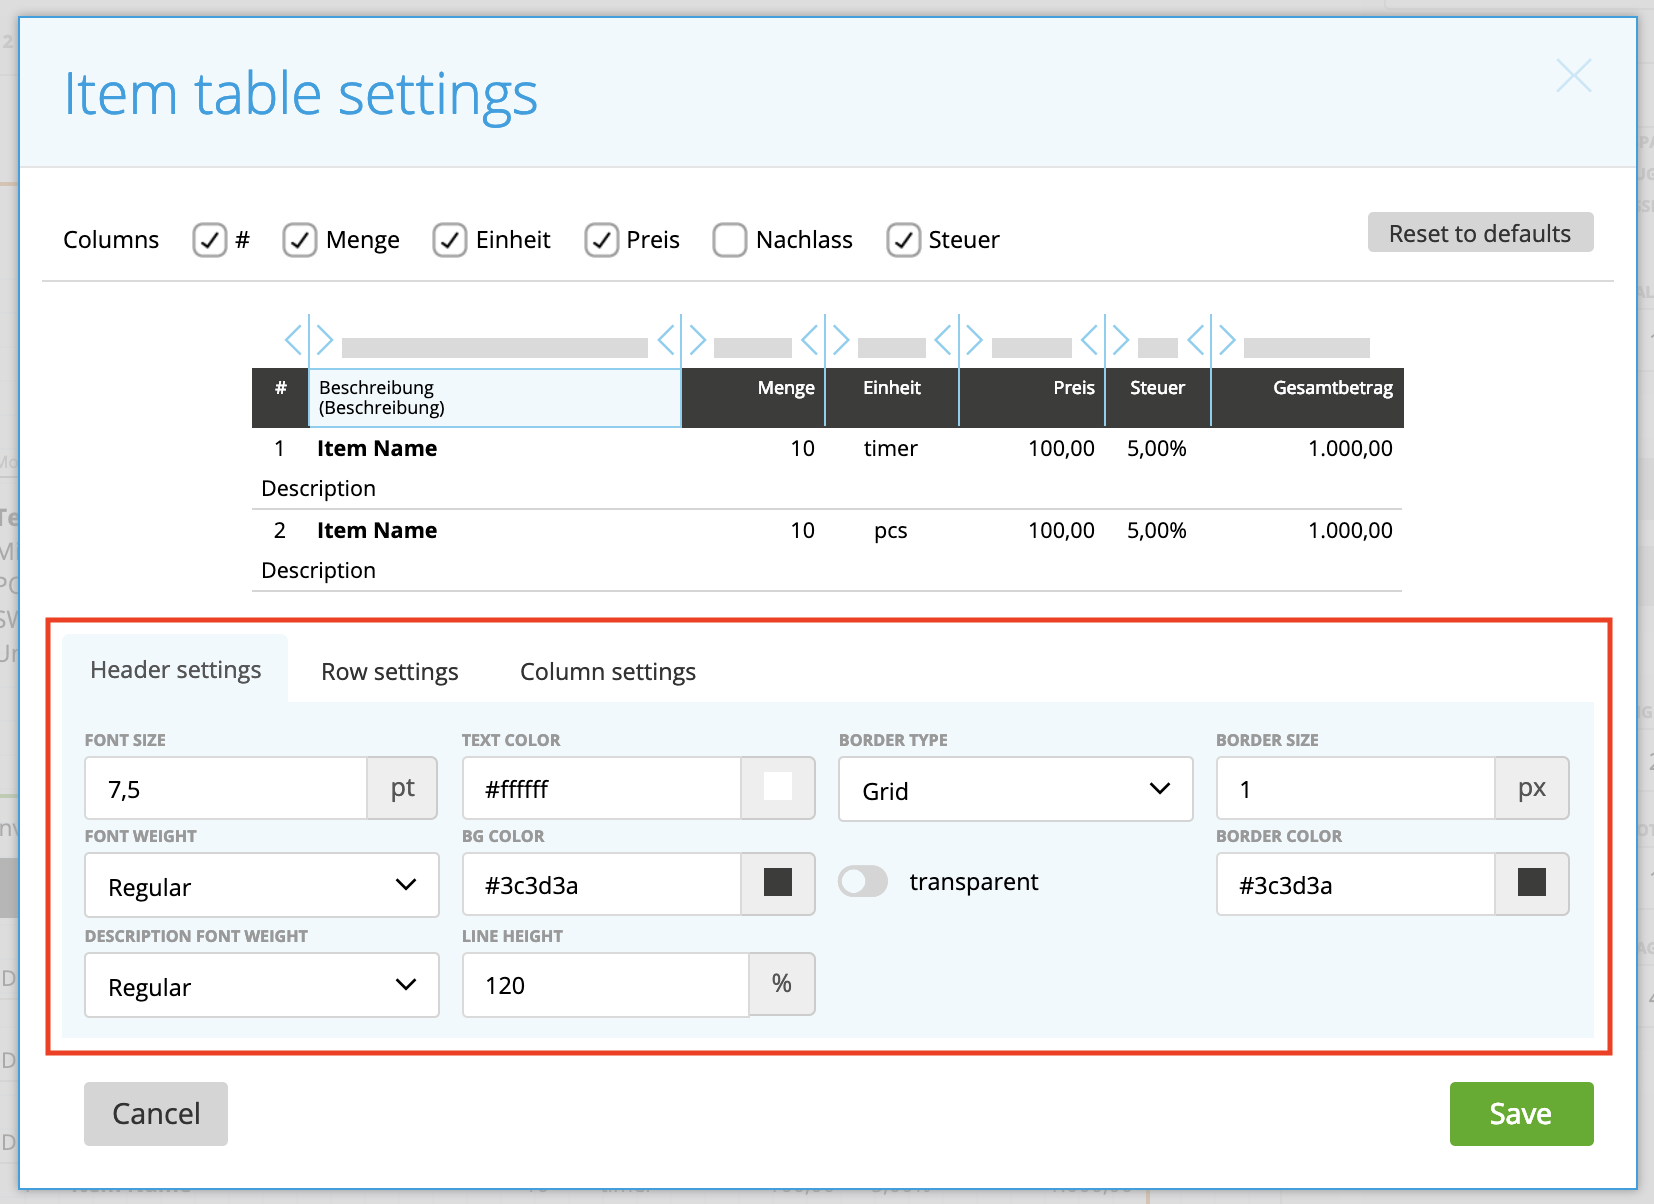
Row settings – for customizing the look of items rows:
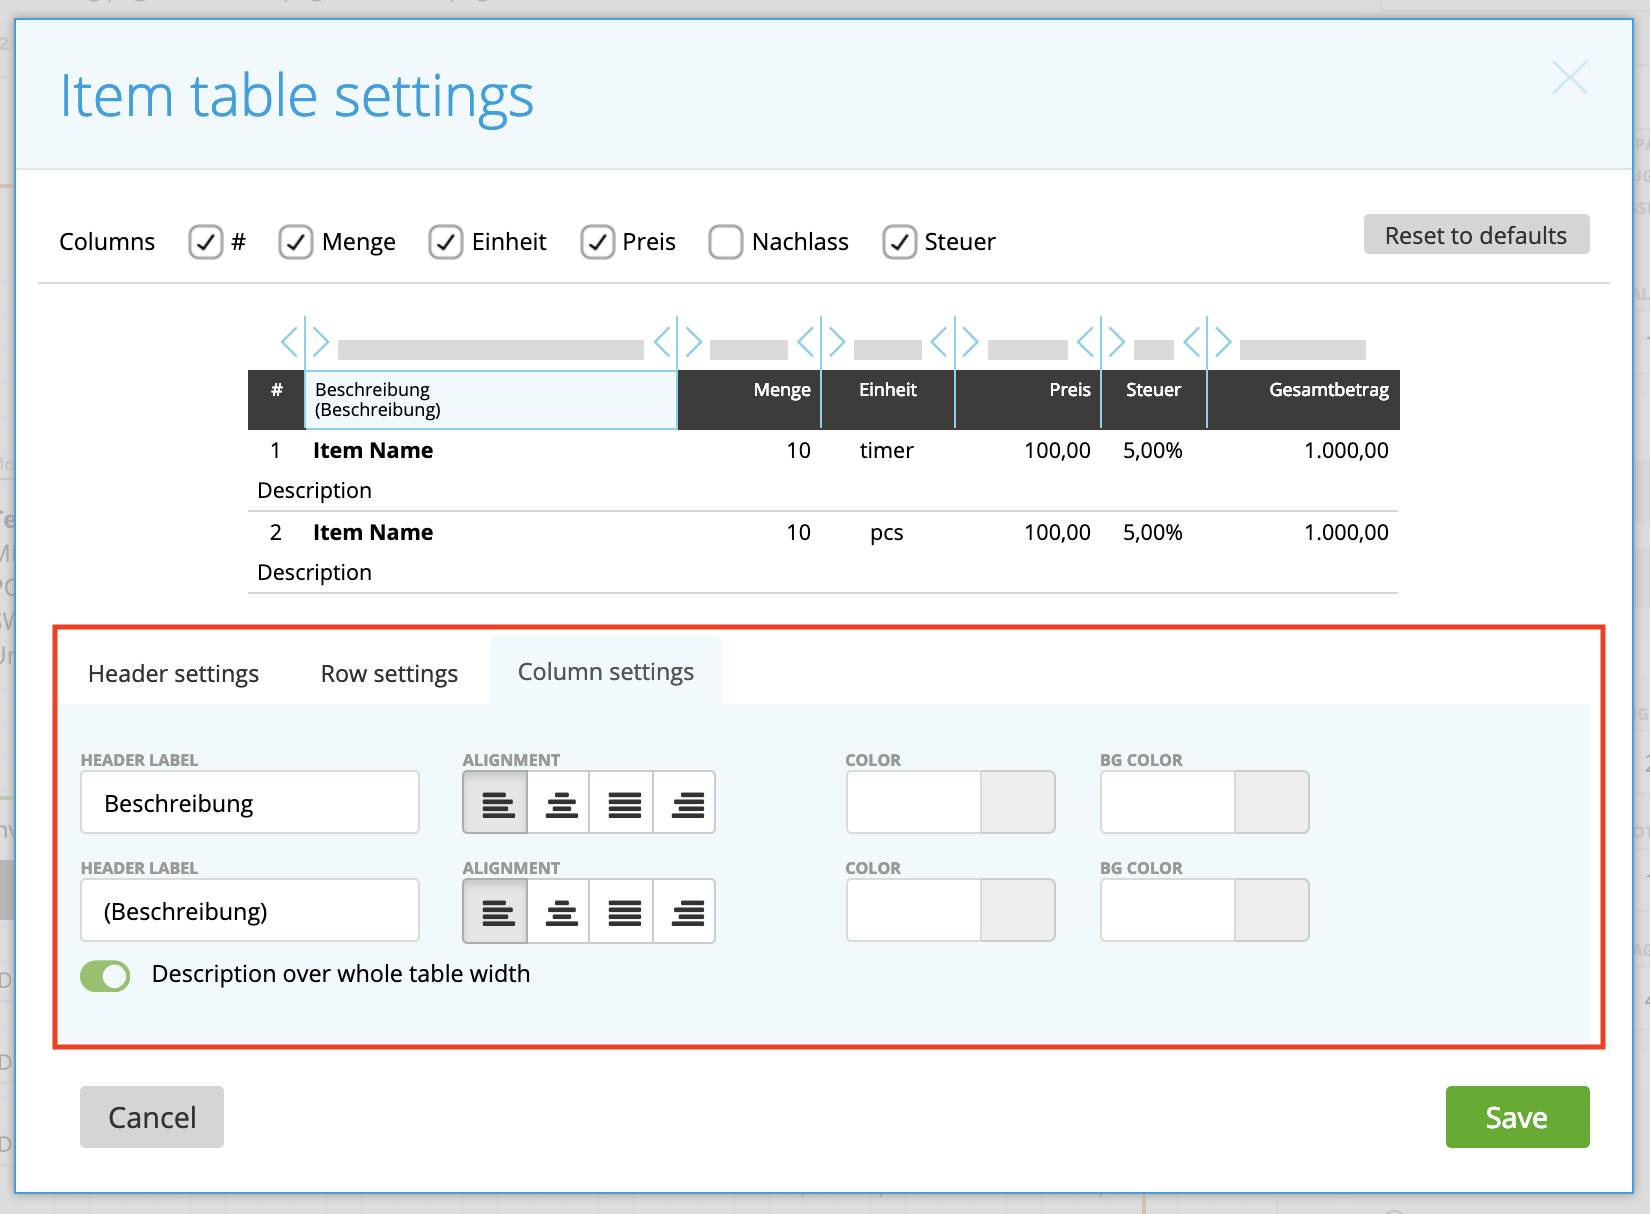
Column settings – use this to customize the look of table column with items names.
– Totals – a block which sums up information on the related products.
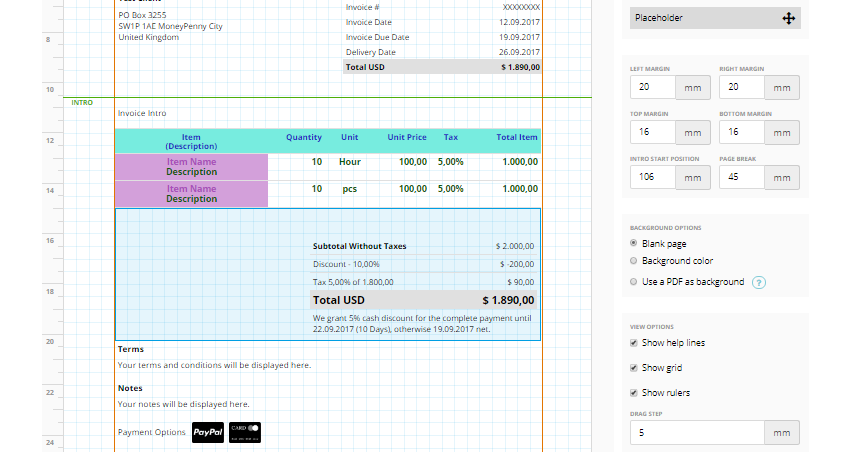
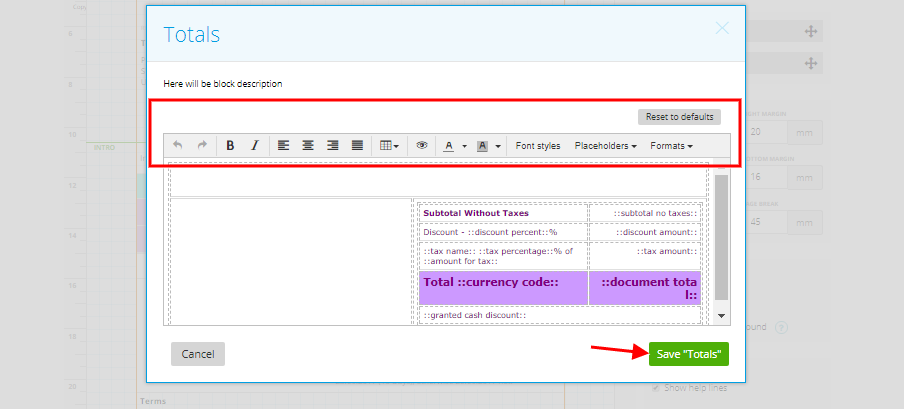
Again, it’s not a deletable block, but the good news is that you can make your own edits. Click on this block to open the editor. Here you can alter its appearance, its place on the document, text alignment, text/background colors, font styles (size and height), add or remove placeholders and add top/bottom lines.
Terms, Notes, Payment Options
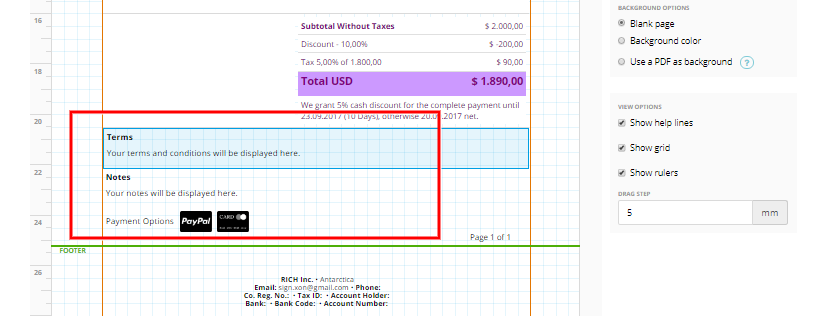
Another case of an undeletable block which can simply be changed just like Intro or Totals blocks.
Note: if you don’t want it to show it on your business documents, simply remove it from the editor.
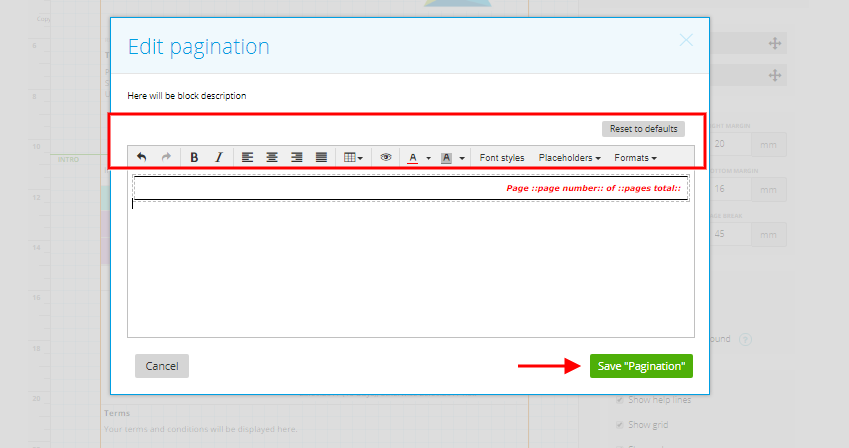
– Pagination – shows the page number and the total amount of pages in a document. You can move, delete or edit it as you wish.

Click the pencil icon to edit it just like the other placeholders.
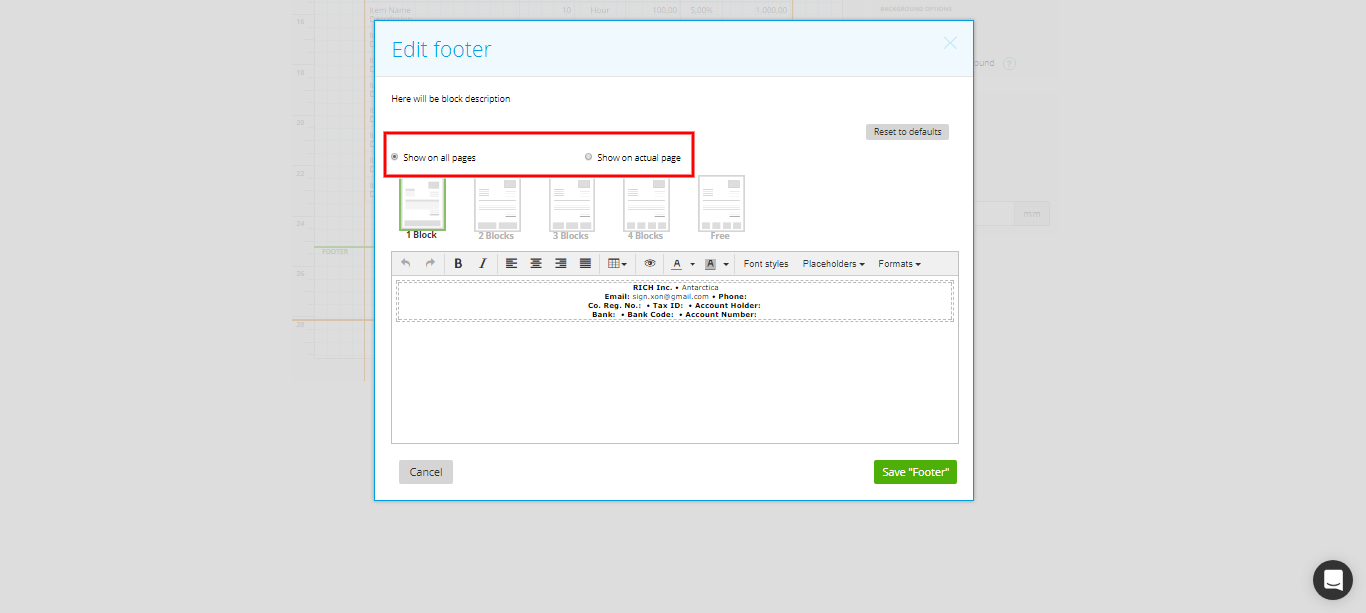
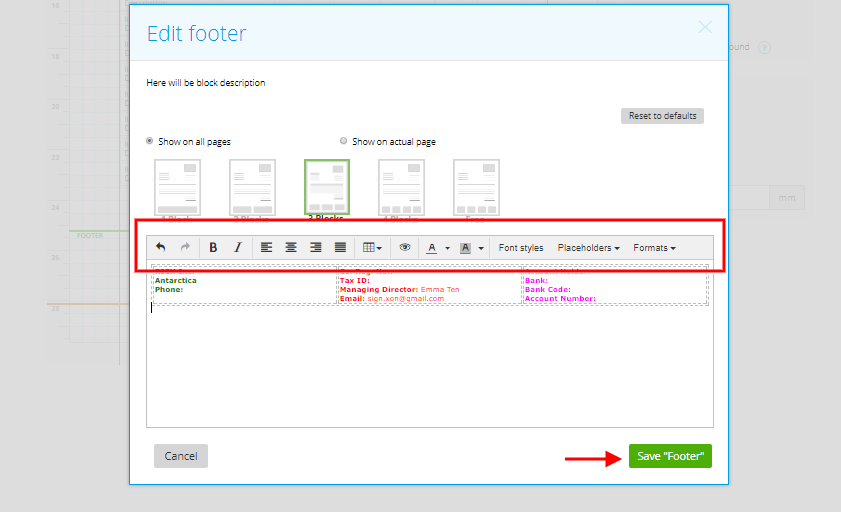
– Footer – by default, the footer includes the general information about your company: name, email, phone, registration number, bank account etc. But you can enter any information you find relevant because the Footer block can be moved, edited or deleted.

Click the pencil icon to start editing it. First you can choose an option ‘Show on all pages’ – in this case, the footer will be displayed on all pages of the document, or ‘Show on actual page’ – a footer that will be displayed only on the page you are editing.
Also, you can choose how many blocks this footer should include.
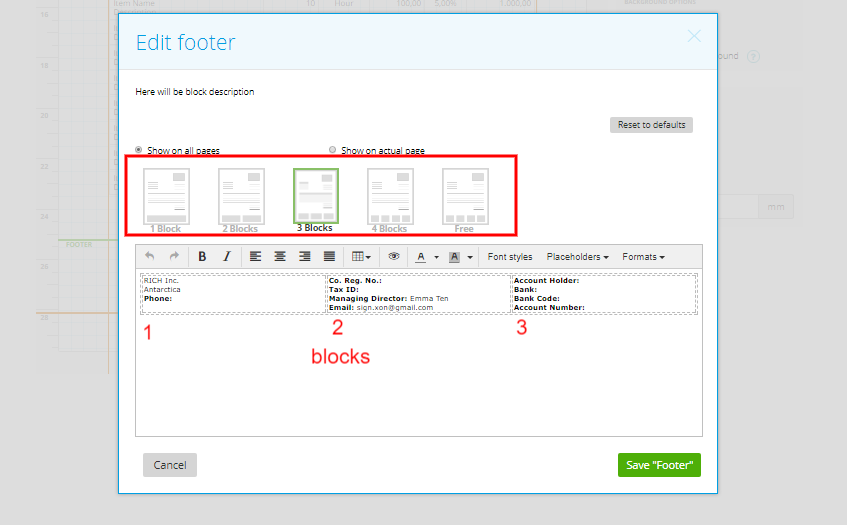
Next, you can edit it like the other placeholders.
– Footerborder – How to add a footer border?
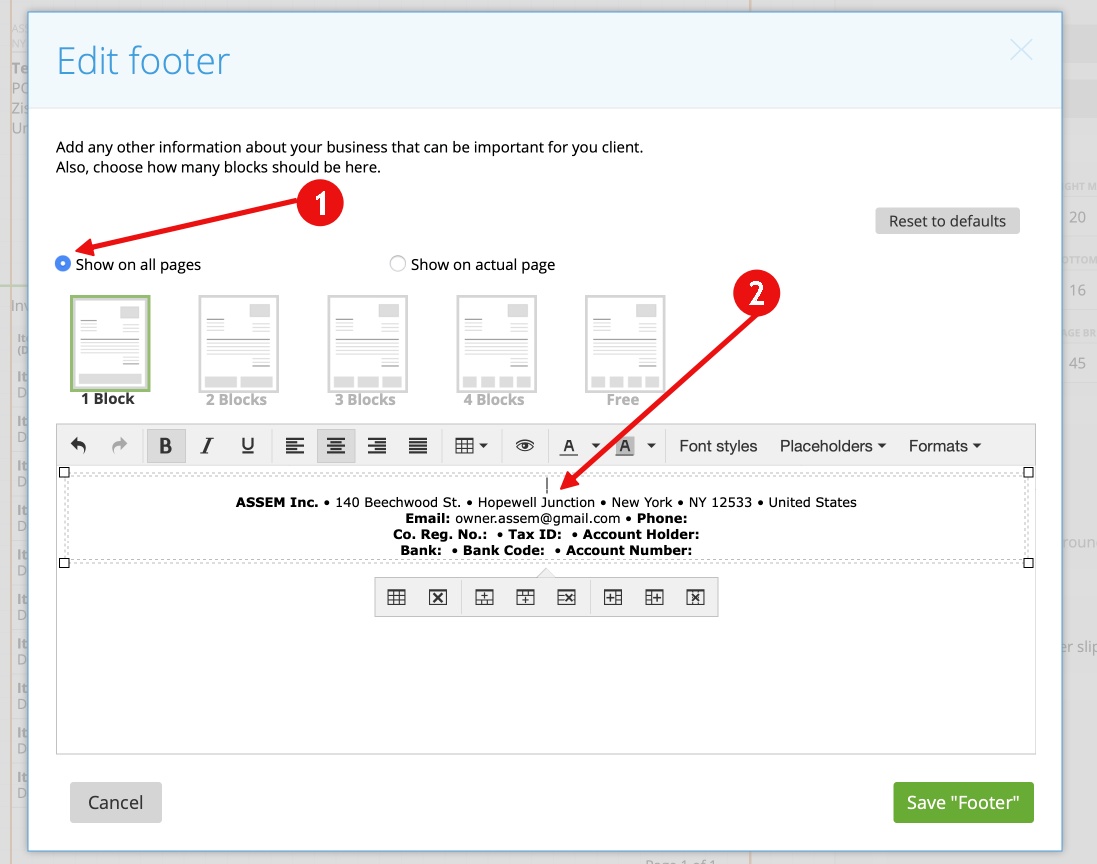
Simply click on the footer in the template and created and choose ‘show on all pages’:
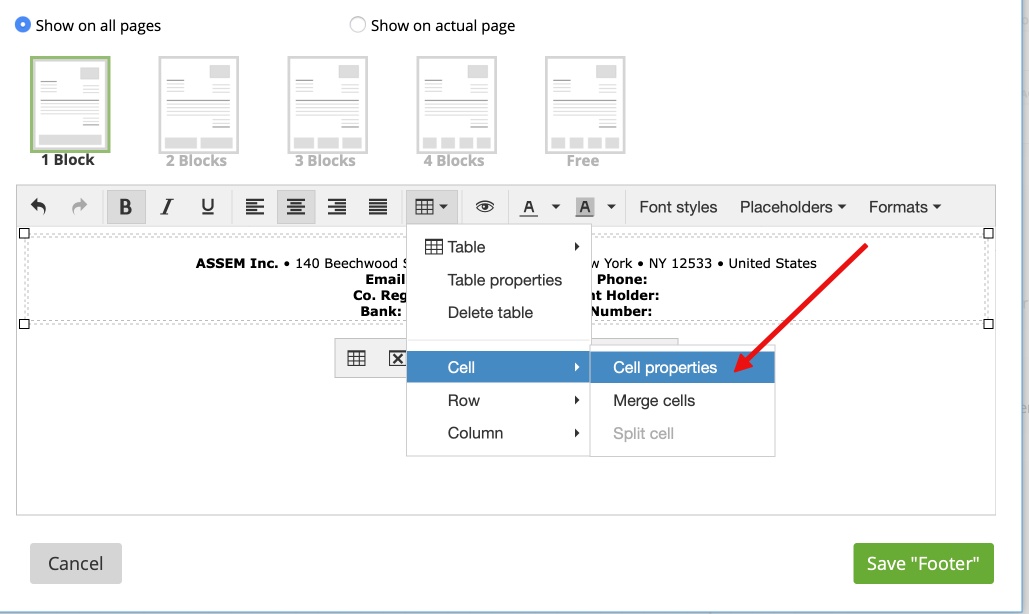
Go to ‘Cell’ -> ‘Cell properties’
and enter following: border-top: 1px solid #e0e0e0;
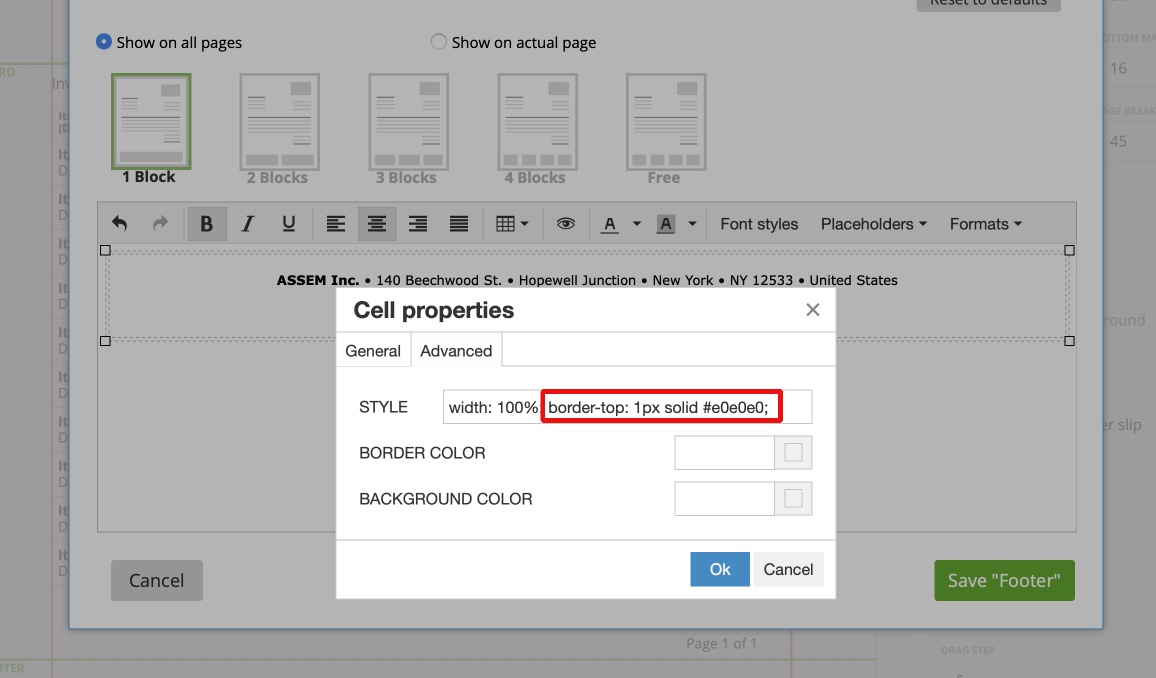
save the footer and press “preview” – Done!
Troubleshoot:
Sometimes it might happen that your footer won’t displayed properly on the PDF. Please check then if each single line of the footer is in a separate table line. In most cases this helps to solve overlapping texts.
– Signature – an additional block that you can place on your document.
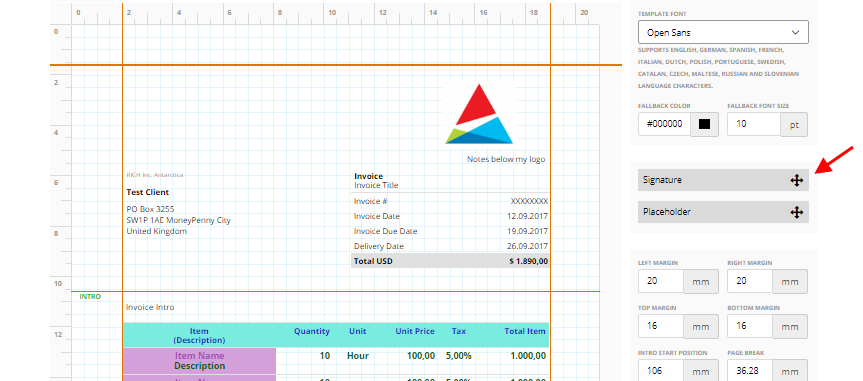
It’s very helpful if you want to have your signature or stamp featured on documents.
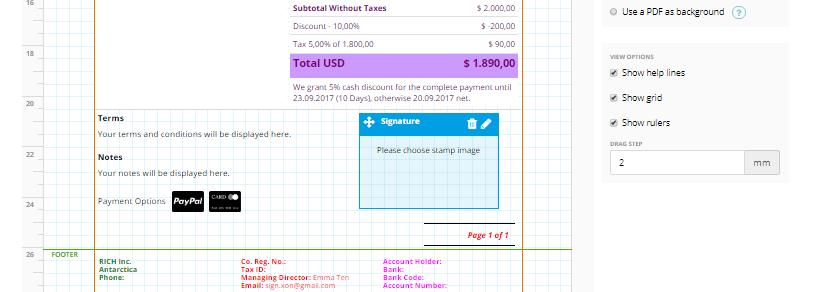
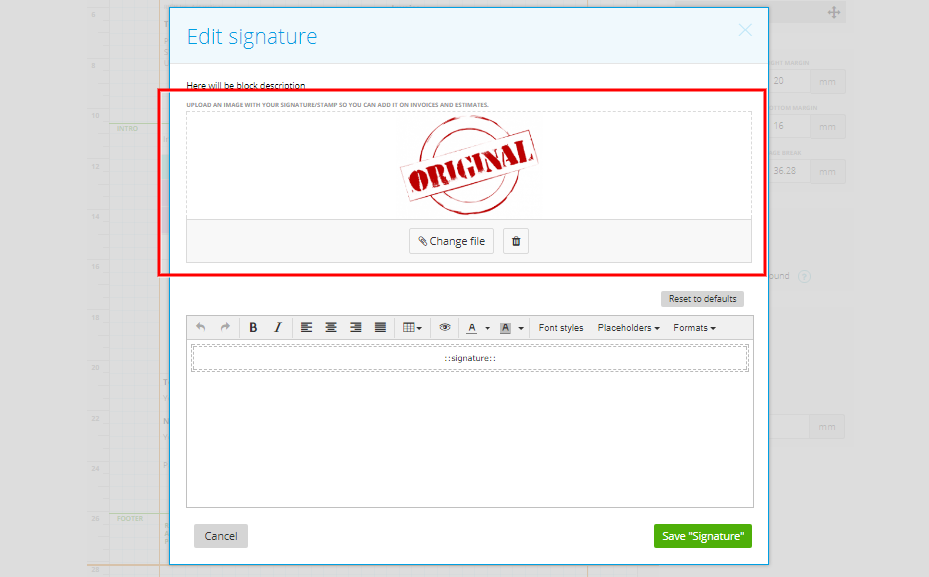
Click on the pencil icon and upload your stamp/signature.
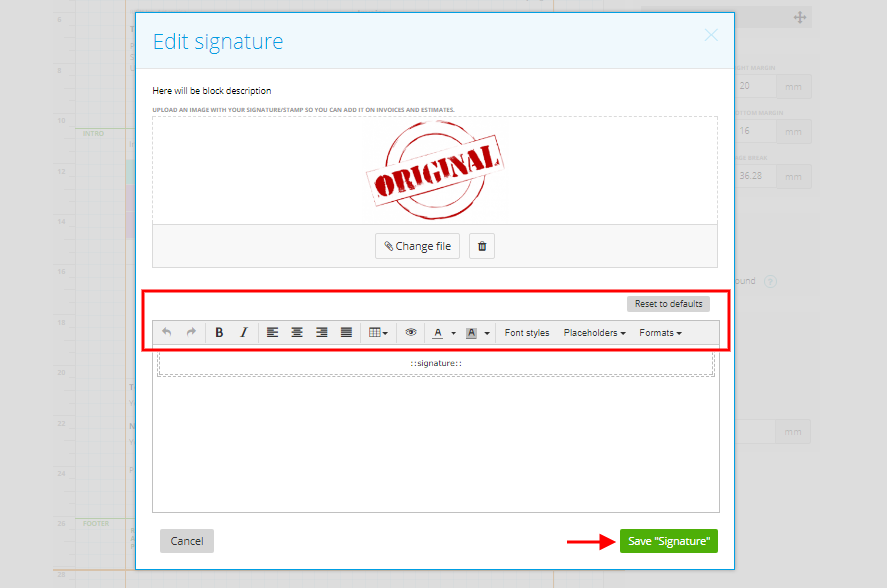
Also, you can add other text/information and edit it like the other placeholders.
– Placeholder – if you need more blocks with information on your documents, you can use the ‘Placeholder’ block.
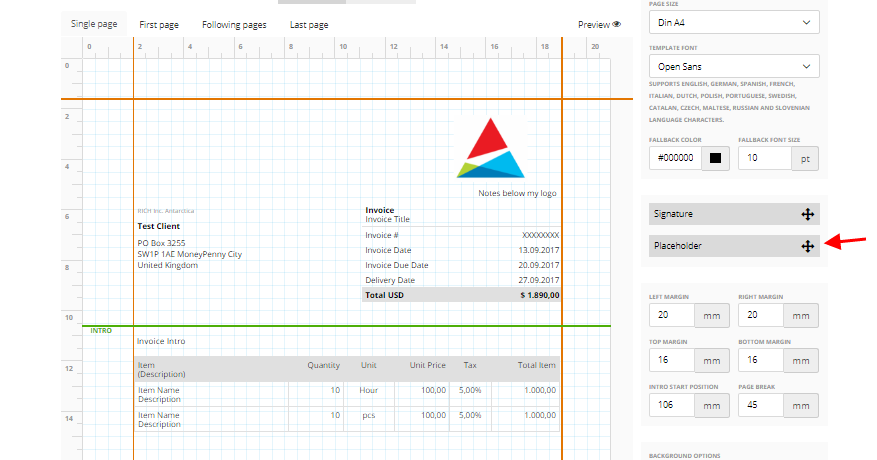
Drag and drop it to the right place on the document.
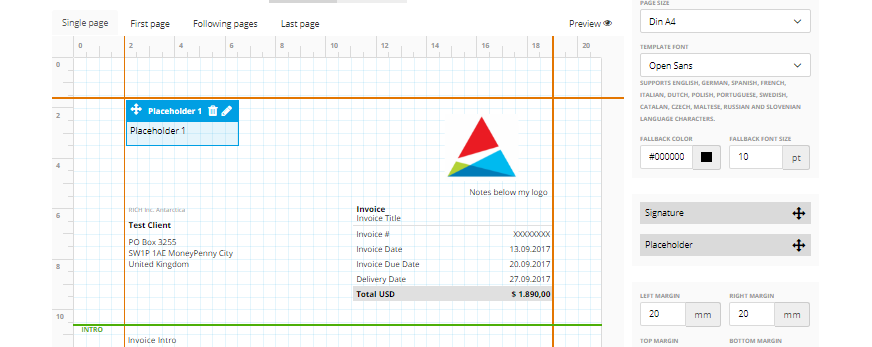
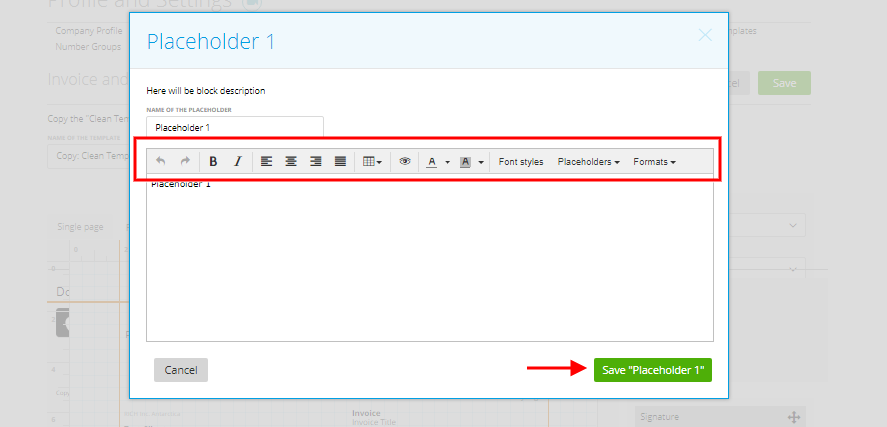
Click on the pencil icon to edit it like the other blocks.
Default zistemo templates
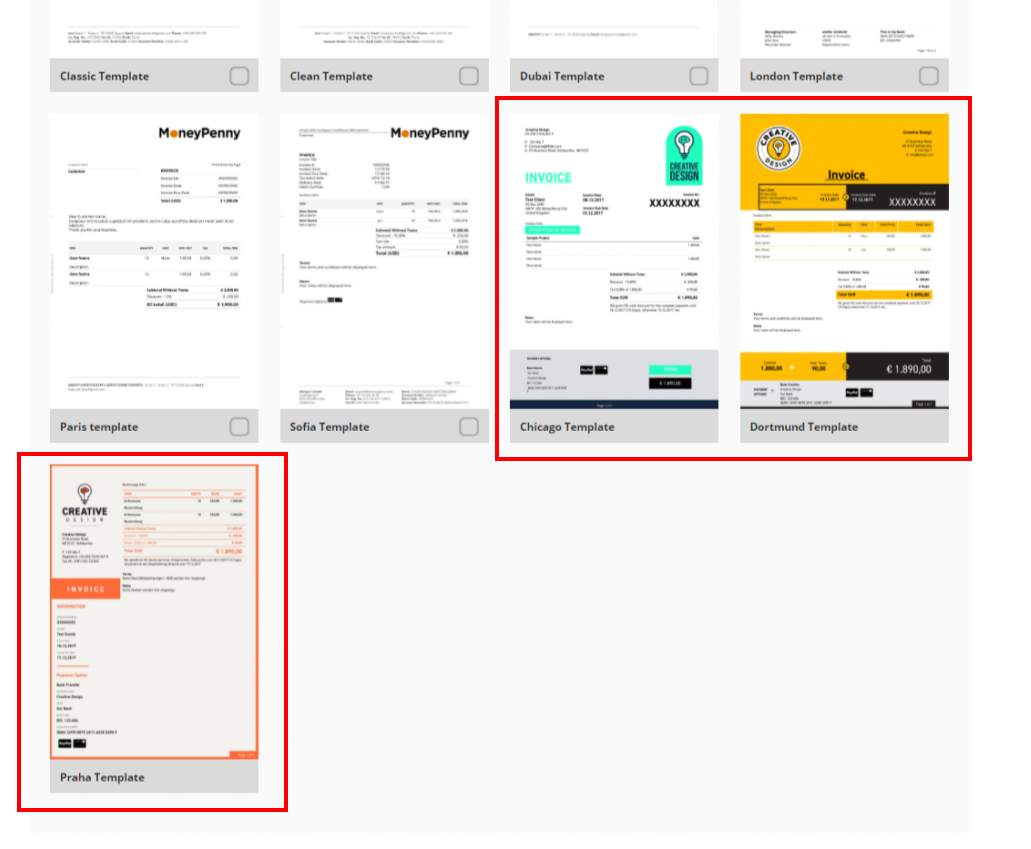
There are 9 default templates you can choose from for your documents. You can find them in the ‘Shared’ tab:
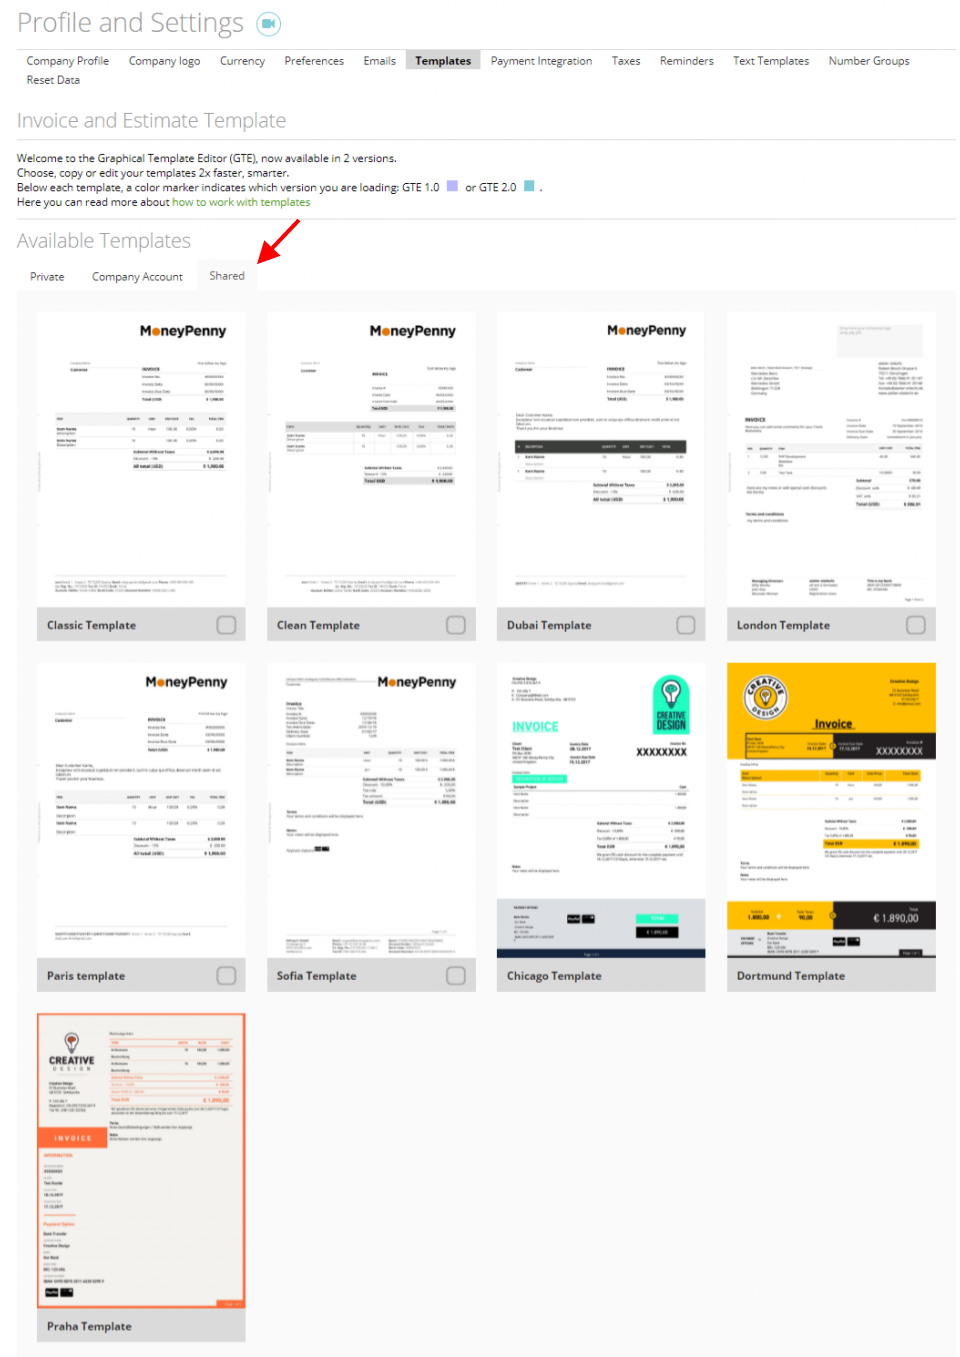
You can choose any of the following six templates as default: Classic Template, Clean Template, Dubai Template, London Template, Paris Template, Sofia Template, Chicago Template. Just mark its checkbox and this template will be used by default for new documents.
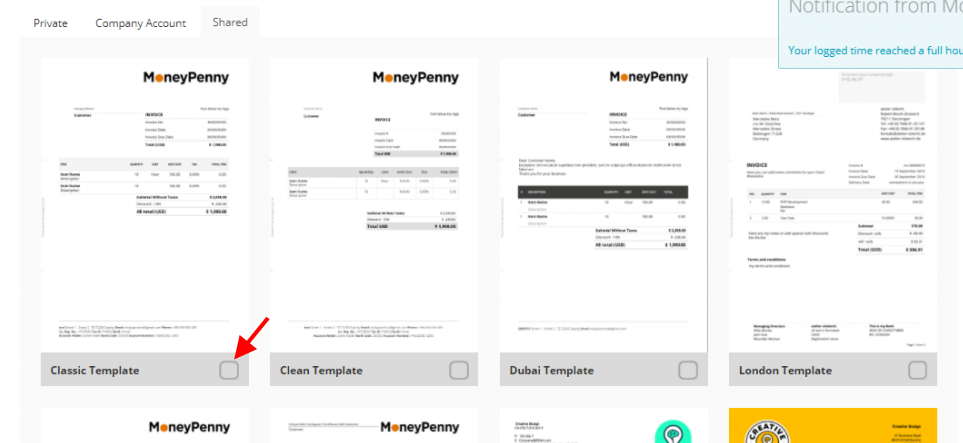
Apart from the 6 mentioned above, there are 3 additional templates which cannot be marked as default but you can copy them, change some info and save them in your custom templates (‘Company Account’ tab). These templates are Chicago Template, Dortmund Template, Praha Template.
