Recurring Invoices are invoices that are created automatically with a specific frequency.
zistemo allows you to create a Recurring Invoice Profile that will create and even send out these invoices for you.
Just go to Sales -> Invoices -> Recurring Invoices -> and click ‘Create recurring Invoice’:
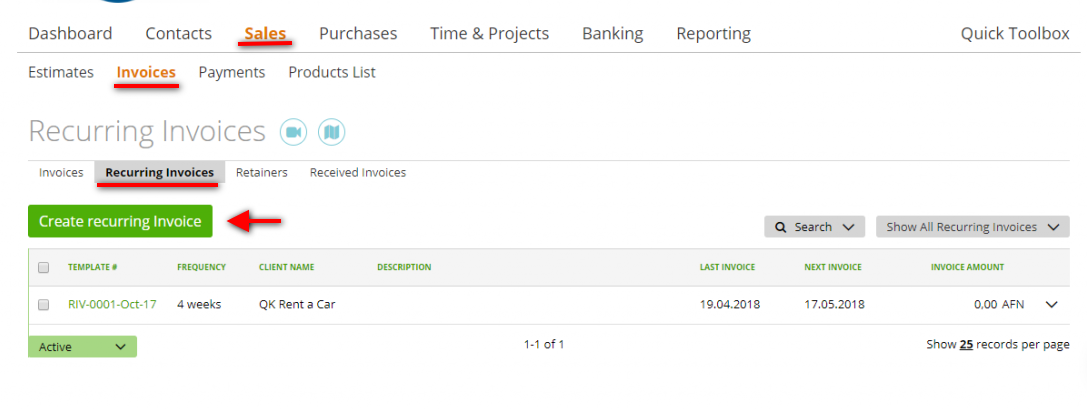
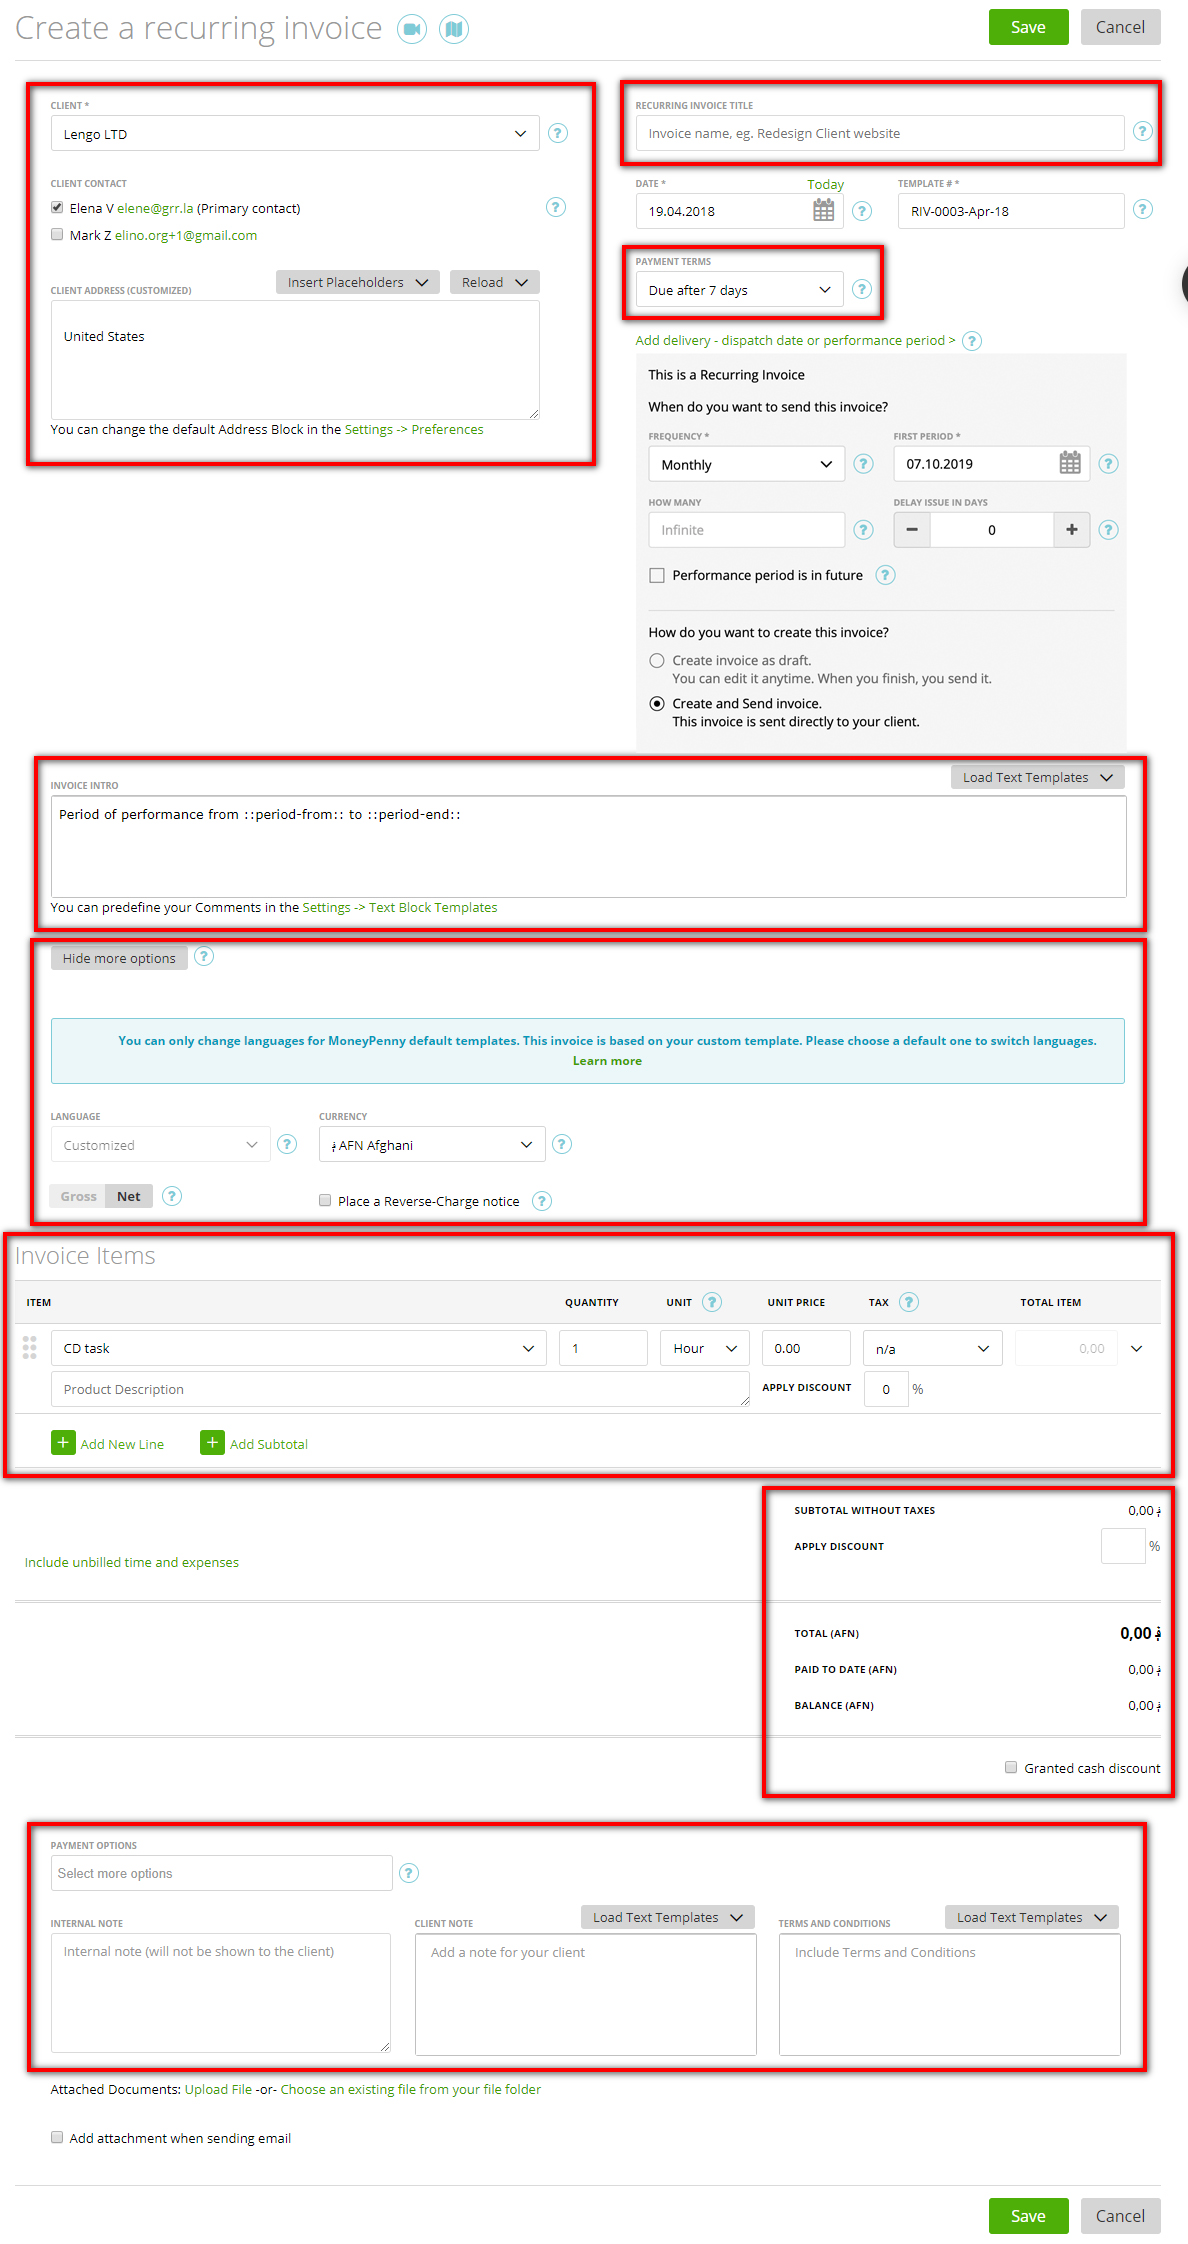
On the “Create Recurring Invoice” page you should create an invoice which will be regularly sent – automatically – to your client.
The Conditionally Recurring Invoice Profile consists of multiple fields which will be copied to all recurring invoices and fields related only to a specific profile.
The information which will be showed/copied to invoices will be displayed in the following fields:
– A client, client contacts, client address
– Invoice title
– Payment terms
– Invoice Intro
– More options
– Invoice items table
– Payment options
– Internal Note, Client Note, Terms and Conditions
– Template # – the Number of the Recurring Invoice Profile. To change it, go to Settings -> Number Groups (read more here)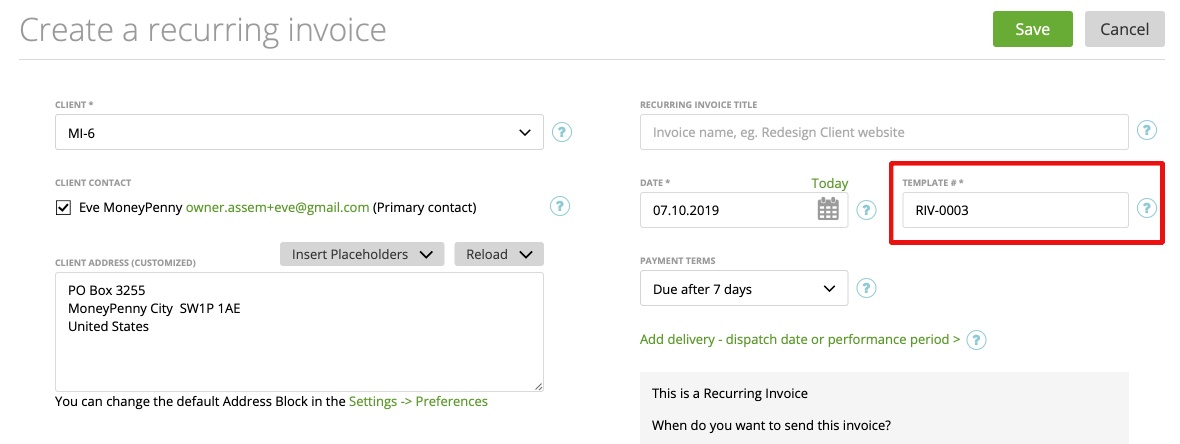
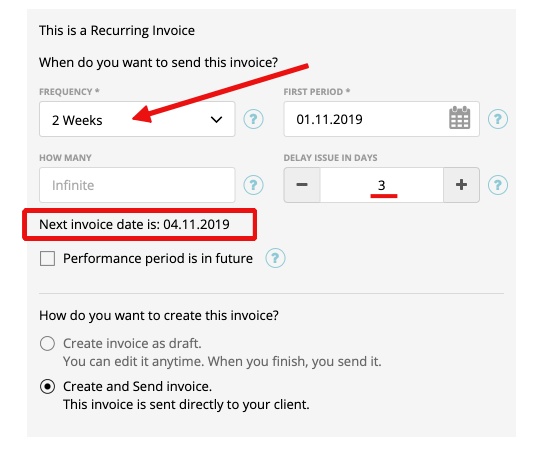
– Frequency – The regularity of invoices creation. Here you can set up if your invoice will be send e.g. weekly, monthly, yearly etc. 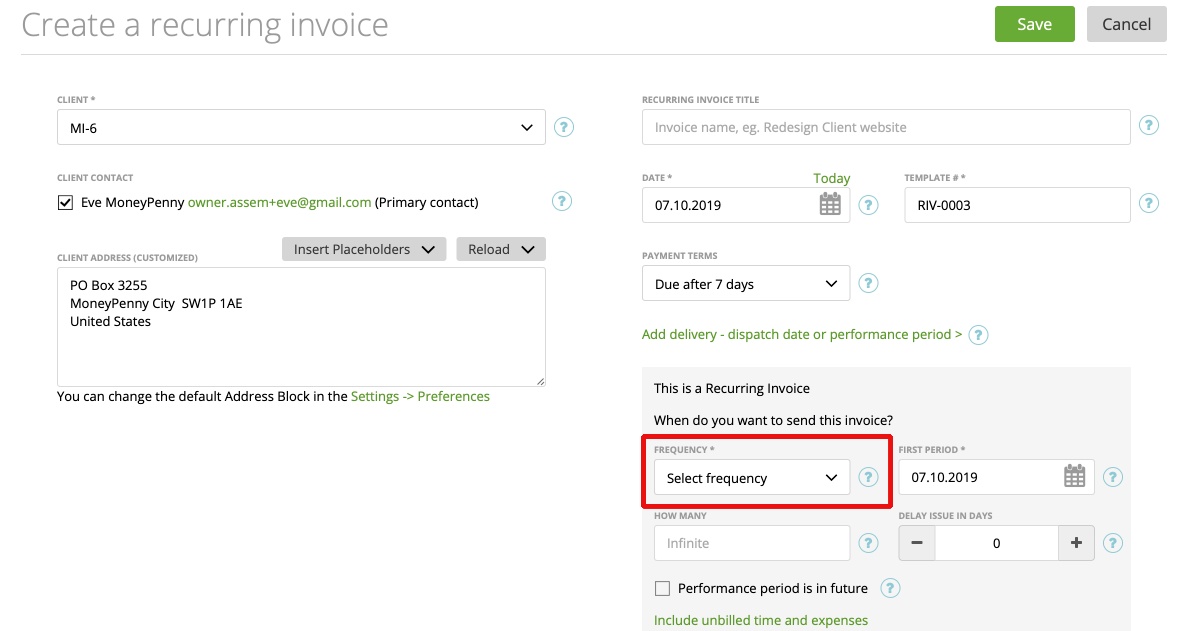
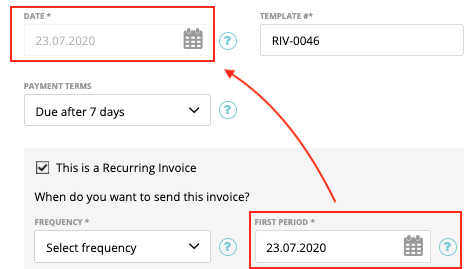
– First period – On this date the first period of your recurring invoice will end and the invoice will be created – either as draft or it will be send automatically, depends on what you set up (red more on “how would you like to send the invoice?)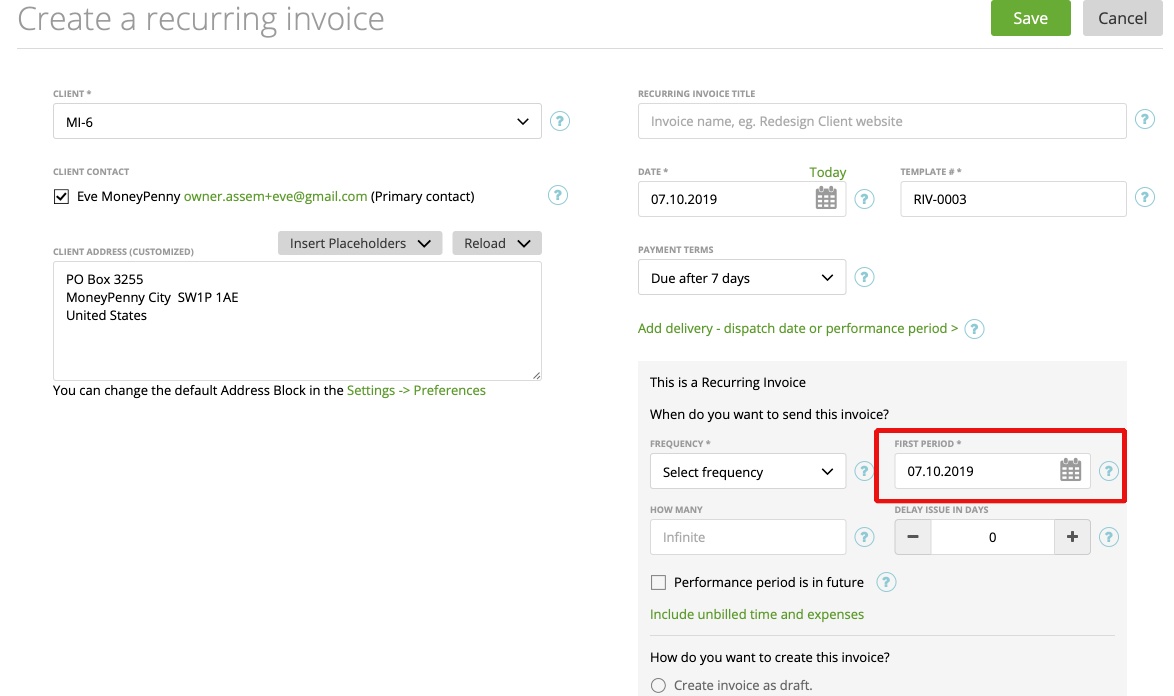
Please pay attention, there is a “Date” field, it will be ignored. This field will be calculated automatically, based on the first period and the frequency you set up.
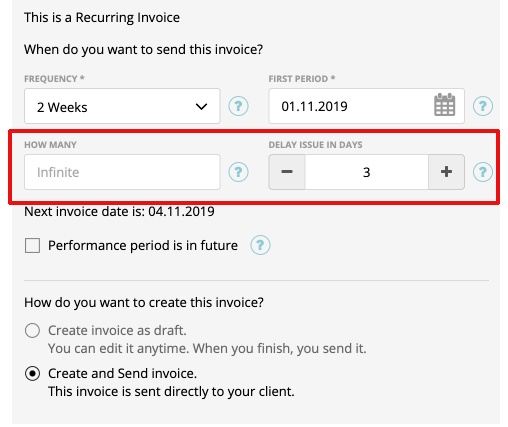
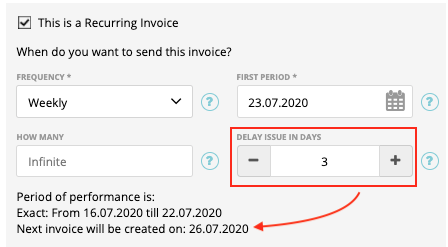
– Delay issues in days – If you want your invoice not exactly be created on the first period date, you can set up delay issue days. If you do so, the date when the invoice will be created will be delayed by the amount of the days you entered. E.g. you your first period end on 23.07.2020 but you want your invoice be created 3 days after that date, you can set the delay issue days to 3 and the invoice will be created on 26.07.2020 instead of 23.07.2020. You will get a prompt feedback on what date the invoice will be created:
– How many – The number of recurring invoices that should be automatically created from this Recurring Profile. Note: you can leave this field empty – in this case, this profile will create an unlimited number of invoices (until you cancel the Recurring Profile).
Also, if a frequency is selected as well as the Delay Days, you’ll get a message explaining when you should expect your next invoice to be sent. So the first period starts 01.11. + 3 days = 04.11.2019 is the next invoice date, see below:
– Perfomance period is in the future – By default the period of performance will be in the past. But sometimes you might want to send an invoice where the period of performance is in the future (e.g. for server maintenance). So, when activate this feature you can set the delay issue days into a negative amount.
Please note that by default the invoice issue date (it’s the date that will be on the invoice) will be date of the first period. If you deactivate this feature, the invoice issue date is the date when the invoice will be created. Please make sure you set up the invoice issue date regarding to the regulation in your country.
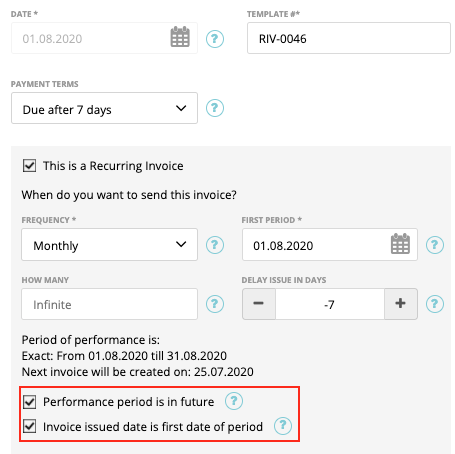
Example: The period of performance is 01.08.2020 – 31.08.2020. The Delay issue days are -7. So, in this example the invoice will be created on 25.07.2020 but the invoice date is the 01.08.2020. If you would deactivate “Invoice issued date is first date of period” the invoice date would be the 25.07.2020.
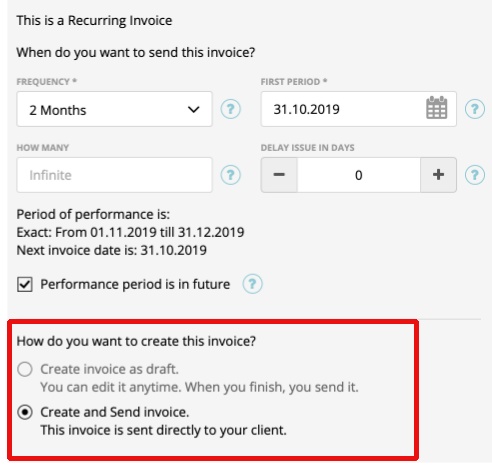
– How would you like to create your invoice? – you can choose the first option ‘Create invoice as a draft’ – in this case, the recurring invoices will be created as Proforma Invoices – this invoice will not be sent to your client until you click the send button (more about Proforma Invoices here).
If you choose the ‘Create and Send’ option, then the invoices will be automatically activated and sent to the client:
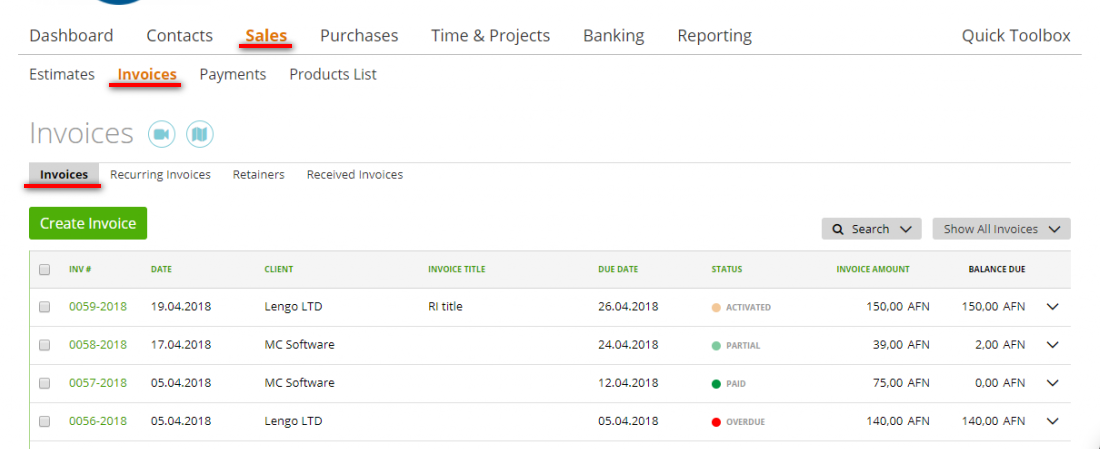
All the auto-generated invoices through the Recurring Profile will be shown on the Invoices list (Sales -> Invoices):
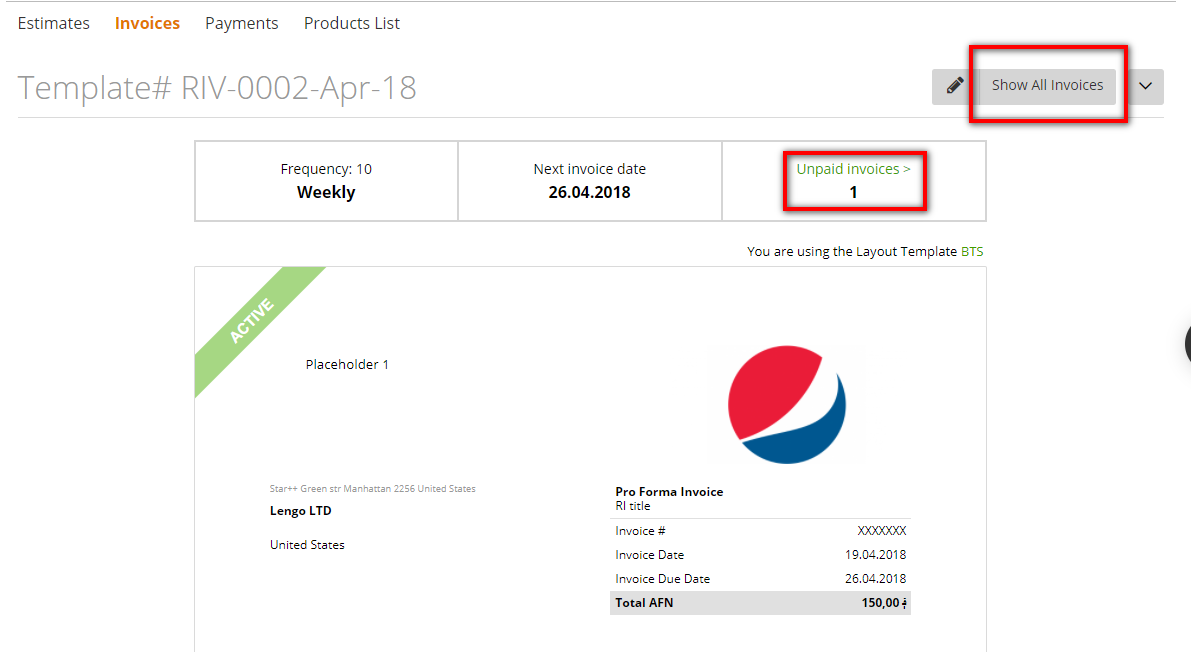
You can review all invoices linked to this Profile – just go to the Recurring Invoice Profile preview (click on a specific recurring invoice from the Recurring Invoices list) and click ‘Show all invoices’ or ‘Unpaid invoices’ if you only want to find the unpaid invoices, for instance:
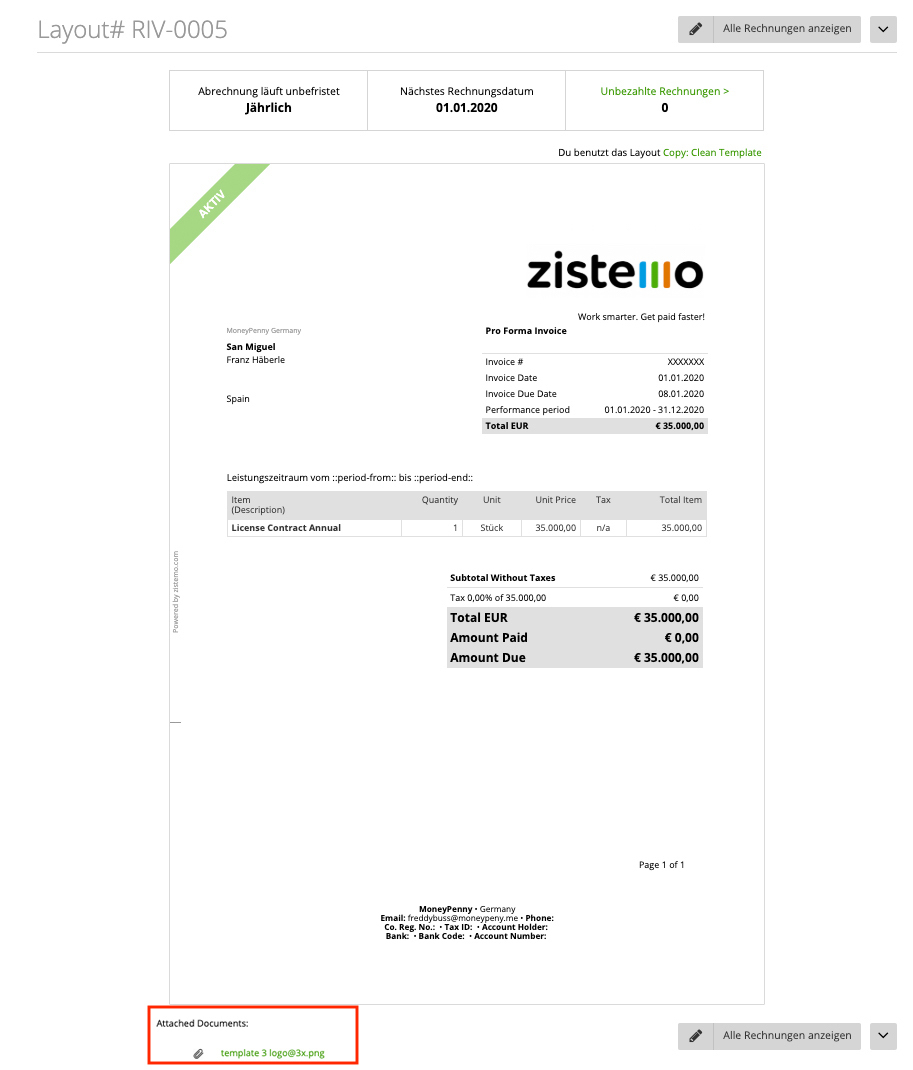
If you add an attachment to a recurring invoice, the attachment will be at the end of the preview mode:
Note: If you checked the checkbox “Draft/ProForma Invoices have a separate number” in the settings – this option will not apply to reccuring invoices. There will be no separated number, only the invoice number. More Infos HERE
