Expensify
Shoeboxed
Xero
Expenses Import
To integrate zistemo expenses with Expensify or Shoeboxed, first, you have to set it up in “User menu” -> “Integration”.

Expensify
Click the “Expensify” button. Here, you need to fill “Client ID” and “Client Secret”. To get it, click the green link in the header – “Integration settings”:
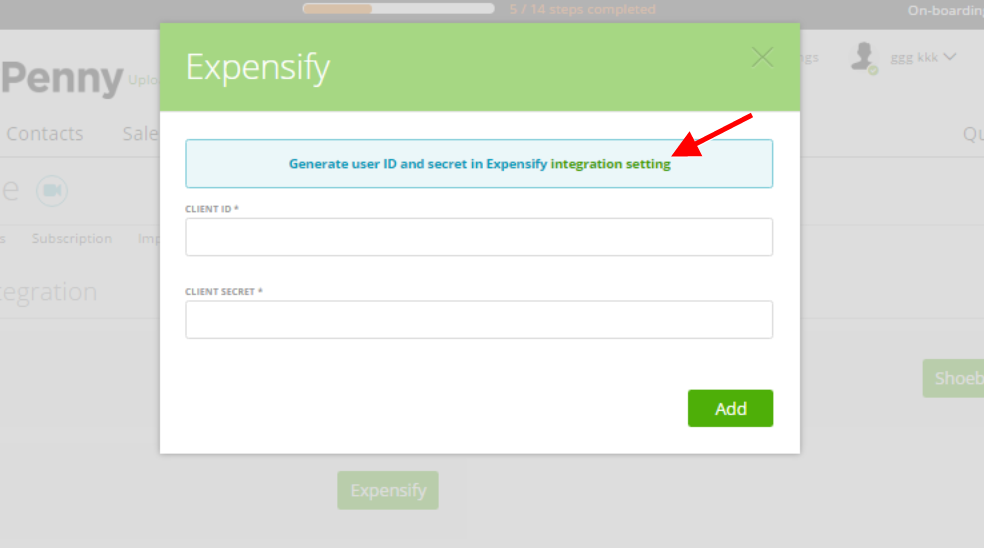
Then click “Click here to regenerate your partnerUserSecret”.
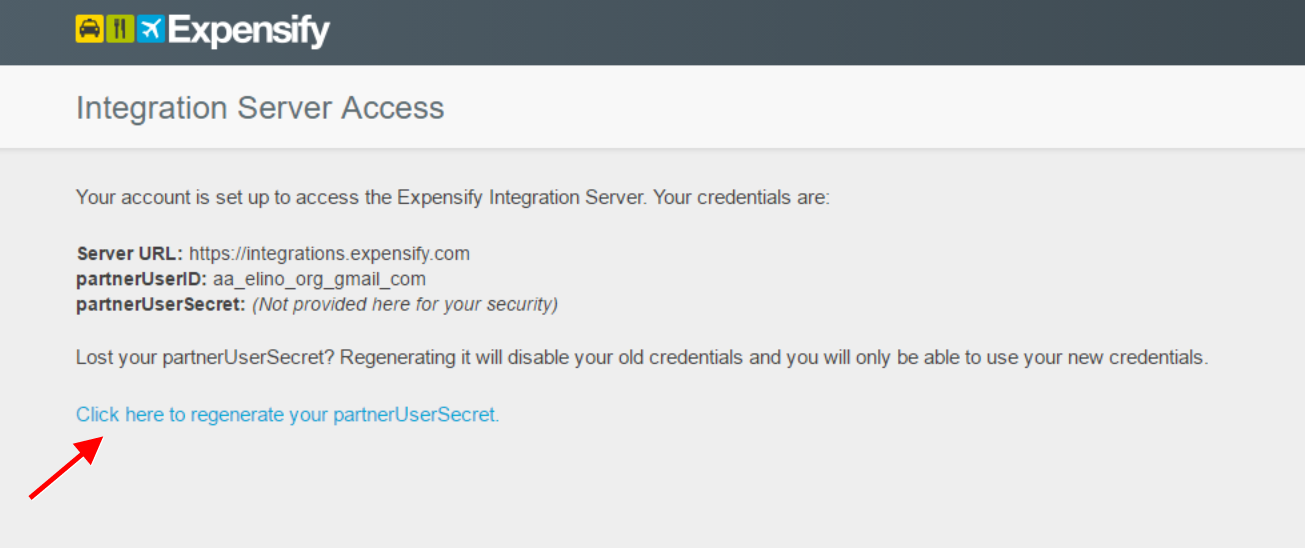
Copy the data:
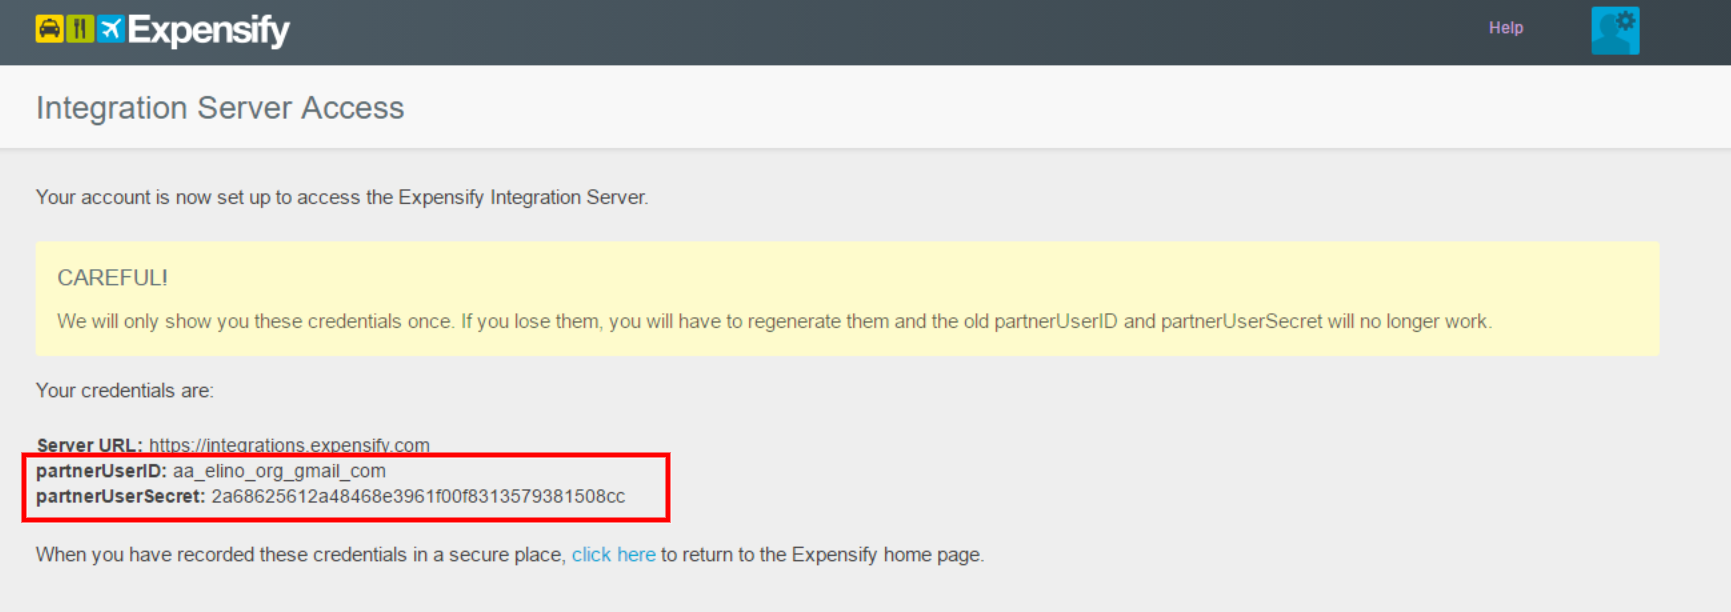
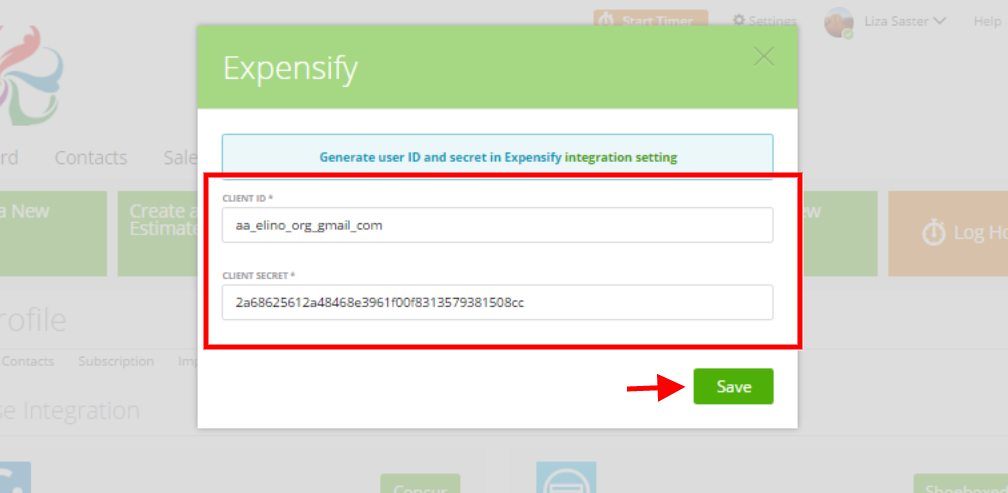
and insert it in the “Expensify” integration settings screen, as shown below:
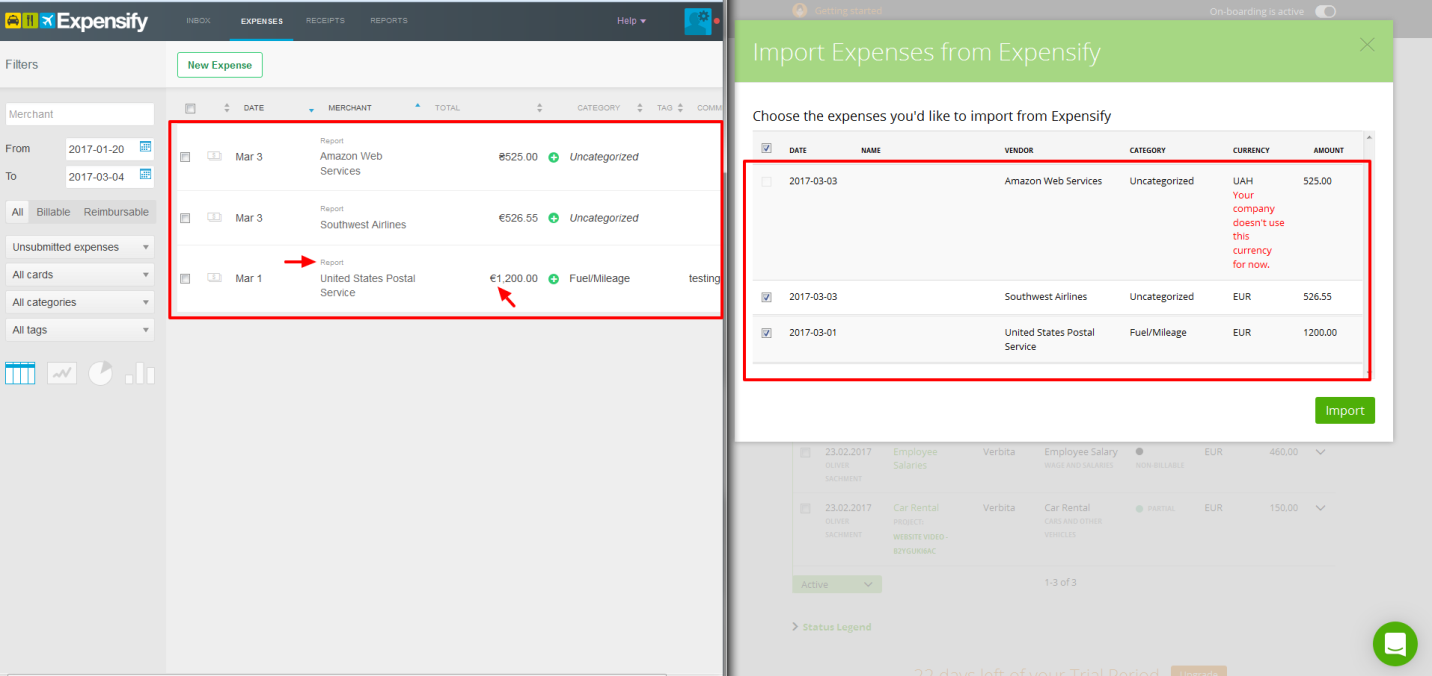
Note: if you want to export expenses from Expensify to zistemo – first you should create the expense report and attach expenses to this report in Expensify.
The expense currency should be the same as in your zistemo account.
Shoeboxed
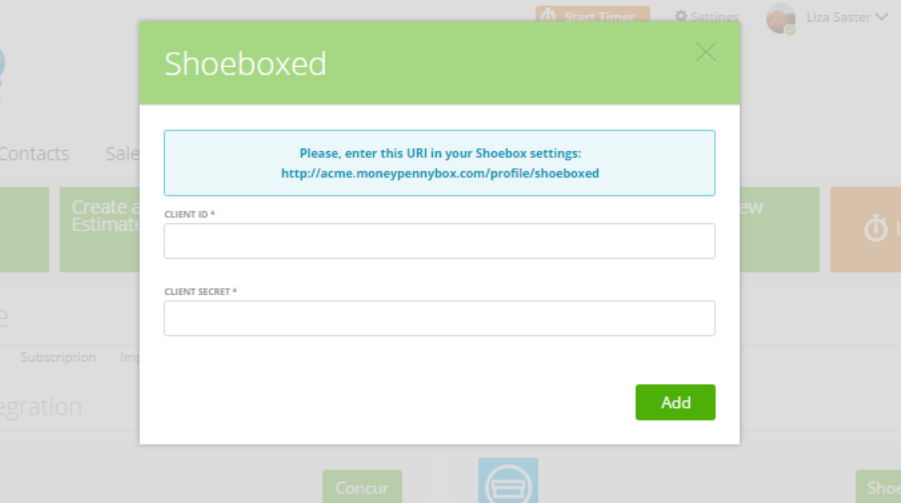
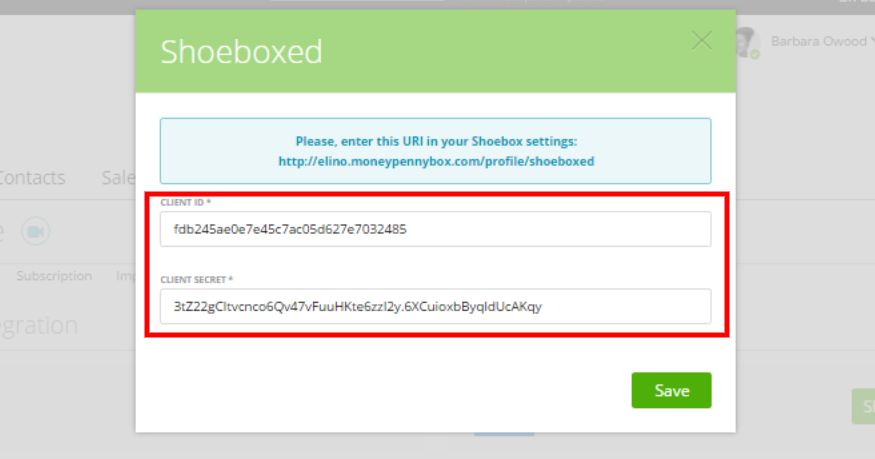
To integrate zistemo with Shoeboxed, you need the “Client ID” and the “Client Secret”.
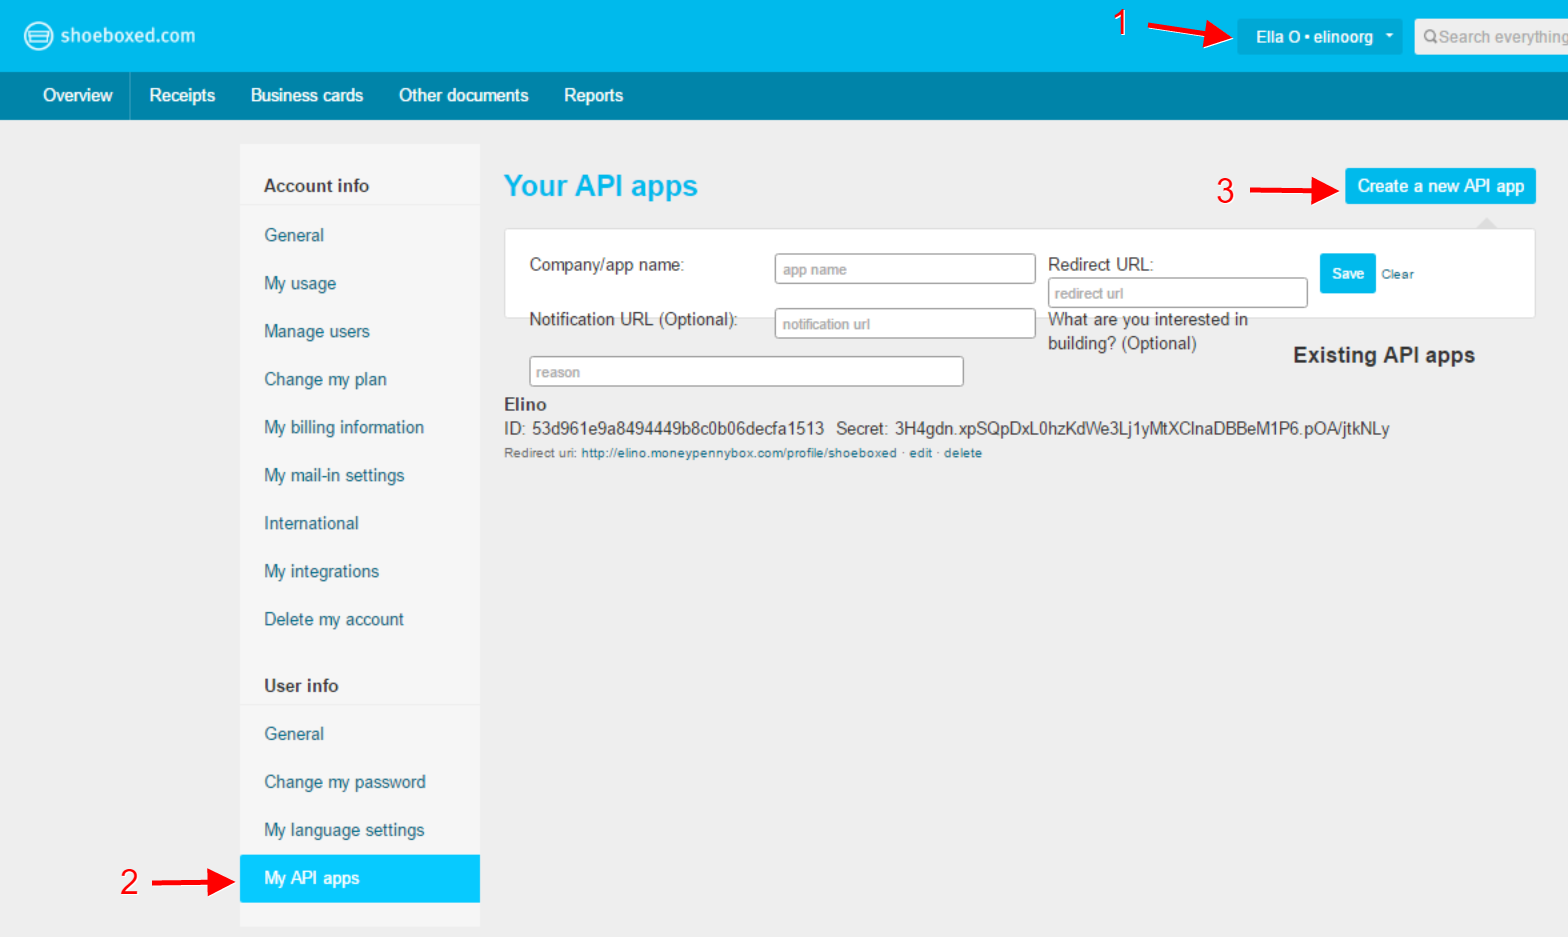
To get it, go to your Shoeboxed account –> open “Settings” -> choose “My API apps” tab -> and click “Create a new API app”.
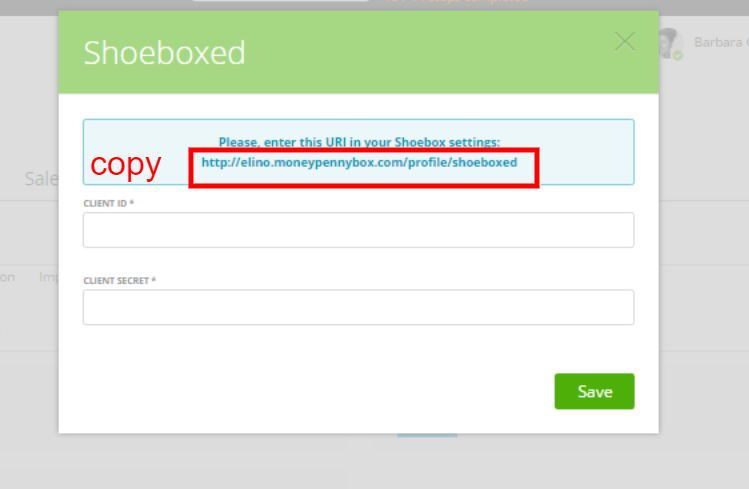
Now add your “Company name” (or any other relevant info/name) to the “Company/app name” field, then copy the URL from your zistemo Shoeboxed integration window and insert to the “Redirect URL” field. Next, click “Save”.

After saving, you will see “ID” and “Secret”:

Copy it to your “Shoeboxed” integration screen and click “Save”.
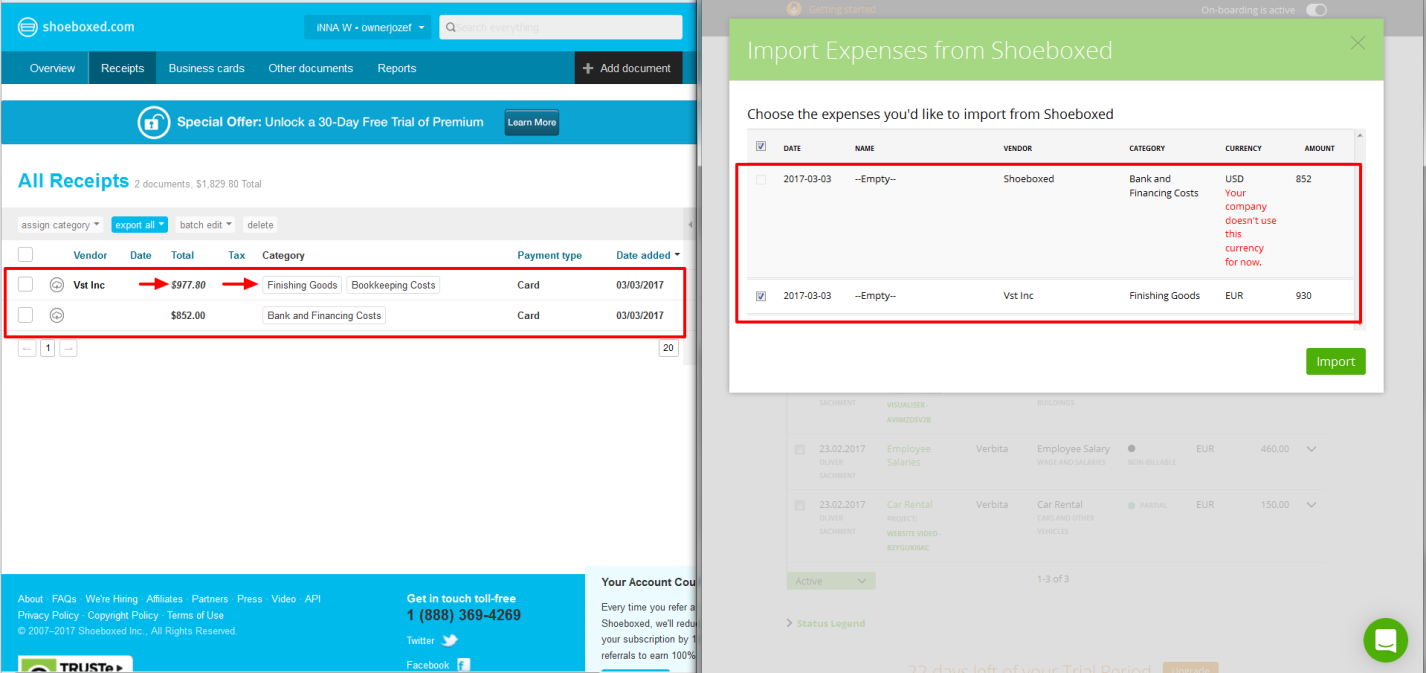
Note: if you wish to export expenses from Shoeboxed to zistemo, it’s recommended to have them registered in Shoeboxed with category and amount. Also, you should use the same currency as in your zistemo account.
Shoeboxed lets you add more than one category to an expense, while zistemo only allows one. In this case, remember that zistemo will take the first category.
NOTE: If you change your mind, you should know that you can change/disconnect Xero, Shoeboxed, Expensify or Quickbooks at any time. Just go to the user menu -> Integration and click “Disconnect”:


