zistemo streamlines your invoicing process by allowing you to attach the expense documents (receipts, checks, etc.) to your clients’ invoices straight from your mobile phone. For instance, you uploaded a photo of a receipt through the zistemo mobile app. Now you can add it to the invoice right away.
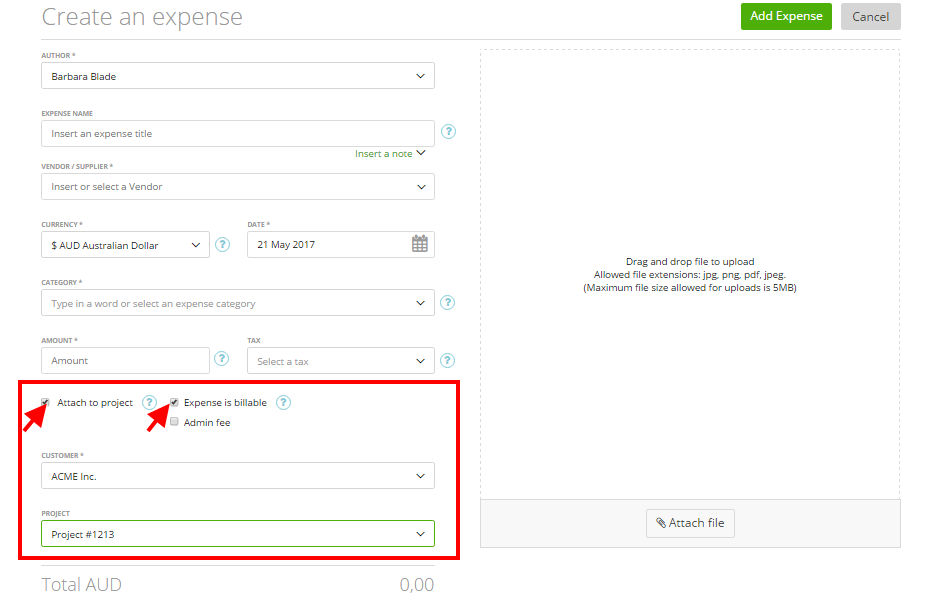
In order to attach an expense to a specific invoice, you have to select the customer and the project. Just go to ‘Add Expense‘, then click the ‘Attach to project‘ box and choose a customer from the drop-down list.
Also, make sure that the checkbox “Expense is billable” is checked (if it’s unchecked, then you will not be able to attach it to the invoice). Click on the ‘Add Expense’ button to confirm your action, and that’s it 🙂

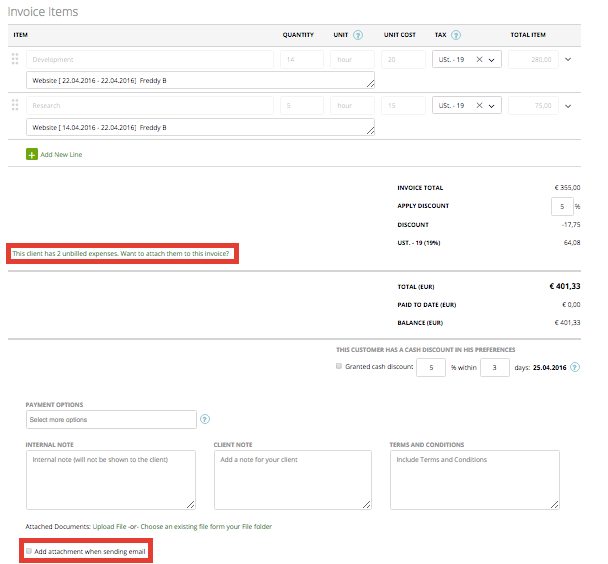
When you will create a new invoice for this customer, zistemo will automatically recognize there’s an unbilled expense for this customer and you’ll be able to attach it to your invoice in the ‘Invoice Items’ section.
The expense documents will be visible at the end of your invoice, where you can also opt for adding them as attachments when sending out the invoice by email. Your client will then have a clear view of what types of expenses the invoice contains, as well as the documented proofs for any extra expenses you added.
If you want to attach expense documents to an invoice, you should mark the ‘Attach also the Document to the invoice’ and click ‘Attach expenses’ as you can see in the screen below:
This option comes handy particularly for small businesses which provide services but also need to buy supplies or materials in order to complete their tasks. For instance, home improvement teams will invoice working hours as well as materials, right when they purchase them from the store.


