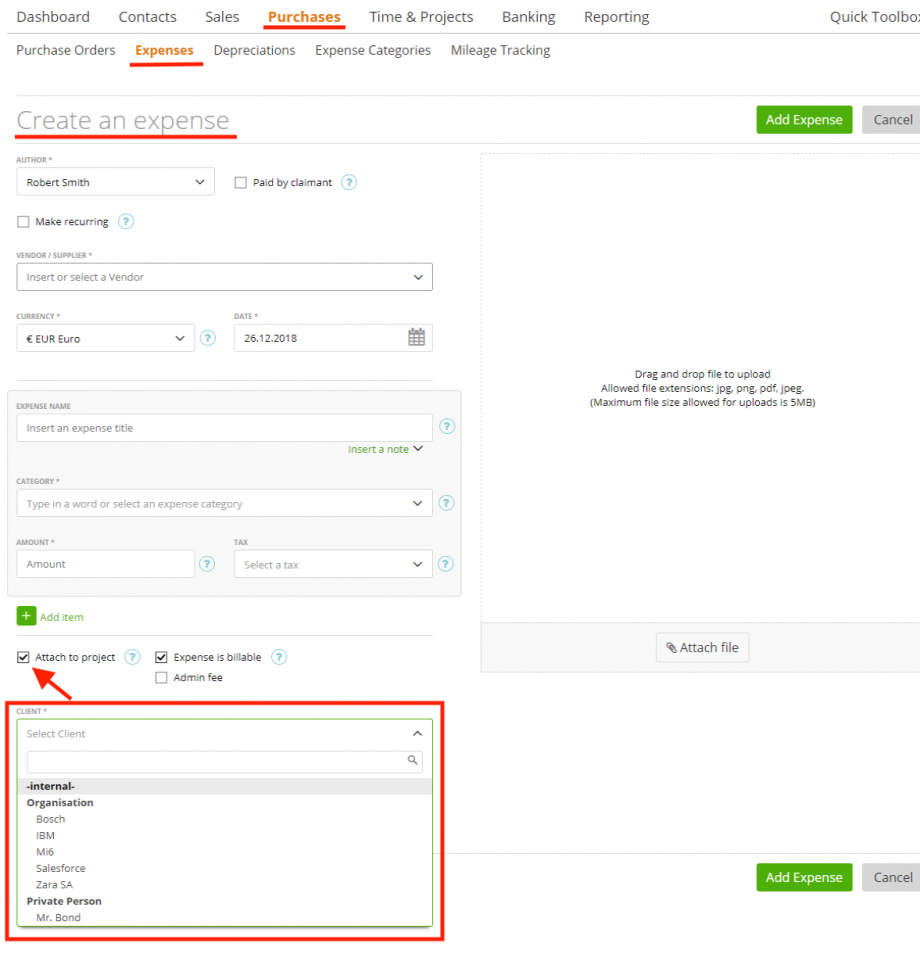
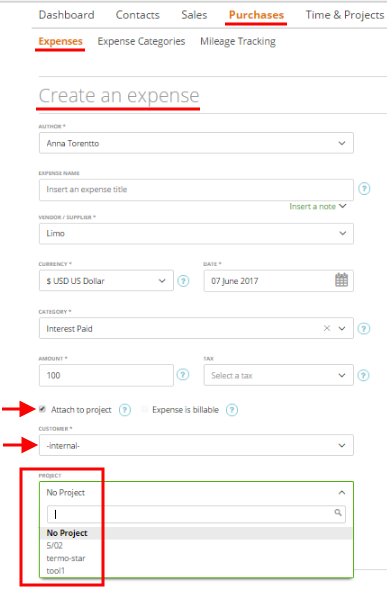
If expenses are related to the project, you can attach them to it through the expense page.
Mark the ‘Attach to project’ checkbox and choose the client and project.
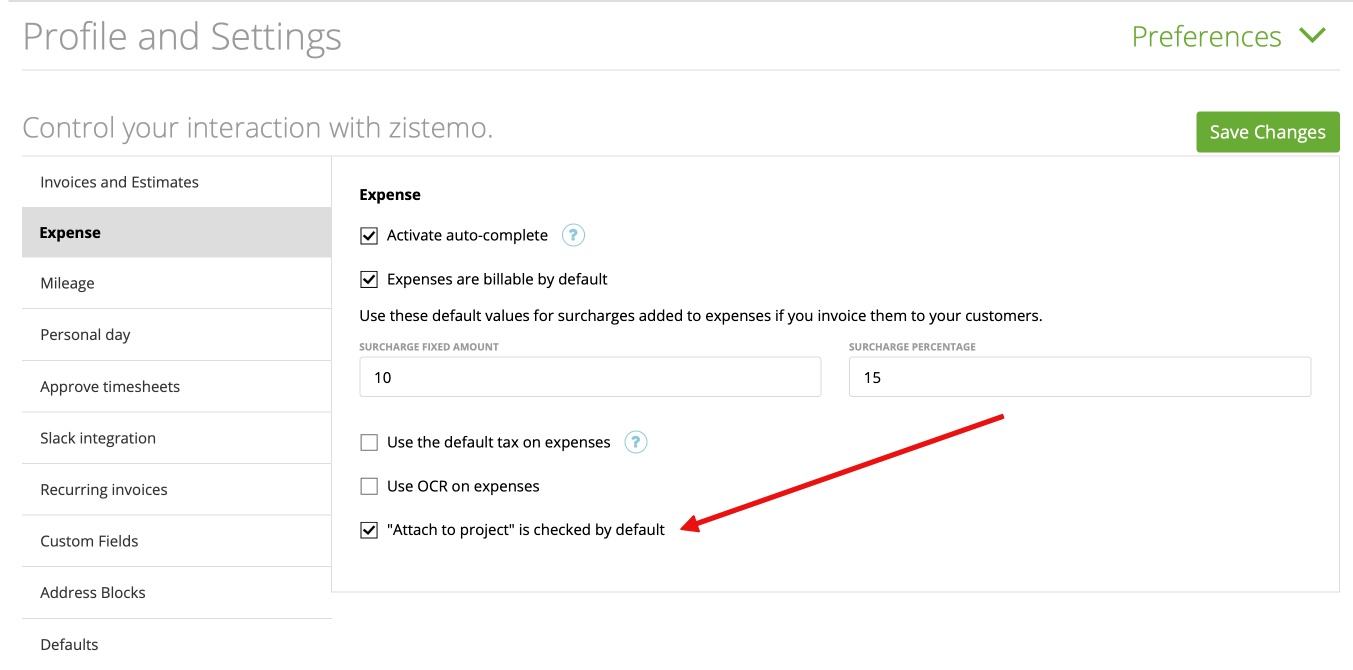
If you want to, that “Attach to project” is checked by default, please enable it in the Preference Settings -> Expense:
You will not see this information (attached expenses) on the project page. But you will be able to attach these expenses to the invoice generated from this project.
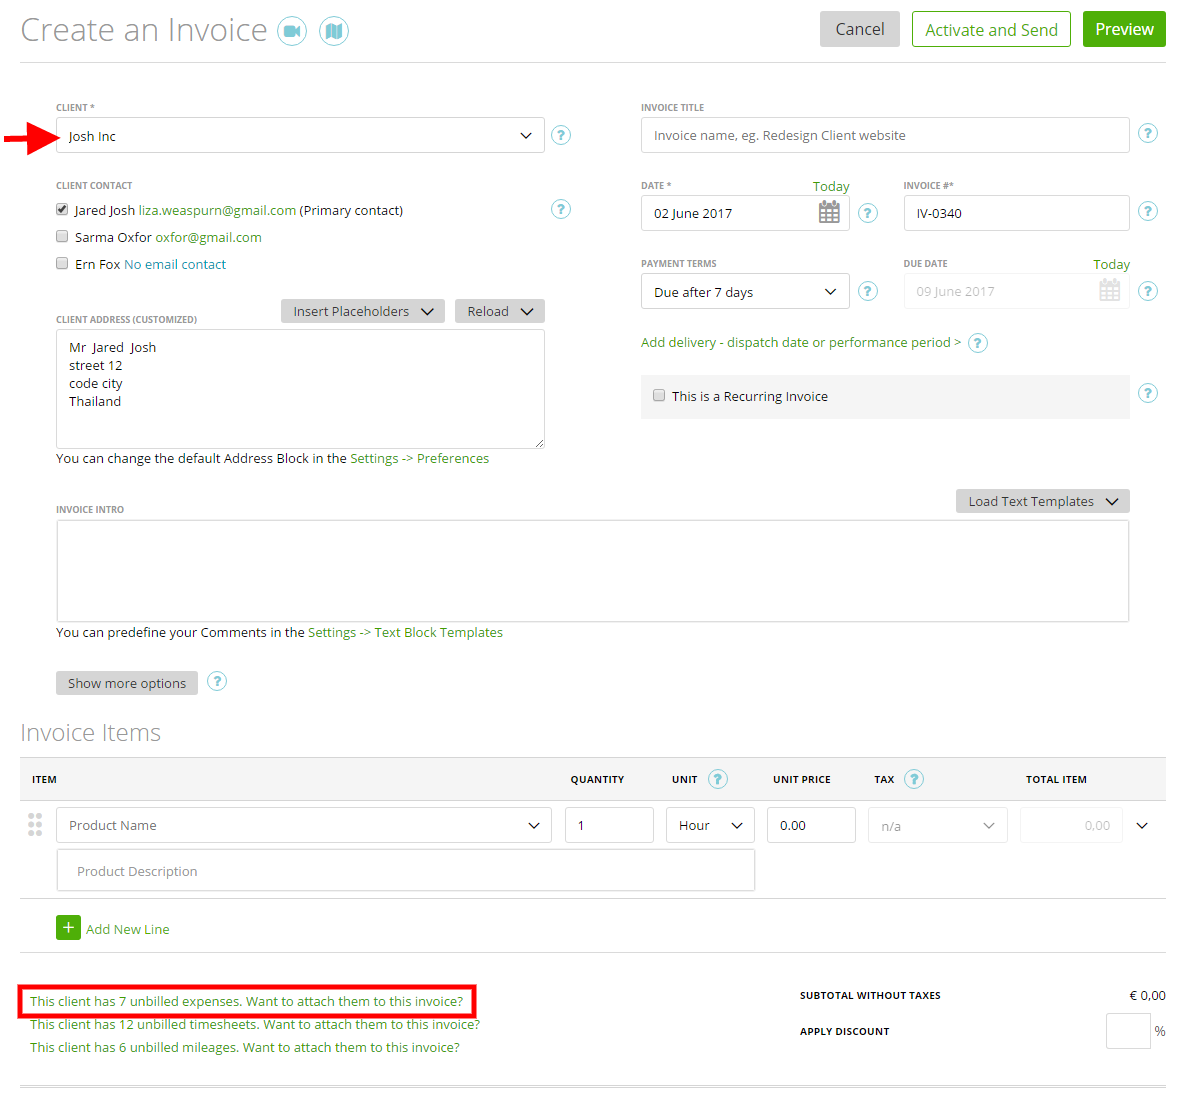
Your client will pay these additional expenses through the invoice.
Expenses for an internal client project
Are you selling projects to clients? (e.g. in real estate)
Track your expenses on internal projects and add them automatically to the final project invoice.
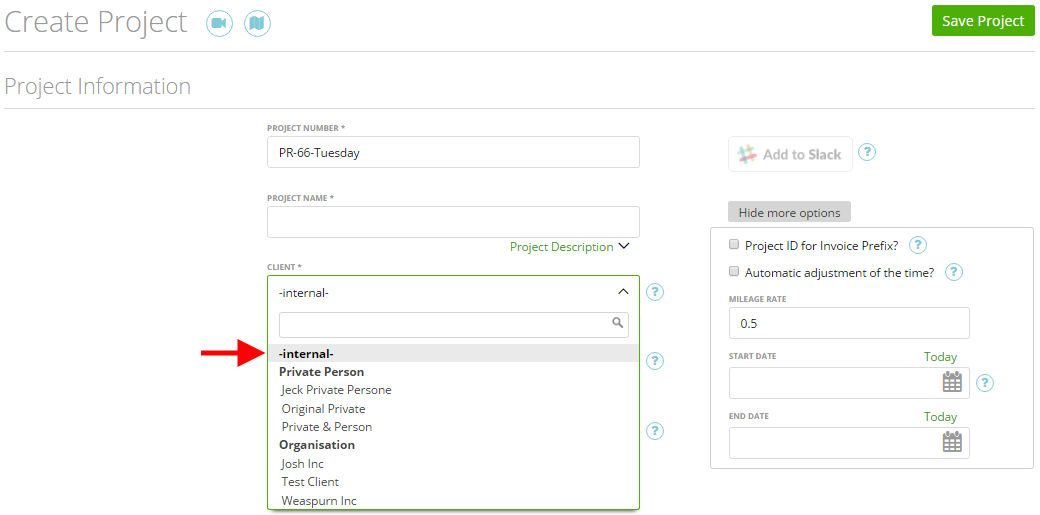
To do that, follow the simple steps: ‘Expense’ tab ➝ ‘Add Expense’ ➝ mark the checkbox ‘Attach to project’. Select the customer ‘-internal-‘ in order to add the expense to your in-house projects instead of an existing external client.
Then simply choose the exact project that you would like to sell (as in the screenshot below) and finish by pressing ‘Add Expense’. Now, the expense will be added to your project, which then can be invoiced to your client as a whole.
Add several expenses in bulk action
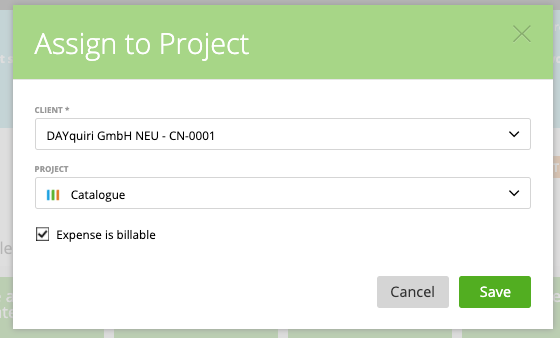
You also can add several expenses to one project with a bulk action. Just go to the expense grid and select several expenses you want to add to a project. Click on top on “Assign to Project”
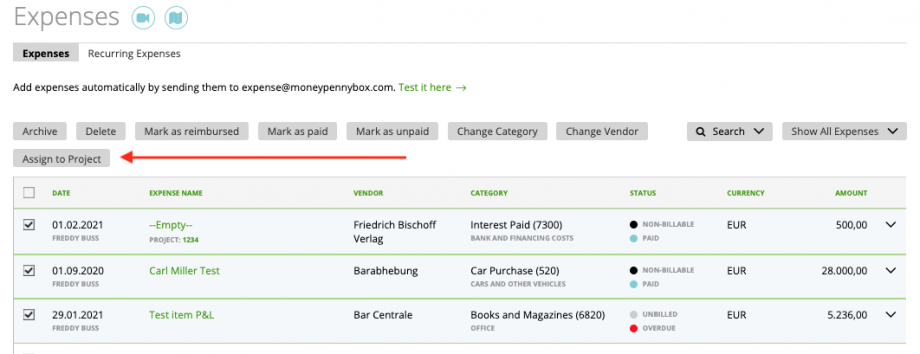
After you clicked on it, you can choose the client + project and choose if the expenses are billable or not
